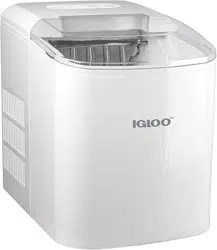
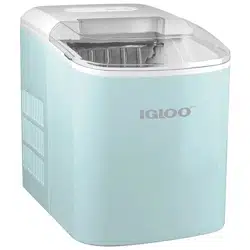
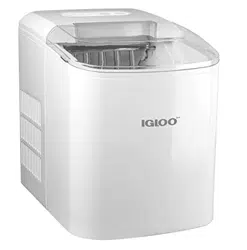
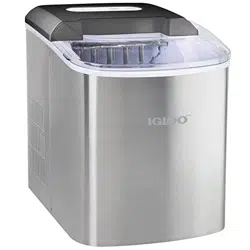
User Manual Ice Maker Machine
PARTS & ASSEMBLY
Before first use, be sure to remove all interior and exterior packaging, and follow the steps under CLEANING & MAINTENANCE to properly clean your unit.
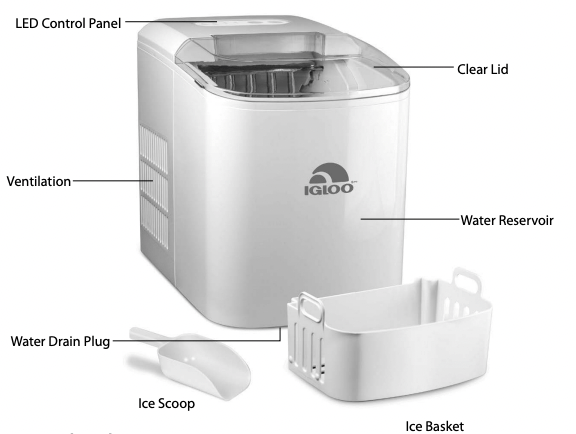
LED Control Panel
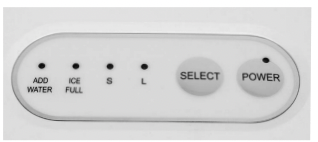
ADD WATER = illuminates when time to add water to Water Reservoir
ICE FULL = illuminates when Ice Basket is full
S = Small ice cube indicator
L = Large ice cube indicator
SELECT = press to select size of ice cubes
POWER = press button to turn unit ON/OFF
HOW TO OPERATE
BEFORE FIRST USE
1. Follow the steps under CLEANING & MAINTENANCE before using this unit.
2. Place the unit on a flat, level surface in a location that is protected from direct sunlight and other sources of heat (i.e. stove, furnace, radiator). Ensure there is at least four inches of empty space on all sides of the unit.
3. Allow one hour for the refrigerant fluid to settle before plugging the cord into an electrical outlet for the first time.
USING YOUR ICE CUBE MAKER
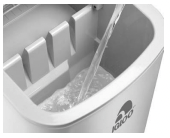
1. Open the Clear Lid to remove the Ice Basket and pour water into the Water Resevoir. Keep the water level below the MAX level mark. If water levels exceed the MAX level mark, drain any excess water by removing the Water Drain Plug.
2. Press the POWER button on the LED Control Panel to begin the ice-making cycle.
3. Select the desired size of the ice cubes by pressing the SELECT button. If the room temperature is lower than 60°F (16°C), it is recommended to select the small-sized ice cubes in order to keep ice from sticking together.
4. Each ice-making cycle lasts 6 to 15 minutes, depending on the size of the ice cube selected and the ambient temperature of the room. In extremely hot temperatures, ice-making time may vary considerably.
5. While the ice maker is on, check the water level periodically. If the water pump is unable to pump water, the unit will stop automatically and the Add Water light will illuminate.
6. If the water level is low, press the POWER button to turn the unit OFF, fill water up to the MAX level mark and press the POWER button again to turn ON the unit again.
7. The unit automatically stops working when the Ice Basket is full and the ICE FULL light will illuminate.
8. To ensure a reasonable hygiene level, change the water in the Water Reservoir every 24 hours. If the unit isn’t in use, drain all water left in the Water Reservoir.
IMPORTANT NOTE: In the event that the power is disconnected during the ice making cycle or that the LED lights on the Control Panel are blinking, press the POWER button to stop the ice making cycle. Unplug the unit from the electrical outlet. Allow the unit to sit for a few minutes to let it warm up and allow ice to fall from the evaporator fingers. Empty the Water Tray and wait three minutes before restarting the unit.
 DO NOT touch the Evaporator while the unit is in use or during the ice making process. This could cause severe burns.
HELPFUL TIPS
ADD WATER INDICATOR
If the Add Water Indicator comes on, try the following:
• Turn off the unit, add water, and press the POWER button again to restart the unit.
• There may be too much ice. Turn off the Ice Maker, remove some ice from the Ice Basket.
ICE CUBES STICK TOGETHER
• The ice cycle may be too long. Stop the Ice Maker, then restart it when the ice cubes melt. Select the smaller sized ice cubes using the SELECT button.
• The water temperature in the Water Resevoir may be too low. Change the water in the Water Resevoir. The room temperature should be set between 45˚ F - 90˚ F.
ICE MAKER NOT WORKING
If the ice-making cycle seems to be running properly, but no ice is being made, try the following:
• The ambient temperature or water temperature in Water Resevoir may be too high. The unit must be in an environment below 90˚ F. Try pouring colder water (between 45˚ F - 90˚ F) into the Water Resevoir.
• If changing the water or allowing the unit to cool does not work, there may be a leakage of the refrigerant fluid, or a pipe in the cooling system may be blocked. Please take your ice maker to a qualified technician for repair.
LED LIGHTS
• If the LED lights on the Control Panel are blinking, there may be a disruption in the power source. Press the POWER button to stop the ice-making cycle. Let the ice maker sit for several minutes to let it warm up and allow ice to fall from the evaporator fingers. Empty the Water Tray and wait three minutes before restarting the unit.
CLEANING & MAINTENANCE
Your AUTOMATIC ICE MAKER should be cleaned before storing. Following these steps will help to maintain the unit and add to longevity.
- 1. Unplug the unit from the electrical outlet.
- 2. Remove the Ice Basket, then clean the Ice Basket and Ice Scoop using warm, soapy water, and a soft cloth. Wipe dry with a non-abrasive, dry towel.
- 3. Clean the interior and exterior of the unit using warm, soapy water, and a non-abrasive towel.
- 4. Drain the interior water by unplugging the Water Drain Plug on the bottom of the unit.
- 5. Dry the interior and exterior with a soft, non-abrasive cloth.
- 6. If the unit has not been in use for a long time, always open the Water Drain Plug and completely drain the water from the Water Reservoir.
RECIPES
Your AUTOMATIC ICE MAKER can be used to instantly make ice cubes to be for a variety of beverages. Here are some delicious beverages that you can make at home.
MUDDY WATER
• 1 part cola
• 1 part orange juice
• Ice
- Fill 1/4 of each glass with ice made with your AUTOMATIC ICE MAKER.
- Pour orange juice until the glass is half full, or to taste.
- Pour cola until glass is full.
- Stir well.
ROY ROGERS
• 6-8 oz. cola
• 1/4 oz. grenadine
• Maraschino cherries
• Ice
- Fill glasses with ice from your AUTOMATIC ICE MAKER.
- Add in Cola and grenadine.
- Stir well.
- Add maraschino cherry as garnish.
STRAWBERRY LEMONADE
• 8 large strawberries, halved
• 11/8 cups white sugar
• 7 cups water
• 2 cups freshly squeezed lemon juice
• Lemon slices
• Mint leaves
- Place strawberries in a blender and top with 2 tablespoons sugar. Pour 1 cup of water over sugared strawberries. Blend until strawberry chunks transform into juice.
- Combine strawberry juice, 6 cups water, 1 cup sugar and lemon juice in a large pitcher. Stir until well blended.
- Fill glasses with ice from your AUTOMATIC ICE MAKER.
- Pour strawberry lemonade into glasses.
- Garnish with a lemon slice and mint leaves, if desired.
GINGER BEER MOJITO MOCKTAIL
• 6 oz. ginger beer
• 2 oz. fresh lime juice
• 10 mint leaves
• Fresh lime slices
• Ice
- Muddle the mint and lime juice in your glass.
- Fill glass ice from your AUTOMATIC ICE MAKER.
- Add ginger beer to glass.
- Stir thoroughly.
- Garnish with additional mint leaves and fresh lime slice.
BLACKBERRY BASIL ICED TEA
• 6 cups water
• 4 bags black tea
• 12 oz. fresh blackberries
• 8-12 basil leaves
• Liquid sweetener to taste
- Combine water, tea bags, blackberries and basil leaves in a pitcher. Cover and refrigerate for 12-24 hours.
- When ready, remove tea bags and add liquid sweetener to taste.
- Fill tall glass with ice from your AUTOMATIC ICE MAKER.
- Add iced tea to glass until full.
IMPORTANT SAFEGUARDS
A person who has not read and understood all operating and safety instructions is not qualified to operate this appliance. All users of this appliance must read and understand this Instruction Manual before operating or cleaning this appliance.
When using electrical appliances, basic safety precautions should always be followed, including:
- 1. Read all instructions before operating this appliance.
- 2. DO NOT TOUCH the hot surfaces. Use handles or knobs.
- 3. This appliance is NOT A TOY.
- 4. Unsupervised young children and cognitively challenged individuals should never operate this appliance.
- 5. Close supervision is necessary when any appliance is used by or near children.
- 6. To protect against electrical shock do not immerse cord, plug or any part of this unit in water or other liquids.
- 7. Unplug from outlet when not in use, before removing parts and before cleaning. Allow to cool before putting on or taking off any parts, and before cleaning.
- 8. DO NOT operate any appliance with a damaged cord or plug, or after the appliance malfunctions, or if the appliance has been damaged in any manner. Return the appliance to the nearest repair shop for examination, repair or adjustment.
- 9. The manufacturer does not recommend the use of accessory attachments other than what is provided by the manufacturer. Use of attachments may cause injuries.
- 10. DO NOT use the appliance for other than its intended use.
- 11. DO NOT use outdoors. FOR HOUSEHOLD USE ONLY.
- 12. DO NOT place on or near a hot gas or electric burner, or in a heated oven.
- 13. DO NOT let cord hang over edge of table or counter, or touch hot surfaces.
- 14. NEVER leave unit unattended while in use or when plugged into an outlet.
- 15. Extreme caution must be used when moving an appliance containing hot food.
- 16. Always attach plug to appliance first, then plug cord in the wall outlet. To disconnect, turn any control to "off," then remove plug from wall outlet.
ADDITIONAL IMPORTANT SAFEGUARDS
Operating Safety Precautions
- 1. DO NOT touch the Evaporator while the unit is in use or during the ice making process. This could cause severe burns.
- 2. DO NOT clean unit with flammable liquids. The fumes can create a fire hazard or explosion.
- 3. Check Ice Hopper for presence of foreign objects prior to use.
- 4. DO NOT turn unit upside down while in use, or when filled with ice.
Instructions for the Electrical Cord and Plug
- 1. This appliance has a polarized plug (one blade is wider than the other). To reduce the risk of electrical shock, this plug is intended to fit into a polarized outlet only one way. If the plug does not fit fully into the outlet, reverse the plug. If it still does not fit, contact a qualified electrician. Do not attempt to modify the plug in any way.
- 2. A short power supply cord is provided to reduce the risk resulting from becoming entangled or tripping over a long cord.
- 3. If a long detachable power-supply cord or extension cord is used:
• Extension cords can be used if care is exercised in their use.
• The marked electrical rating of the cord or extension cord should be at least as great as the electrical rating of the appliance.
• When using a longer cord or extension cord, make sure that the cord does not drape over a countertop or tabletop where it can be pulled on or tripped over unintentionally.
- 4. The manufacturer does not recommend using this machine in countries that do not support 120V AC even if a voltage adapter, transformer, or converter is in use.