
THANK YOU for purchasing this high-quality product. If you should experience a problem not covered in TROUBLESHOOTING, please
visit our website at www.whirlpool.com for additional information. If you still need assistance, call us at 1-800-253-1301.
In Canada, visit our website at www.whirlpool.ca or call us at 1-800-807-6777.
You will need your model and serial number, located on the inside wall of the refrigerator compartment.
Para obtener acceso a “Instrucciones para el usuario del refrigerador” en español, o para obtener información adicional acerca de su
producto, visite: www.whirlpool.com.
Necesitará su número de modelo y de serie, ubicado en el interior del compartimiento del refrigerador.
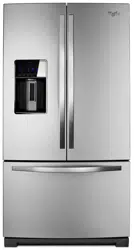
REFRIGERATOR USER INSTRUCTIONS
W10329360B
Table of Contents / Table des matières
REFRIGERATOR SAFETY .............................................................. 2
INSTALLATION INSTRUCTIONS ................................................... 3
Unpack the Refrigerator ............................................................... 3
Location Requirements ................................................................4
Electrical Requirements ...............................................................4
Water Supply Requirements ........................................................5
Connect the Water Supply ...........................................................5
Refrigerator Doors and Drawer ....................................................6
Adjust the Doors ..........................................................................9
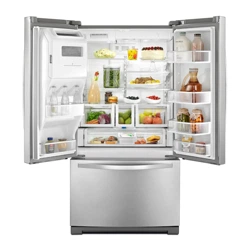
REFRIGERATOR USE ....................................................................9
Opening and Closing Doors ......................................................... 9
Using the Controls .......................................................................9
Crisper Humidity Control ...........................................................11
Ice Maker and Ice Storage Bin ..................................................11
Water and Ice Dispenser ............................................................11
Water Filtration System ..............................................................12
REFRIGERATOR CARE ...............................................................13
Cleaning .....................................................................................13
Changing the Light Bulb ............................................................14
TROUBLESHOOTING ..................................................................14
Refrigerator Operation ...............................................................14
Temperature and Moisture .........................................................15
Ice and Water .............................................................................15
WATER FILTER CERTIFICATIONS ..............................................16
PERFORMANCE DATA SHEETS .................................................17
WARRANTY ..................................................................................19
SÉCURITÉ DU RÉFRIGÉRATEUR...............................................21
INSTRUCTIONS D’INSTALLATION .............................................23
Déballage du réfrigérateur..........................................................23
Exigences d’emplacement .........................................................24
Spécications électriques ..........................................................24
Spécications de l’alimentation en eau .....................................25
Raccordement à la canalisation d’eau ......................................25
Portes et tiroir du réfrigérateur ...................................................26
Ajuster les portes .......................................................................29
UTILISATION DU RÉFRIGÉRATEUR ..........................................29
Ouverture et fermeture des portes .............................................29
Utilisation des commandes .......................................................29
Réglage de l’humidité dans le tiroir à légumes ..........................31
Machine à glaçons et bac d’entreposage à glaçons.................31
Distributeur d’eau et de glaçons ................................................32
Système de ltration d’eau ........................................................33
ENTRETIEN DU RÉFRIGÉRATEUR ............................................33
Nettoyage ...................................................................................33
Remplacer l’ampoule d’éclairage ..............................................34
DÉPANNAGE .................................................................................35
Fonctionnement du réfrigérateur ...............................................35
Température et humidité ............................................................35
Glaçons et eau ...........................................................................36
FEUILLES DE DONNÉES SUR LA PERFORMANCE ................38
GARANTIE .....................................................................................40
2
REFRIGERATOR SAFETY
You can be killed or seriously injured if you don't immediately
You
can be killed or seriously injured if you don't
follow
All safety messages will tell you what the potential hazard is, tell you how to reduce the chance of injury, and tell you what can
happen if the instructions are not followed.
Your safety and the safety of others are very important.
We have provided many important safety messages in this manual and on your appliance. Always read and obey all safety
messages.
This is the safety alert symbol.
This symbol alerts you to potential hazards that can kill or hurt you and others.
All safety messages will follow the safety alert symbol and either the word “DANGER” or “WARNING.”
These words mean:
follow instructions.
instructions.
DANGER
WARNING
IMPORTANT SAFETY INSTRUCTIONS
WARNING:
To reduce the risk of fire, electric shock, or injury when using your refrigerator, follow these basic precautions:
SAVE THESE INSTRUCTIONS
■ Plug into a grounded (earthed) outlet.
■ Do not remove ground prong.
■ Do not use an adapter.
■ Do not use an extension cord.
■ Disconnect power before servicing.
■ Replace all parts and panels before operating.
■ Remove doors from your old refrigerator.
■ Use nonflammable cleaner.
■
Do not store or use petrol, flammable liquids or gas in the
vicinity of this or other electrical appliances. The fumes can
cause fires or explosions.
■ Do not store explosive substances such as aerosol cans
with a flammable propellant in this refrigerator.
■ Do not use or place electrical devices inside the refrigerator
compartments if they are not of the type expressly
authorized by the manufacture.
■ Use two or more people to move and install refrigerator.
■ Disconnect power before installing ice maker (on ice maker
kit ready models only).
■ A qualified service technician must install the water line and
ice maker. See installation instruction supplied with
ice maker kit IC13B for complete details.
■
Connect to a potable water supply only.
■ Use a sturdy glass when dispensing ice (on some models).
■ This appliance is not intended for use by persons (including
children) with reduced physical, sensory or mental
capabilities, or lack of experience and knowledge, unless
they have been given supervision or instruction concerning
use of the appliance by a person responsible for their safety.
■ Children should be supervised to ensure that they do not
play with the appliance.
■ To avoid the risk of children becoming trapped and
suffocating, do not allow them to play or hide inside the
refrigerator.
■ If the power supply cord is damaged, it must be replaced by
the manufacturer or its service agent or a similarly qualified
person.
State of California Proposition 65 Warnings:
WARNING: This product contains one or more chemicals known to the State of California to cause cancer.
WARNING: This product contains one or more chemicals known to the State of California to cause birth defects or
other reproductive harm.

3
Proper Disposal of Your Old Refrigerator
IMPORTANT: Child entrapment and suffocation are not problems
of the past. Junked or abandoned refrigerators are still dangerous
–even if they will sit for “just a few days.” If you are getting rid
of your old refrigerator, please follow these instructions to help
prevent accidents.
Before You Throw Away Your Old Refrigerator or Freezer:
■ Take off the doors.
■ Leave the shelves in place so that children may not easily
climb inside.
INSTALLATION INSTRUCTIONS
Unpack the Refrigerator
Remove the Packaging
■ Remove tape and glue residue from surfaces before turning
on the refrigerator. Rub a small amount of liquid dish soap
over the adhesive with your ngers. Wipe with warm water
and dry.
■ Do not use sharp instruments, rubbing alcohol, ammable
uids, or abrasive cleaners to remove tape or glue. These
products can damage the surface of your refrigerator. For
more information, see “Refrigerator Safety.”
■ Dispose of/recycle all packaging materials.
Clean Before Using
After you remove all of the packaging materials, clean the inside
of your refrigerator before using it. See the cleaning instructions in
“Refrigerator Care.”
WARNING
Suffocation Hazard
Remove doors from your old refrigerator.
Failure to do so can result in death or brain damage.
Important information to know about disposal of
refrigerants:
Dispose of refrigerator in accordance with Federal and Local
regulations. Refrigerants must be evacuated by a licensed,
EPA certified refrigerant technician in accordance with
established procedures.
WARNING
Excessive Weight Hazard
Use two or more people to move and install
refrigerator.
Failure to do so can result in back or other injury.
When Moving Your Refrigerator:
Your refrigerator is heavy. When moving the refrigerator for
cleaning or service, be sure to cover the oor with
cardboard or hardboard to avoid oor damage. Always pull
the refrigerator straight out when moving it. Do not wiggle or
“walk” the refrigerator when trying to move it, as oor
damage could occur.
Important information to know about glass shelves
and covers:
Do not clean glass shelves or covers with warm water when
they are cold. Shelves and covers may break if exposed to
sudden temperature changes or impact, such as bumping.
Tempered glass is designed to shatter into many small,
pebble-size pieces. This is normal. Glass shelves and covers
are heavy. Use both hands when removing them to avoid
dropping.
4
Location Requirements
IMPORTANT: This appliance is designed for indoor, household
use only.
This appliances is intended to used in household and similar
applications such as:
■ Staff kitchen areas in shops, ofce and other working
environments,
■ Farm houses and by clients in hotels, motels and other
residential type environments,
■ Bed and breakfast type environments,
■ Catering and similar non-retail applications.
To ensure proper ventilation for your refrigerator, allow for 1/2"
(1.25 cm) of space on each side and at the top. Allow for 1"
(2.54 cm) of space behind the refrigerator. If your refrigerator has
an ice maker, allow extra space at the back for the water line
connections. When installing your refrigerator next to a xed wall,
leave 3
3
/
4
" (9.5 cm) minimum space between the refrigerator and
wall to allow the door to swing open.
NOTE: It is recommended that you do not install the refrigerator
near an oven, radiator, or other heat source. Do not install the
refrigerator in a location where the temperature will fall below
55°F (13°C).
Electrical Requirements
Before you move your refrigerator into its nal location, it is
important to make sure you have the proper electrical connection.
If the supply cord is damaged, it must be replaced by the
manufacturer or its service agent or a similarly qualied person.
Do not use a cord that shows cracks or abrasion damage along
its length or at either the plug or connector end.
Recommended Grounding Method
A 115 volt, 60 Hz, AC only 15 or 20 A fused, grounded electrical
supply is required. It is recommended that a separate circuit
serving only your refrigerator and approved accessories be
provided. Use an outlet that cannot be turned off by a switch. Do
not use an extension cord.
NOTE: Before performing any type of installation, cleaning, or
removing a light bulb, turn Cooling OFF, and then disconnect the
refrigerator from the electrical source. When you have nished,
reconnect the refrigerator to the electrical source and turn Cooling
ON. See “Using the Controls.”
WARNING
Explosion Hazard
Keep ammable materials and vapors, such as
gasoline, away from refrigerator.
Failure to do so can result in death, explosion, or re.
3³⁄₄" (9.5 cm)
1/2" (1.25 cm)
Electrical Shock Hazard
Plug into a grounded 3 prong outlet.
Do not remove ground prong.
Do not use an adapter.
Do not use an extension cord.
Failure to follow these instructions can result in death,
fire, or electrical shock.
WARNING
5
Water Supply Requirements
Gather the required tools and parts before starting installation.
Read and follow the instructions provided with any tools listed
here.
TOOLS NEEDED:
■ Flat-blade screwdriver ■ 1/4" Nut driver
■ 7/16" and 1/2" Open-end or
two adjustable wrenches
■ 1/4" Drill bit
■ Cordless drill
IMPORTANT:
■ Connect to potable water supply only.
■ All installations must meet local plumbing code requirements.
■ Do not use a piercing-type or 3/16" (4.76 mm) saddle valve
which reduces water ow and clogs more easily.
■ Use copper tubing and check for leaks. Install copper tubing
only in areas where the household temperatures will remain
above freezing.
■ For models with water lters, the disposable water lter
should be replaced at least every 6 months.
Water Pressure
A cold water supply with water pressure of between 35 and
120 psi (241 and 827 kPa) is required to operate the water
dispenser and ice maker. If you have questions about your water
pressure, call a licensed, qualied plumber.
Reverse Osmosis Water Supply
IMPORTANT: The pressure of the water supply coming out of
a reverse osmosis system going to the water inlet valve of the
refrigerator needs to be between 35 and 120 psi (241 and
827 kPa).
If a reverse osmosis water ltration system is connected to your
cold water supply, the water pressure to the reverse osmosis
system needs to be a minimum of 40 to 60 psi (276 to 414 kPa).
If the water pressure to the reverse osmosis system is less than
40 to 60 psi (276 to 414 kPa):
■ Check to see whether the sediment lter in the reverse
osmosis system is blocked. Replace the lter if necessary.
■ Allow the storage tank on the reverse osmosis system to rell
after heavy usage.
■ If your refrigerator has a water lter, it may further reduce
the water pressure when used in conjunction with a reverse
osmosis system. Remove the water lter. See “Water Filtration
System.”
If you have questions about your water pressure, call a licensed,
qualied plumber
Connect the Water Supply
Read all directions before you begin.
IMPORTANT: If you turn the refrigerator on before the water line
is connected, turn the ice maker OFF.
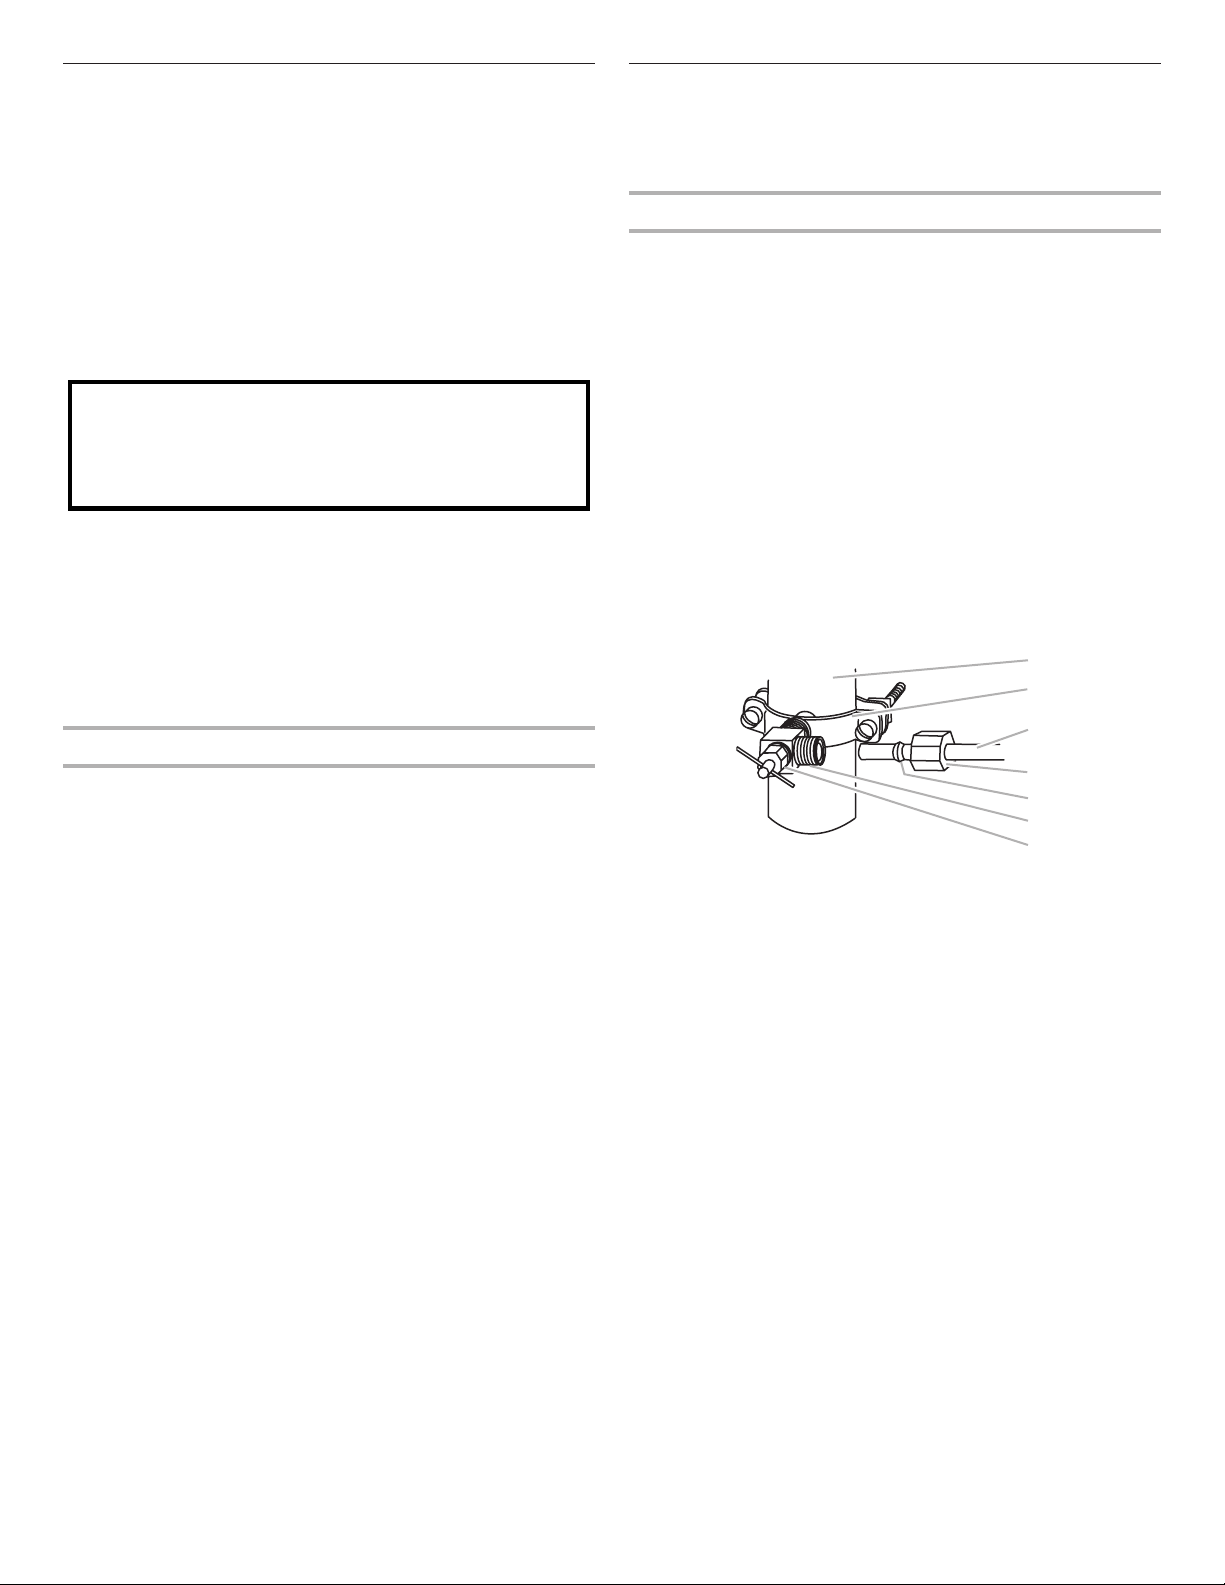
Connect to Water Line
1. Unplug refrigerator or disconnect power.
2. Turn OFF main water supply. Turn ON nearest faucet long
enough to clear line of water.
3. Find a 1/2" to 1¹⁄
4
" (12.7 mm to 31.8 mm) vertical cold water
pipe near the refrigerator.
IMPORTANT:
■ Make sure it is a cold water pipe.
■ Horizontal pipe will work, but the following procedure
must be followed: Drill on the top side of the pipe, not the
bottom. This will help keep water away from the drill. This
also keeps normal sediment from collecting in the valve.
4. Determine the length of copper tubing you need. Measure
from the connection on the rear of the refrigerator to the water
pipe. Add 7 ft (2.1 m) to allow for cleaning. Use 1/4" (6.35 mm)
O.D. (outside diameter) copper tubing. Be sure both ends of
copper tubing are cut square.
5. Using a cordless drill, drill a 1/4" hole in the cold water pipe
you have selected.
6. Fasten the shutoff valve to the cold water pipe with the pipe
clamp. Be sure the outlet end is solidly in the 1/4" drilled hole
in the water pipe and that the washer is under the pipe clamp.
Tighten the packing nut. Tighten the pipe clamp screws slowly
and evenly so the washer makes a watertight seal. Do not
overtighten.
7. Slip the compression sleeve and compression nut on the
copper tubing as shown. Insert the end of the tubing into the
outlet end squarely as far as it will go. Screw compression nut
onto outlet end with adjustable wrench. Do not overtighten or
you may crush the copper tubing.
8. Place the free end of the tubing in a container or sink, and
turn ON the main water supply. Flush the tubing until water is
clear. Turn OFF the shutoff valve on the water pipe.
Do not use with water that is microbiologically unsafe or
of unknown quality without adequate disinfection before
or after the system. Systems certified for cyst reduction
may be used on disinfected waters that may contain
filterable cysts.
F
G
A
B
C
D
E
A. Cold water pipe
B. Pipe clamp
C. Copper tubing
D. Compression nut
E. Compression sleeve
F. Shutoff valve
G. Packing nut

6
Connect to Refrigerator
1. Create a service loop (minimum diameter of 2 ft [61 cm])
with the copper tubing. Avoid kinks when coiling the copper
tubing.
2. Remove the plastic cap from water valve inlet port. Place a
compression nut and sleeve on the copper tubing.
3. Insert the end of the copper tubing into the water valve inlet
port. Shape tubing slightly so that the tubing feeds straight
into the port to avoid kinks.
4. Slide the compression nut over the sleeve and screw into the
water valve inlet port.
5. Using an adjustable wrench, hold the nut on the plastic water
line to keep it from moving. Then, with a second wrench turn
the compression nut on the copper tubing counterclockwise
to completely tighten. Do not overtighten.
6. Check connection by pulling on copper tubing. Attach the
plastic water line to the refrigerator cabinet with a “P” clamp.
7. Turn on water supply to the refrigerator and check for leaks.
Correct any leaks.
Complete the Installation
1. Plug into a grounded 3 prong outlet.
NOTE: Allow 24 hours to produce the rst batch of ice.
Discard the rst three batches of ice produced. Allow 3 days to
completely ll the ice container.
Refrigerator Doors and Drawer
All graphics referenced in the following instructions are included
later in this section after “Final Steps.”
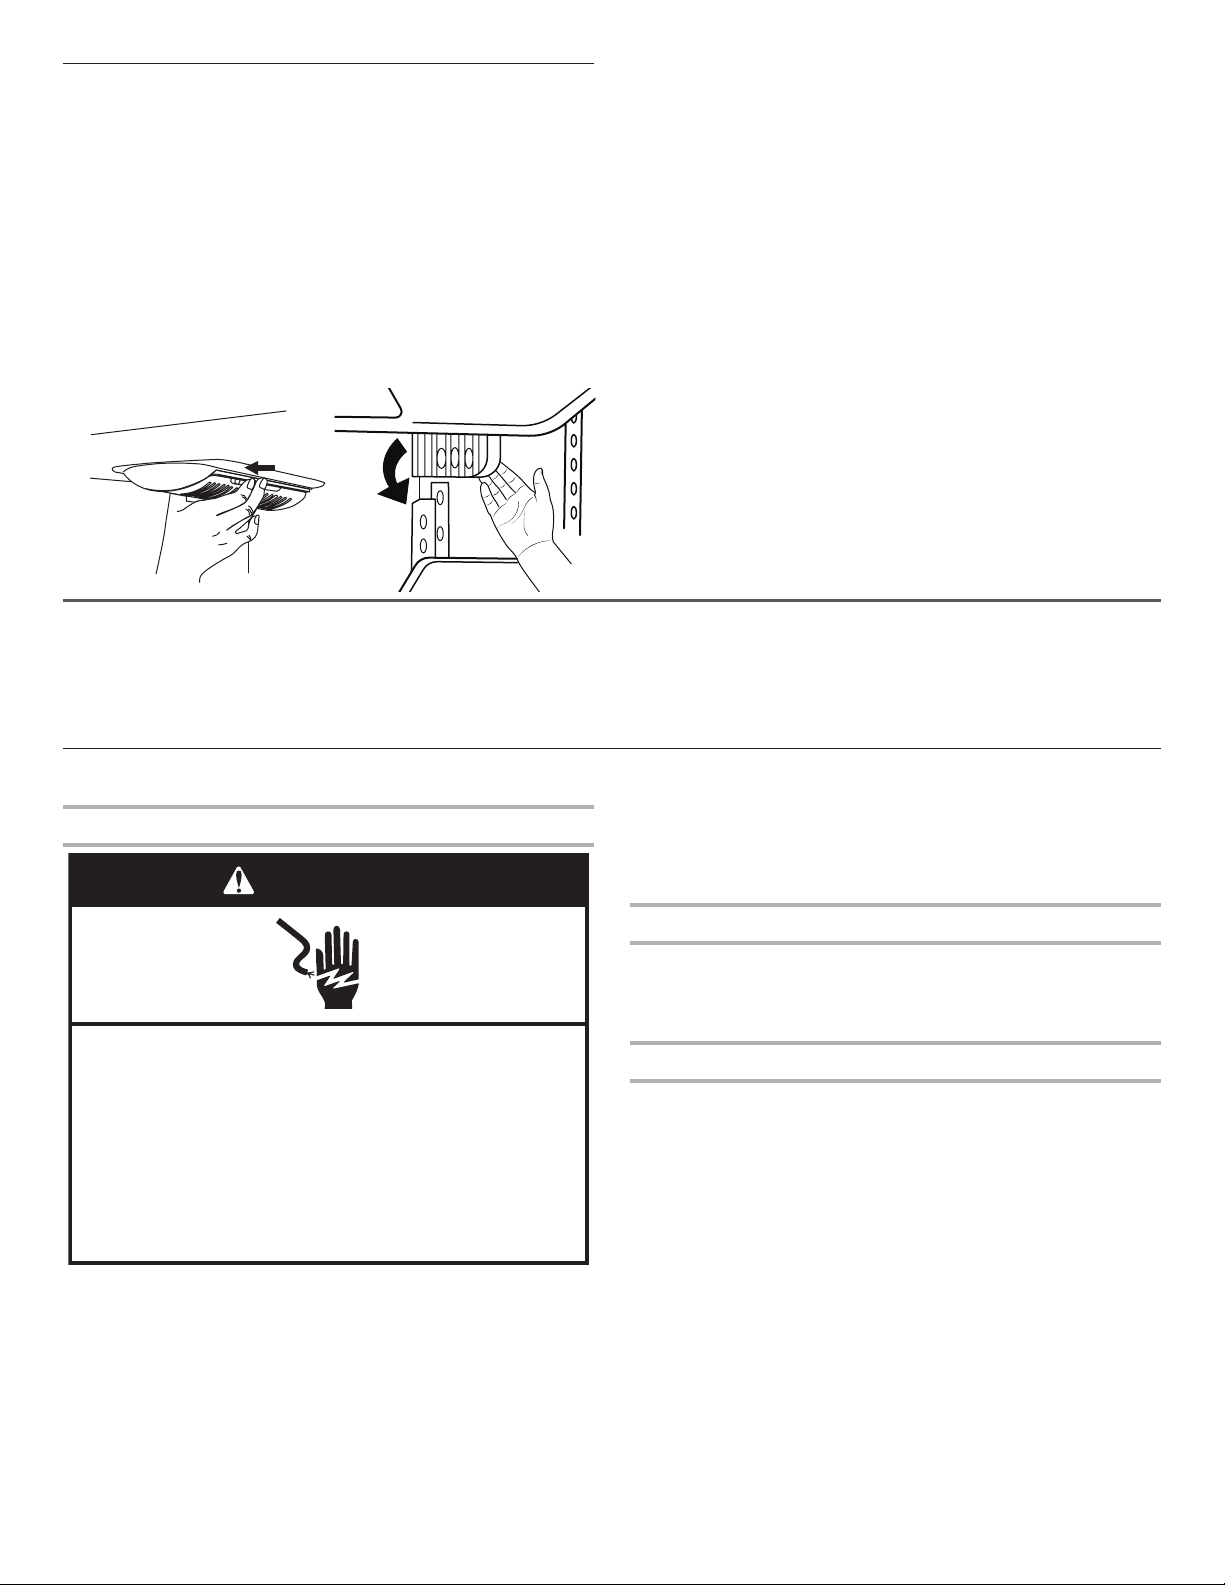
Remove and Replace Handles
To Remove Handles:
1. Grasp the lower part of the handle rmly, slide the handle up
and pull the handle straight out from the door. See Handle
graphics 1 and 2.
To Replace Handles:
1. Position the handle so that the large holes in the mounting
clips are down and align the holes with the door studs.
2. Rotate the handle so that the mounting clips are at against
the door and slide the handle down to engage. See Handle
graphics 1 and 2.
Remove Doors and Hinges
IMPORTANT:
■ Remove food and any adjustable door or utility bins from
doors.
B
A
C
D
A. Plastic water tubing
B. Sleeve
C. Compression nut
D. Copper tubing
C
B
D
E
A
A. “P” clamp
B. Plastic water line
C. Water valve inlet port
D. Compression nut
E. Copper tubing
Electrical Shock Hazard
Plug into a grounded 3 prong outlet.
Do not remove ground prong.
Do not use an adapter.
Do not use an extension cord.
Failure to follow these instructions can result in death,
fire, or electrical shock.
WARNING
WARNING
Electrical Shock Hazard
Disconnect power before removing doors.
Failure to do so can result in death or electrical shock.
7
■ Keep the refrigerator doors closed until you are ready to lift
them free from the cabinet.
NOTE: Provide additional support for the refrigerator door
while the hinges are being removed. Do not depend on the
door gasket magnets to hold the door in place while you are
working.
TOOLS NEEDED: 5/16", 3/8", 1/4" hex head socket wrench,
Torx
†
T20 screwdriver, #2 Phillips screwdriver, and a at-blade
screwdriver.
1. Unplug refrigerator or disconnect power.
2. Remove the base grille. Grasp the grille rmly and pull it
toward you.
3. Starting with the right-hand side door, remove the parts
for the top hinge as shown in Top Hinge graphic. Lift the
refrigerator door from the bottom hinge pin.
4. Remove the top hinge cover from left-hand side refrigerator
door.
5. Disconnect the wiring plug located on top of the hinge by
wedging a at-blade screwdriver or your ngernail between
the two sections. See Connections graphic.
6. Disconnect the water line by pulling back on the locking collar
while pulling the water line out of the water line connector.
See Connections graphic.
7. Remove the parts for the top hinge as shown in Top Hinge
graphic. Lift the left-hand side door from the bottom hinge
pin.
8. Using a 3/8" hex wrench, remove the leveling leg brackets
from the bottom of the cabinet. Keep screws for later use.
Replace Doors and Hinges
1. Assemble the parts for the top hinge as shown in Top Hinge
graphic. Do not tighten the screws completely.
2. Replace the parts for the bottom hinge as shown in Bottom
Hinge graphic. Tighten screws. Replace the refrigerator door
NOTE: Provide additional support for the refrigerator door
while the hinges are being moved. Do not depend on the
door gasket magnets to hold the door in place while you are
working.
3. Align the door so that the bottom of the refrigerator door
aligns evenly with the top of the freezer drawer. Tighten all
screws.
4. Reconnect the wiring plug on top of the left-hand side
refrigerator door.
5. Reconnect the water line by pulling back the locking collar
ring while rmly pushing the water line into the connector.
6. Check for leaks. Replace the top hinge covers.
Remove and Replace Freezer Drawer
IMPORTANT: Two people may be required to remove and replace
the freezer drawer. Graphics are included later in this section.
Remove Drawer Front
1. Open the freezer drawer to full extension.
2. Loosen the four screws attaching the drawer glides to the
drawer front. See Drawer Front Removal graphic.
NOTE: Loosen screws three to four turns. Keep the screws in
the drawer front.
3. Lift drawer front upward and off the screws. See Drawer Front
Removal graphic.
Replace Drawer Front
1. Slide the drawer glides out of the freezer compartment. Insert
the screws in the top of the drawer front into the slots in the
drawer brackets. See Drawer Front Replacement graphic.
2. Pull the drawer brackets toward you to position the two
screws in the bottom of the drawer front into the brackets.
See Drawer Front Replacement graphic.
3. Completely tighten the four screws.
Final Steps
1. Replace the base grille.
2. Plug into a grounded 3 prong outlet.
3. Return all removable parts to doors and drawer and food to
refrigerator and freezer.
Electrical Shock Hazard
Plug into a grounded 3 prong outlet.
Do not remove ground prong.
Do not use an adapter.
Do not use an extension cord.
Failure to follow these instructions can result in death,
fire, or electrical shock.
WARNING
†TORX and T20 are trademarks of Acument Intellectual Properties, LLC
8
WARNING
Electrical Shock Hazard
Disconnect power before removing doors.
Failure to do so can result in death or electrical shock.
A
A
B
C
1
2
B
A
C
D
A
B
Door Removal and Replacement
Top Hinges
Bottom Hinges
Connections
Drawer Front Removal Drawer Front Replacement
A. Hinge Cover Screw
B. Top Hinge Cover
C. 5/16" Hex Head Hinge Screws
D. Top Hinge
A. Hinge Pin Cover
B. Bottom Hinge
C. Hinge Screws
A. Wiring Plug
B. Water Line Connection
A. Loosen 4 Door Bracket Screws
9
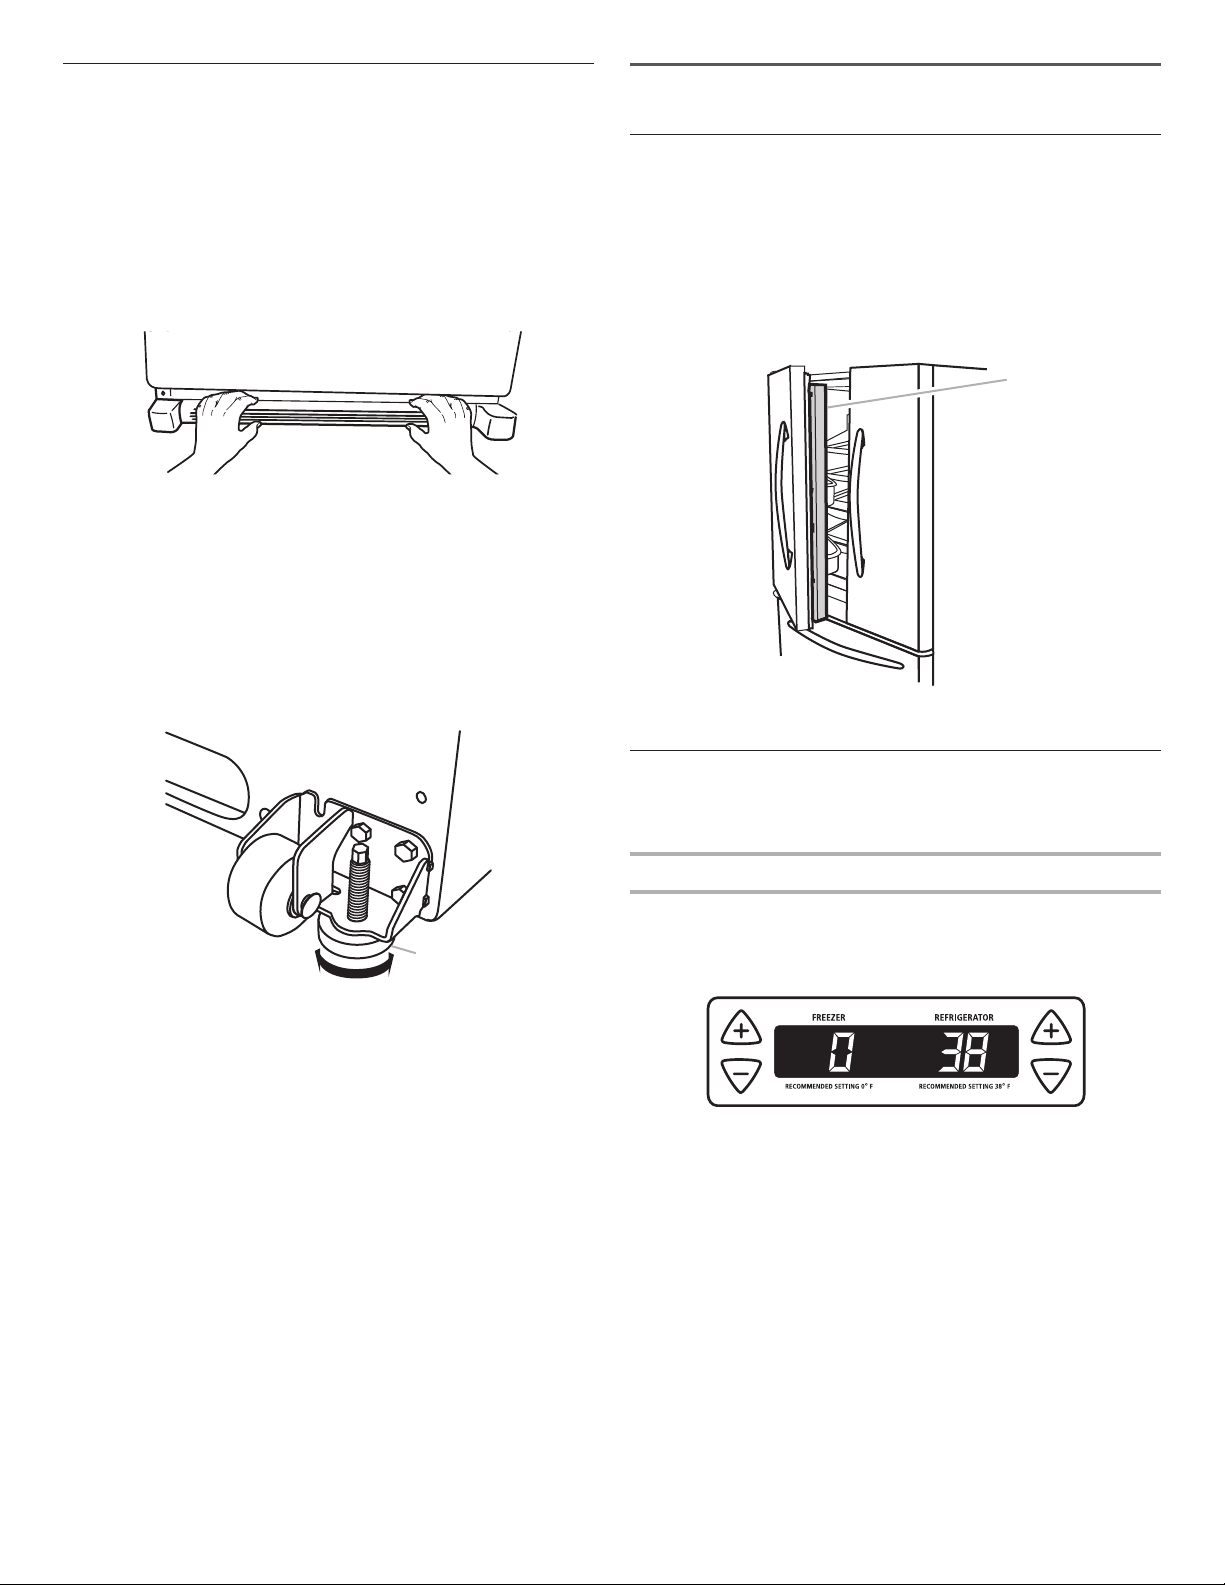
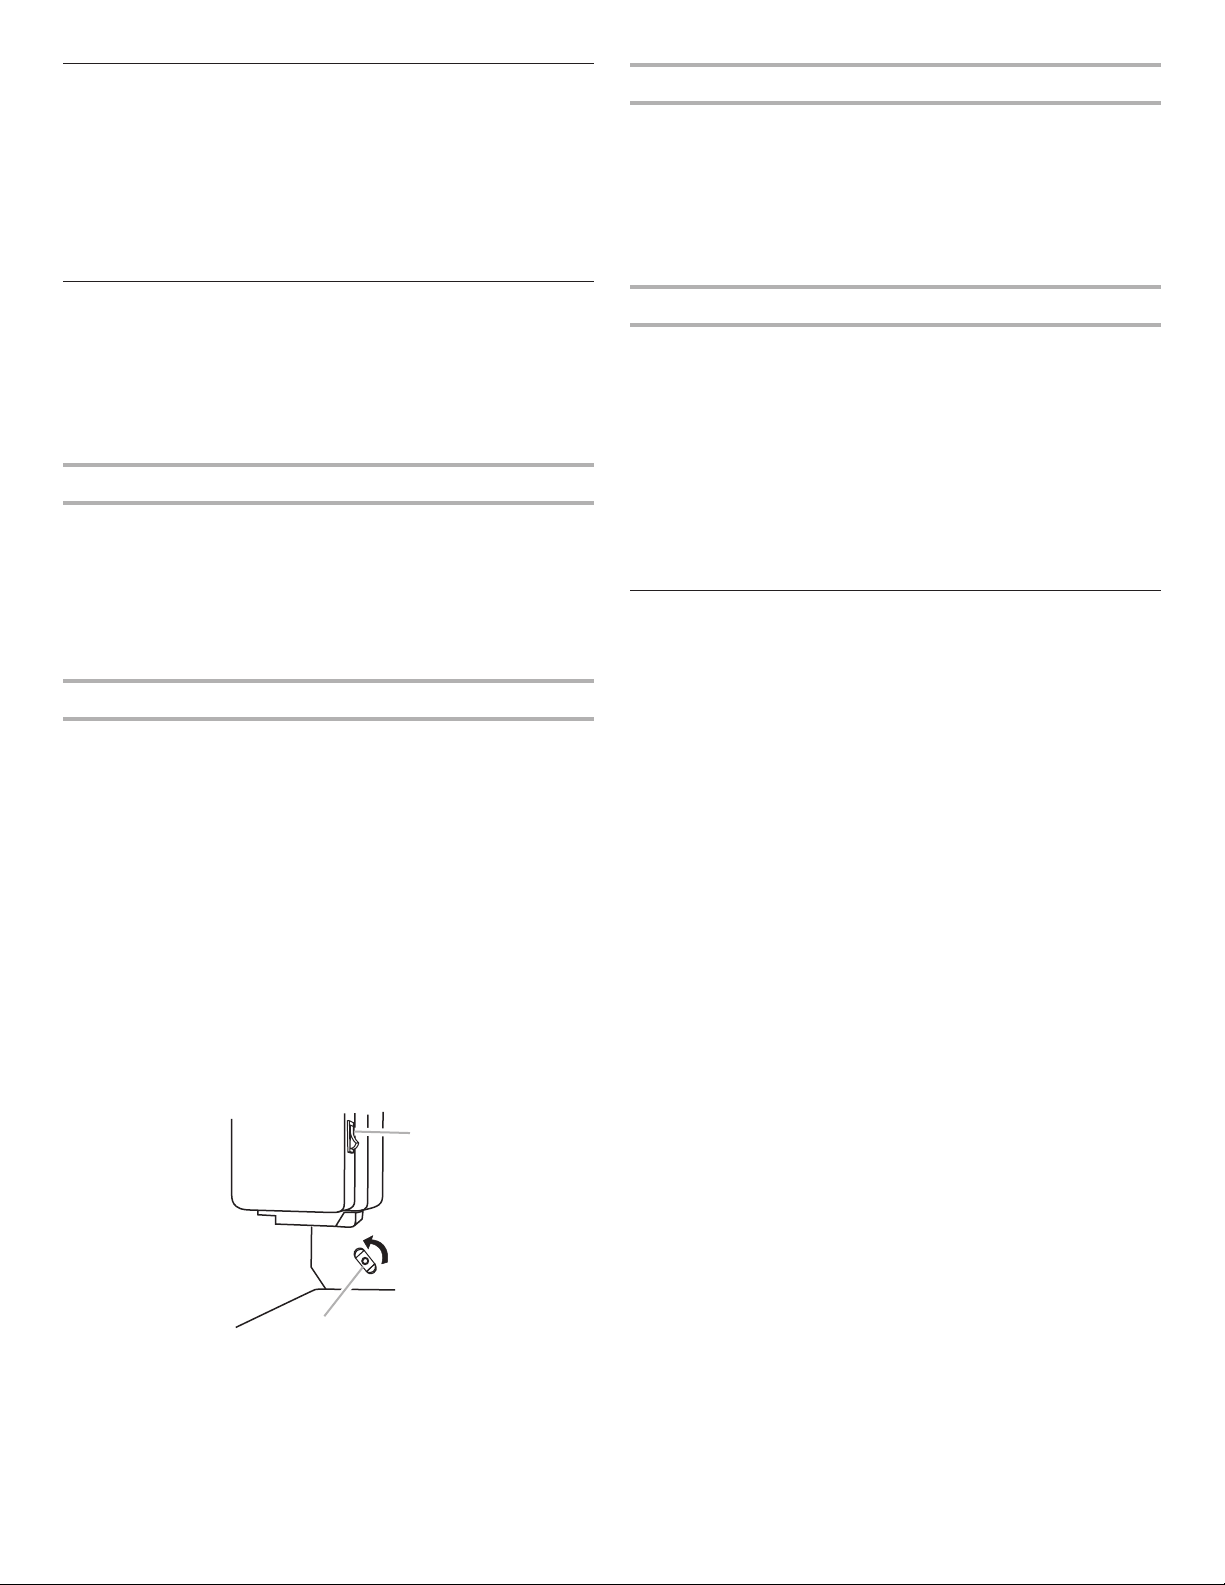
Adjust the Doors
IMPORTANT:
■ Your refrigerator has two adjustable, front leveling screws –
one on each side of the refrigerator base. If your refrigerator
seems unsteady or you want the door to close easier, use the
instructions below.
■ Before moving the refrigerator, raise the leveling screws so the
front rollers are touching the oor.
1. Remove the base grille. Grasp the grille rmly and pull it
toward you.
2. Raise or lower the cabinet.
Using a 1/4" hex driver, turn the leveling screw on each side
to raise or lower that side of the refrigerator.
NOTE: Having someone push against the top of the
refrigerator takes some weight off the leveling screws. This
makes it easier to turn the screws. It may take several turns of
the leveling screw to adjust the tilt of the refrigerator.
■ To raise, turn the leveling screw clockwise.
■ To lower, turn the leveling screw counterclockwise.
3. Open the door again to make sure that it closes as easily as
you like. If not, tilt the refrigerator slightly more to the rear by
turning both leveling screws clockwise. It may take several
more turns, and you should turn both screws the same
amount.
4. Replace the base grille.
REFRIGERATOR USE
Opening and Closing Doors
There are two refrigerator compartment doors. The doors can be
opened and closed either separately or together.
There is a vertically-hinged seal on the left refrigerator door.
■ When the left side door is opened, the hinged seal
automatically folds inward so that it is out of the way.
■ When both doors are closed, the hinged seal automatically
forms a seal between the two doors.
Using the Controls
The control center is located on the front of the ice and water
dispenser.
Temperature Controls
For your convenience, your temperature controls are preset at
the factory. When you rst install your refrigerator, make sure the
controls are still set to the recommended set points as shown.
Recommended Settings
IMPORTANT:
■ When the power is on, the temperature display shows the set
point temperature of the compartment.
■ Wait 24 hours for your refrigerator to cool completely before
adding food. If you add food before the refrigerator has
cooled completely, your food may spoil.
NOTE: Adjusting the refrigerator and freezer temperature
controls to a colder than recommended setting will not cool
the compartments any faster.
■ The recommended settings should be correct for normal
household refrigerator use. The controls are set correctly
when milk or juice is as cold as you like and when ice cream
is rm.
■ If the temperature is too warm or too cold in the refrigerator
or freezer, rst check the air vents to be sure they are not
blocked before adjusting the controls.
A
A. Leveling screw
A
A. Hinged seal
10
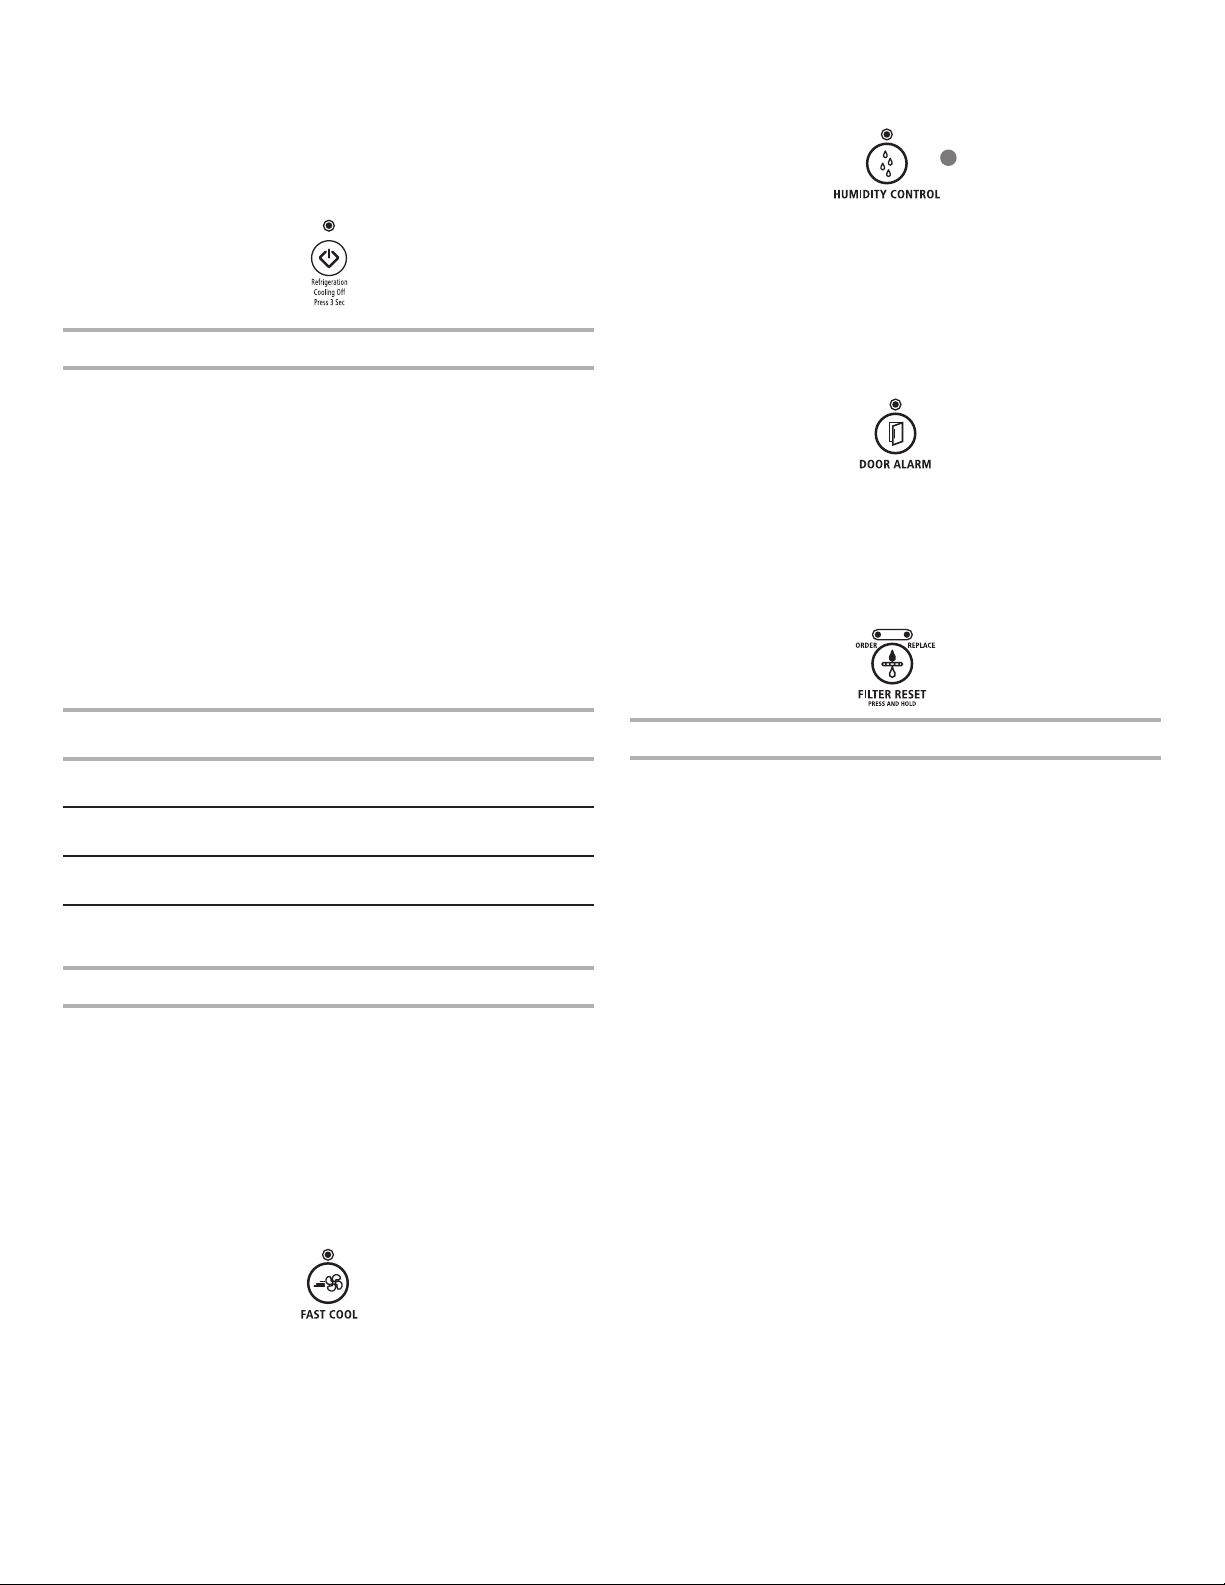
Cooling On/Off:
■ Cooling On/Off turns off cooling for both compartments. It
does not disconnect power to the refrigerator.
■ Press and hold Cooling On/Off for 3 seconds. The LED will
light up to indicate that cooling is Off. Press the button again
to turn on the cooling. The LED will turn off.
Adjusting Controls
The REFRIGERATOR control adjusts the refrigerator compartment
temperature. The FREEZER control adjusts the freezer
compartment temperature.
If you need to adjust the temperature in either the refrigerator
or freezer compartment, use the settings listed in the chart as a
guide.
To Adjust Set Point Temperatures:
The rst touch of the (+) or (-) touch pad displays the current
temperature set point.
■ Press the (+) or (-) touch pads until the desired temperature
set point is displayed.
NOTE: Except when rst turning on the refrigerator, do not adjust
either temperature control more than one setting at a time. Wait
24 hours between adjustments for the temperature to stabilize.
CONDITION: TEMPERATURE
ADJUSTMENT:
REFRIGERATOR too warm REFRIGERATOR Control
1° lower
FREEZER too warm / too little ice FREEZER Control
1° lower
REFRIGERATOR too cold REFRIGERATOR Control
1° higher
FREEZER too cold FREEZER Control
1° higher
Additional Control Center Features
Fast Cool
The Fast Cool feature assists with periods of high refrigerator use,
full grocery loads, or temporarily warm room temperatures.
■ Press the Fast Cool touch pad to set the freezer and
refrigerator to the lowest temperature settings. Press the Fast
Cool touch pad again to return to the normal refrigerator set
point.
NOTE: The Fast Cool feature will automatically shut off in
approximately 2 hours. When Fast Cool is on, the temperature
cannot be adjusted.
Humidity Control
The humidity control feature turns on a heater to help reduce
moisture on the door hinge seal. Use in humid environments or
when you notice moisture on the door hinge seal. The refrigerator
uses more energy when Humidity Control is on.
■ Press Humidity Control to turn on the door heater. Press
Humidity Control again to turn off the heater. The LED will be
illuminated when Humidity Control is on.
Door Alarm
The Door Alarm feature sounds a chime every few seconds when
the refrigerator door has been left open for 5 continuous minutes.
The chime will sound until the door is closed or Door Alarm is
turned off.
■ Press the Door Alarm touch pad to turn this feature on or off.
The indicator light will be lit when the Door Alarm feature is
on.
Filter Reset
The Filter Reset control allows you to restart the water lter status
tracking feature each time you replace your water lter. See
“Water Filtration System.”
■ Press and hold the Filter Reset touch pad for 3 seconds, until
the Order or Replace light turns off.
User Preferences
The control center allows you to set user preferences, if desired.
Temperature Display (F_C)
This preference allows you to change the temperature display.
F - Temperature in degrees Fahrenheit
C - Temperature in degrees Celsius
Alarm (AL)
This preference allows you to turn off the sound of all alarms.
ON - You will hear the alarm sound.
OFF - You will not hear the alarm sound.
Auto Light Level Selection (LL)
This preference allows you to adjust the dispenser light level from
dimmest to brightest (settings 1 through 9).
NOTE: The Auto Light feature on the control center must be
selected to activate this preference.
Sabbath Mode (SAB)
ON - All control center lights, interior lights and alarm tones will
be disabled.
OFF - All control center lights, interior lights and alarm tones will
be enabled.
NOTE: Press the door alarm touch pad for three seconds to
restore all lights.
To Access the User Preferences Menu:
1. Press and hold the Door Alarm touch pad for 3 seconds. The
preference name will appear in the Freezer display and the
preference status (F or C) or (ON or OFF) will appear in the
Refrigerator display.
2. Use the Freezer (+) or (-) touch pads to scroll through the
preference names. When the desired preference name is
displayed, press the Refrigerator (+) or (-) touch pads to
change the preference status.
3. Set your preferences by pressing and holding the Door Alarm
touch pad for 3 seconds.
11
Crisper Humidity Control
You can control the amount of humidity in the moisture-sealed
crisper. Depending on your model, adjust the control to any
setting between FRUIT and VEGETABLES or LOW and HIGH.
FRUIT/LOW (open) for best storage of fruits and vegetables with
skins.
VEGETABLES/HIGH (closed) for best storage of fresh, leafy
vegetables.
Ice Maker and Ice Storage Bin
IMPORTANT:
■ Flush the water system before turning on the ice maker. See
“Water and Ice Dispenser.”
■ The ice maker and storage bin are located in the upper left-
hand side of the refrigerator compartment.
Turning the Ice Maker On/Off
The On/Off switch is located on the ice maker.
To turn on the ice maker, press the switch to the ON position.
To manually turn off the ice maker, press the switch to the OFF
position.
NOTE: Your ice maker has an automatic shutoff. The ice maker
sensors will automatically stop ice production, but the control will
remain in the ON position.
Removing and Replacing Ice Storage Bin
To Remove the Ice Storage Bin:
1. Hold the base of the storage bin and press the release button
on the lower right.
2. Pull the storage bin out until resistance is felt. Lift up the front
of the ice bin and remove.
3. Press the switch to the OFF position
To Replace the Ice Storage Bin:
IMPORTANT: It may be necessary to turn the auger driver, behind
the ice bin, counterclockwise to properly align the ice bin with
the auger driver. The ice storage bin must be locked in place for
proper ice dispensing.
1. Press the switch to the ON position
2. Slide the ice bin into the guide rails located on either side of
the enclosure.
3. Push the ice bin in until resistance is felt. Raise the front
slightly and push the ice bin in until an audible “click” is heard.
Ice Production Rate
■ Allow 24 hours to produce the rst batch of ice. Discard the
rst three batches of ice produced.
■ The ice maker should produce approximately 8 to 12 batches
of ice in a 24-hour period.
■ To increase ice production, lower the freezer and refrigerator
temperature. See “Using the Controls.” Wait 24 hours
between adjustments.
Remember
■ The quality of your ice will be only as good as the quality of
the water supplied to your ice maker. Avoid connecting the ice
maker to a softened water supply. Water softener chemicals
(such as salt) can damage parts of the ice maker and lead
to poor quality ice. If a softened water supply cannot be
avoided, make sure the water softener is operating properly
and is well maintained.
■ Do not use anything sharp to break up the ice in the bin. This
can cause damage to the ice bin and dispenser mechanism.
■ Do not store anything on top of the ice maker or in the ice
storage bin.
Water and Ice Dispenser
IMPORTANT:
■ After connecting the refrigerator to a water source, ush the
water system. Use a sturdy container to depress and hold the
water dispenser pad for 5 seconds, then release it for
5 seconds. Repeat until water begins to ow. Once water
begins to ow, continue depressing and releasing the
dispenser pad (5 seconds on, 5 seconds off) until a total of
4 gal. (15 L) has been dispensed. This will ush air from the
lter and water dispensing system, and prepare the water
lter for use. Additional ushing may be required in some
households. As air is cleared from the system, water may
spurt out of the dispenser.
NOTE: After 5 minutes of continuous dispensing, the
dispenser will stop dispensing water to avoid ooding. To
continue dispensing, remove the container and press the
dispensing lever again.
■ The dispenser will dispense either water or cubed ice.
■ Allow 24 hours for the refrigerator to cool down and chill
water. Dispense enough water every week to maintain a fresh
supply.
■ Allow 24 hours to produce the rst batch of ice. Discard the
rst three batches of ice produced.
A
B
A. ON position
B. Auger driver
12
Dispense Ice and Water
1. Select water or cubed ice by pressing the corresponding
button on the dispenser control panel. A light above the
button indicates your selection.
2. Press a sturdy container against the dispenser lever.
IMPORTANT: You do not need to apply a lot of pressure to
the lever in order to activate the dispenser. Pressing hard
will not make the water or ice dispense faster or in greater
quantities.
3. Remove the container to stop dispensing.
Dispenser Light
NOTES:
■ The dispenser lights are LEDs which should not need to be
changed.
■ When you use the dispenser, the lever will automatically turn
the light on. If you want the light to be on continuously, you
may choose either On or Auto.
Auto: The dispenser light will illuminate at half-power when the
light sensor detects the light levels in the room are low. To turn
the dispenser light on, press the Light button. The Auto indicator
light will illuminate.
On: For continuous light, press the Light button a second time.
The On indicator light will illuminate.
Off: To turn the dispenser light off, press the Light button a third
time.
Dispenser Lock
The dispenser can be locked for easy cleaning or to avoid
unintentional dispensing by small children and pets.
NOTE: The dispenser lock does not shut off power to the
product, to the ice maker, or to the dispenser light. It just
deactivates all keypad functions.
To Lock and Unlock Dispenser:
Press and hold the Lock/Unlock touch pad for 3 seconds to lock
the dispenser. The indicator light will illuminate when Lock is on.
Press and hold the Lock/Unlock touch pad again for 3 seconds to
unlock dispenser. The indicator light will turn off.
Water Filtration System
The water lter is located in the upper right-hand corner of the
refrigerator compartment.
IMPORTANT: The disposable water lter should be replaced at
least every 6 months. If the water ow to the water dispenser or
ice maker decreases noticeably before 6 months have passed,
replace the water lter more often.
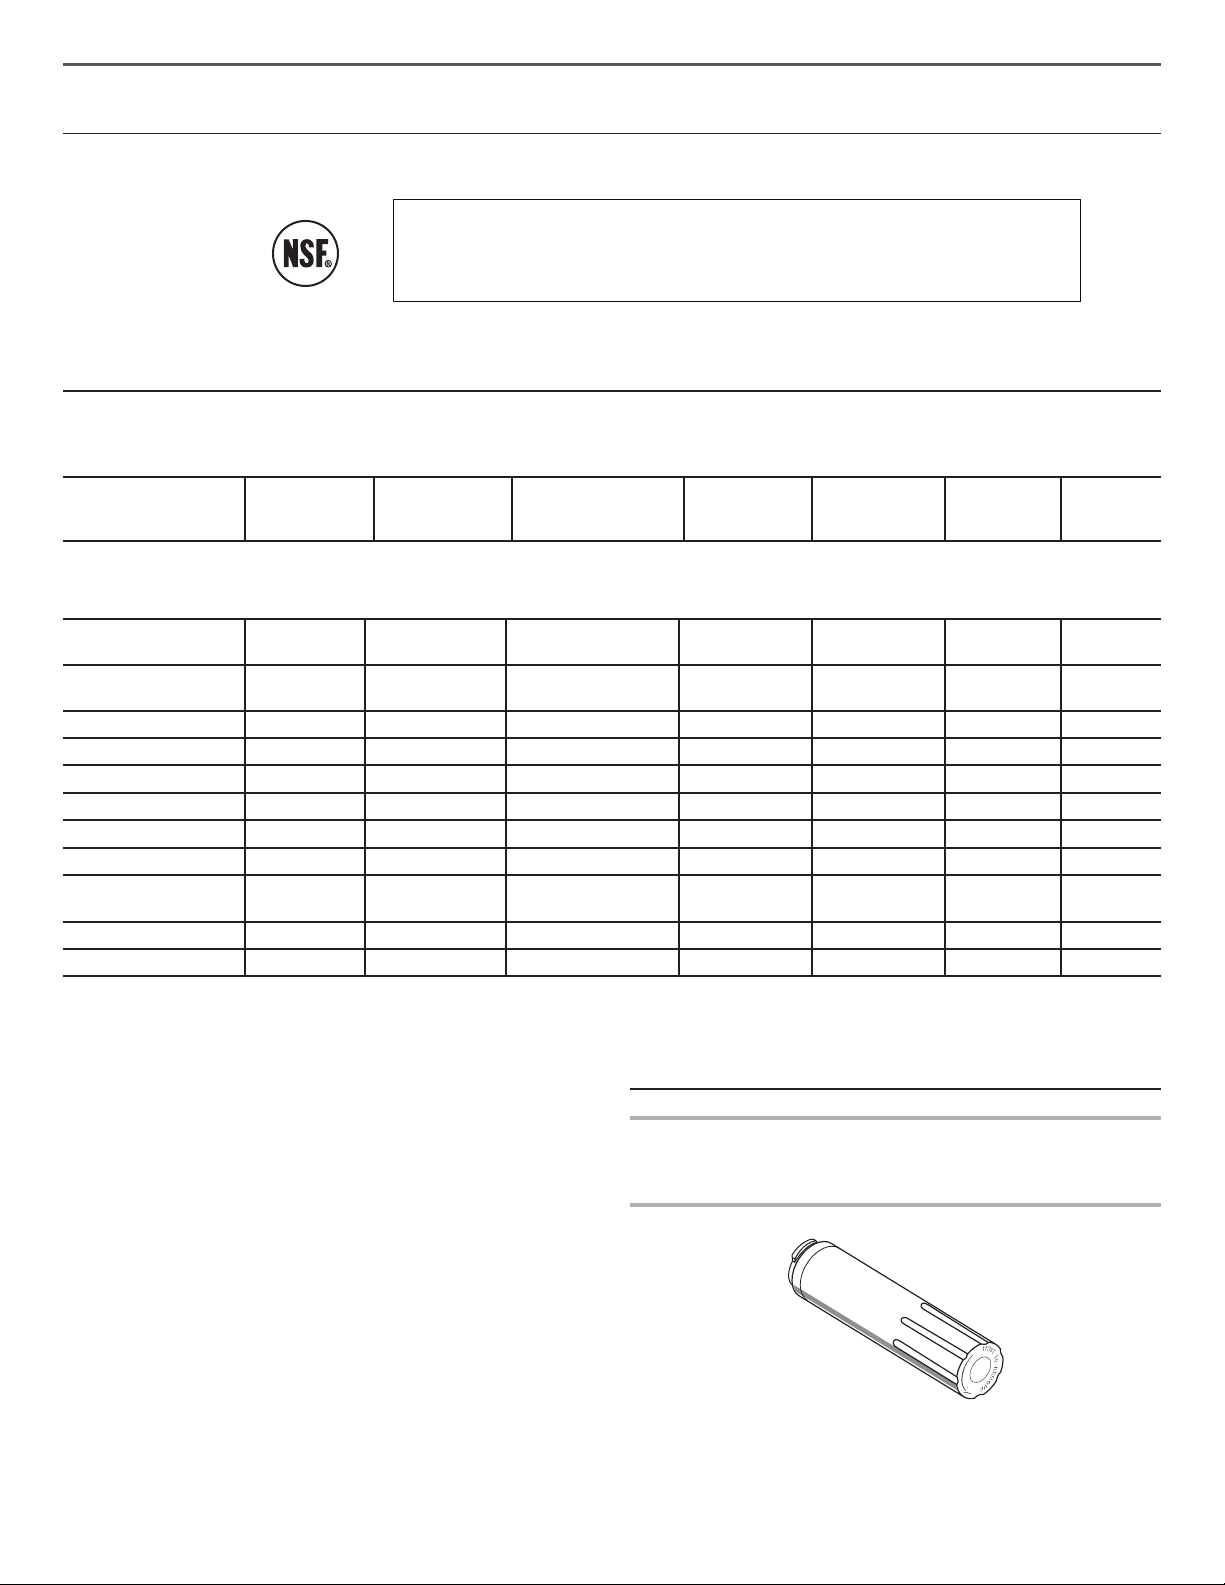
Replacing the Water Filter
To purchase replacement water lters, model UKF8001AXX-750
or model UKF8001AXX-200, contact your dealer or call
1-800-253-1301 U.S.A. or 1-800-807-6777 Canada.
IMPORTANT: Air trapped in the water system may cause water
and lter to eject. Always dispense water for at least 2 minutes
before removing the lter or blue bypass cap.
1. Turn lter counterclockwise to remove.
2. Remove sealing label from replacement lter and insert the
lter end into the lter head.
3. Turn the lter clockwise until it stops. Snap the lter cover
closed.
4. Flush the water system. See “Water and Ice Dispenser(s).”
NOTE: The dispenser feature may be used without a water lter
installed. Your water will not be ltered. If this option is chosen,
replace the lter with the blue bypass cap.
Cut Hazard
Use a sturdy glass when dispensing ice.
Failure to do so can result in cuts.
WARNING
Do not use with water that is microbiologically unsafe or
of unknown quality without adequate disinfection before
or after the system. Systems certified for cyst reduction
may be used on disinfected waters that may contain
filterable cysts.
13
REFRIGERATOR CARE
Cleaning
Both the refrigerator and freezer sections defrost automatically.
However, clean both sections about once a month to avoid odor
buildup. Wipe up spills immediately.
IMPORTANT:
■ Because air circulates between both sections, any odors
formed in one section will transfer to the other. You must
thoroughly clean both sections to eliminate odors. To avoid
odor transfer and drying out of food, wrap or cover foods
tightly.
■ Do not use abrasive or harsh cleaners such as window
sprays, scouring cleansers, ammable uids, cleaning waxes,
concentrated detergents, nail polish remover, bleaches or
cleansers containing petroleum products. Do not use paper
towels, scouring pads, or other harsh cleaning tools that may
scratch or damage the materials.
Clean the Interior
1. Unplug refrigerator or disconnect power.
2. Using a clean sponge or soft cloth and a mild detergent in
warm water, hand wash, rinse, and dry removable parts and
interior surfaces thoroughly.
3. Plug in refrigerator or reconnect power.
Clean the Touch Screen Display on the Dispenser
Panel
1. Make sure the refrigerator is unplugged or the power
is disconnected before wiping the screen, to avoid
unintentionally changing the settings.
2. Mix a solution of mild detergent in warm water. Dampen
a soft, lint-free cloth with the solution and gently wipe the
screen.
NOTE: Do not spray or wipe liquids directly onto the screen,
or over-saturate the cloth.
3. Plug in refrigerator or reconnect power.
Clean the Exterior Surfaces
1. Unplug refrigerator or disconnect power.
2. Using a clean sponge or soft cloth and a mild detergent in
warm water, wash, rinse and thoroughly dry stainless steel
and painted metal exteriors.
■ To keep your stainless steel refrigerator looking like new
and to remove minor scuffs or marks, it is suggested
that you use the manufacturer’s approved Stainless Steel
Cleaner and Polish, Part Number 4396920. To order the
cleaner, call 1-800-422-1230 U.S.A. or 1-800-807-6777
Canada.
IMPORTANT: This cleaner is for stainless steel parts only!
Do not allow the Stainless Steel Cleaner and Polish to come
into contact with any plastic parts such as the trim pieces,
dispenser covers or door gaskets. If unintentional contact
does occur, clean plastic part with a sponge and mild
detergent in warm water. Dry thoroughly with a soft cloth.
3. Plug in refrigerator or reconnect power.
Clean the Condenser
There is no need for routine condenser cleaning in normal
home operating environments. If the environment is particularly
greasy or dusty, or there is signicant pet trafc in the home,
the condenser should be cleaned every 2 to 3 months to ensure
maximum efciency.
To clean the condenser:
1. Unplug refrigerator or disconnect power.
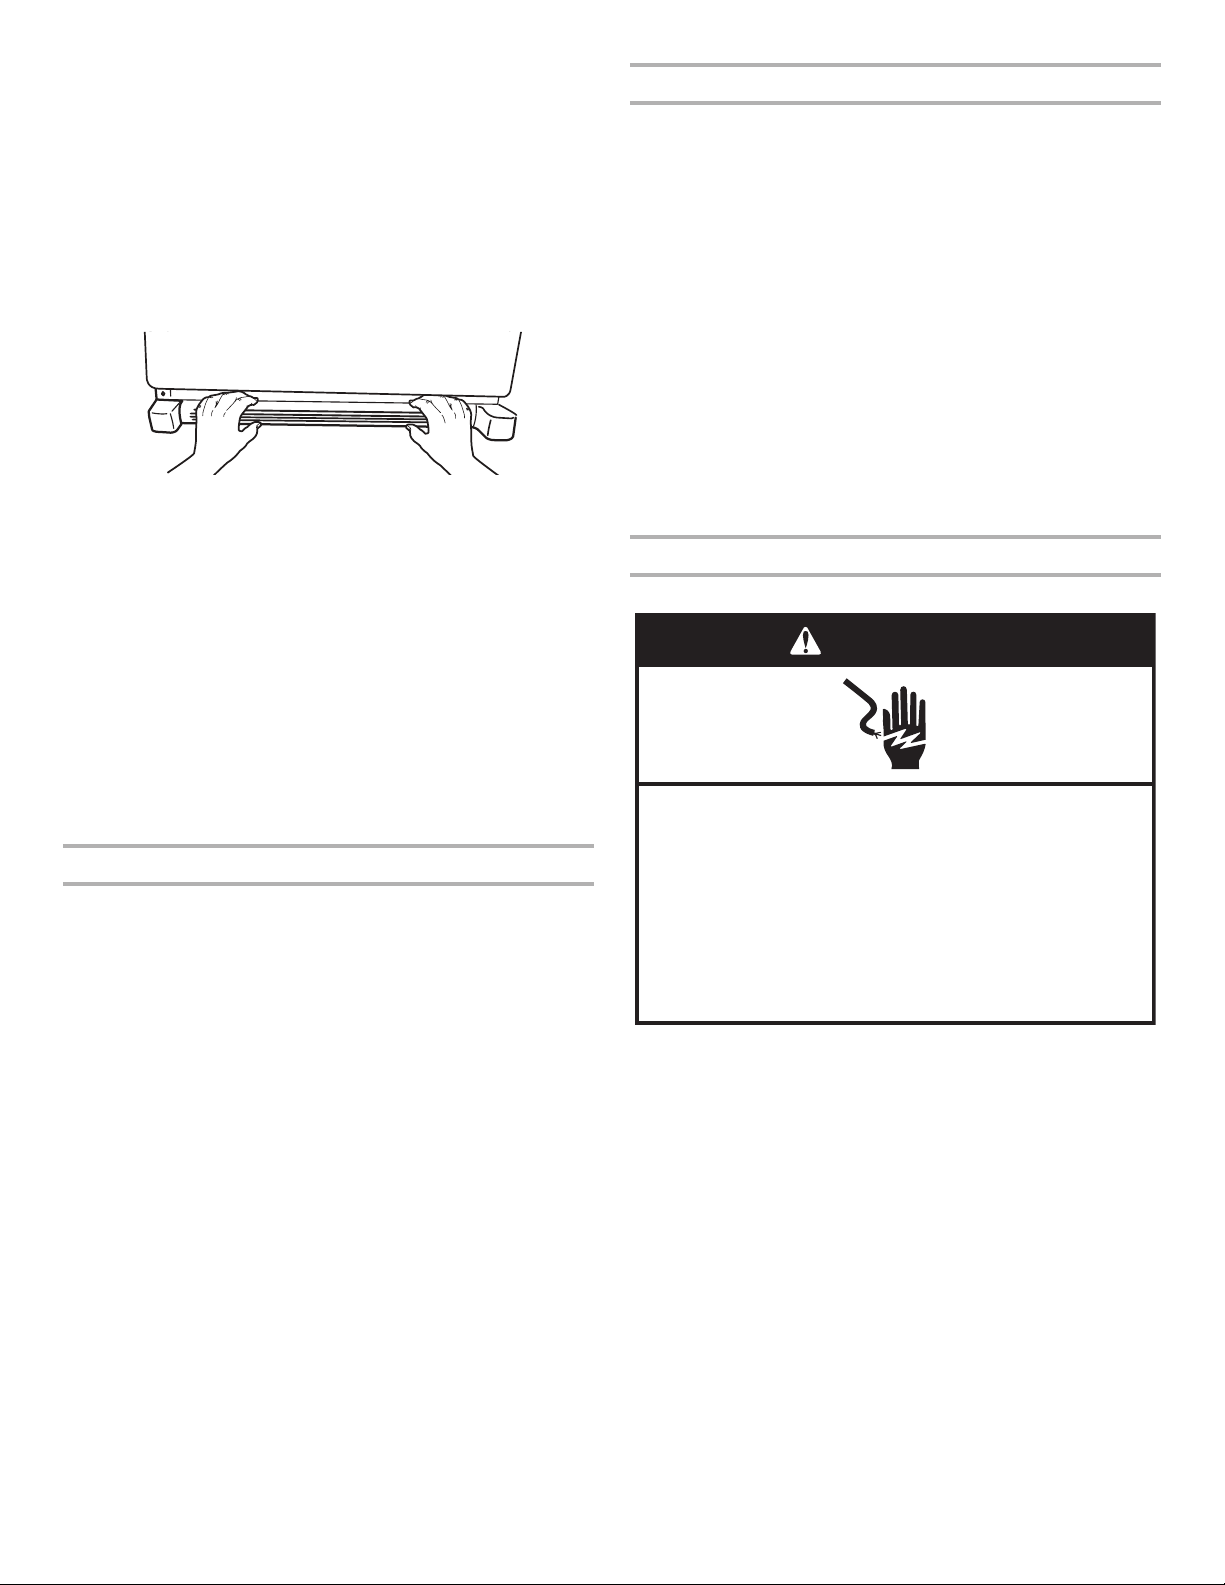
2. Remove the base grille.
3. Use a vacuum cleaner with a soft brush to clean the grille, the
open areas behind the grille and the front surface area of the
condenser.
4. Replace the base grille when nished.
5. Plug in refrigerator or reconnect power.
WARNING
Explosion Hazard
Use nonammable cleaner.
Failure to do so can result in death, explosion, or re.
14
Changing the Light Bulb
IMPORTANT: The light bulbs in both the refrigerator and
freezer compartments use LED bulbs, incandescent bulbs or a
combination of the two. If the lights do not illuminate when the
refrigerator and/or freezer door is opened, call for assistance or
service. See “Warranty” for phone numbers.
1. Unplug the refrigerator or disconnect power.
2. Remove the light shield (on some models).
■ Top of the refrigerator compartment - Squeeze both sides of
the light shield while pulling downward to remove.
■ Beneath ice storage inclosure (on some models) - Press
along upper edge of light shield and roll light shield forward to
remove.
3. Replace the burned-out bulb(s) with a bulb of the same size,
shape and wattage.
■ To replace the burned-out LED bulb with a LED bulb,
order Part Number W10565137 (3.6 watts).
NOTE: Some LED replacement bulbs are not recommended
for wet/damp environments. The refrigerator and freezer
compartments are considered to be wet/damp environments.
If using a brand of LED bulb other than the recommended
LED bulb, before installation, read and follow all instructions
on the LED packaging.
■ When replacing an incandescent bulb, use only
incandescent bulbs for household appliances with a
maximum of 40 watts.
■ Reinstall bulb shield/shroud after replacing incandescent
bulb(s).
4. Plug in refrigerator or reconnect power.
TROUBLESHOOTING
First try the solutions suggested here or visit our website and reference FAQs (Frequently Asked Questions)
to possibly avoid the cost of a service call.
In the U.S.A., www.whirlpool.com In Canada, www.whirlpool.ca
Refrigerator Operation
The refrigerator will not operate
■ Power cord unplugged? Plug into a grounded 3 prong outlet.
■ Is outlet working? Plug in a lamp to see if the outlet is
working.
■ Household fuse blown or circuit breaker tripped? Replace
the fuse or reset the circuit breaker. If the problem continues,
call an electrician.
■ Are controls on? Make sure the refrigerator controls are on.
See “Using the Control(s).”
■ New installation? Allow 24 hours following installation for the
refrigerator to cool completely.
NOTE: Adjusting the temperature controls to coldest setting
will not cool either compartment more quickly.
The motor seems to run too much
Your new refrigerator may run longer than your old one due to
its high-efciency compressor and fans. The unit may run even
longer if the room is warm, a large food load is added, doors are
opened often, or if the doors have been left open.
The refrigerator seems noisy
Refrigerator noise has been reduced over the years. Due to
this reduction, you may hear intermittent noises from your new
refrigerator that you did not notice from your old model. Below
are listed some normal sounds with explanations.
■ Buzzing - heard when the water valve opens to ll the ice
maker
■ Pulsating - fans/compressor adjusting to optimize
performance
■ Hissing/Rattling - ow of refrigerant, movement of water
lines, or from items placed on top of the refrigerator
■ Sizzling/Gurgling - water dripping on the heater during
defrost cycle
■ Popping - contraction/expansion of inside walls, especially
during initial cool-down
■ Water running - may be heard when ice melts during the
defrost cycle and water runs into the drain pan
■ Creaking/Cracking - occurs as ice is being ejected from the
ice maker mold.
Electrical Shock Hazard
Plug into a grounded 3 prong outlet.
Do not remove ground prong.
Do not use an adapter.
Do not use an extension cord.
Failure to follow these instructions can result in death,
fire, or electrical shock.
WARNING
15
The doors will not close completely
■ Door blocked open? Move food packages away from door.
■ Bin or shelf in the way? Push bin or shelf back in the correct
position.
The doors are difficult to open
■ Gaskets dirty or sticky? Clean gaskets and contact surfaces
with mild soap and warm water. Rinse and dry with soft cloth.
Temperature and Moisture
Temperature is too warm
■ New installation? Allow 24 hours following installation for the
refrigerator to cool completely.
■ Door(s) opened often or left open? Allows warm air to enter
refrigerator. Minimize door openings and keep doors fully
closed.
■ Large load of food added? Allow several hours for
refrigerator to return to normal temperature.
■ Controls set correctly for the surrounding conditions?
Adjust the controls a setting colder. Check temperature in
24 hours. See “Using the Control(s).”
Temperature is too cold in refrigerator
■ Refrigerator air vent blocked? If the air vent located in
the top, left, rear corner of the refrigerator compartment is
blocked by items placed directly in front of it, the refrigerator
will get too cold. Move items away from the air vent.
■ Ice storage bin in correct position? See “Ice Maker and Ice
Storage Bin.”
■ Controls set correctly for the surrounding conditions?
Adjust the controls a setting warmer. Check temperature in 24
hours. See “Using the Control(s).”
There is interior moisture buildup
NOTE: Some moisture buildup is normal.
■ Humid room? Contributes to moisture buildup.
■ Door(s) opened often or left open? Allows humid air to enter
refrigerator. Minimize door openings and keep doors fully
closed.
Ice and Water
The ice maker is not producing ice or not enough ice
■ Refrigerator connected to a water supply and the supply
shutoff valve turned on? Connect refrigerator to water
supply and turn water shutoff valve fully open.
■ Kink in the water source line? A kink in the line can reduce
water ow. Straighten the water source line.
■ Ice maker turned on? Make sure ice maker is ON. See “Ice
Maker and Ice Storage Bin.”
■ New installation? Wait 24 hours after ice maker installation
for ice production to begin. Wait 72 hours for full ice
production.
■ Refrigerator door closed completely? Close the door rmly.
If it does not close completely, see “The doors will not close
completely.”
■ Large amount of ice recently removed? Allow 24 hours for
ice maker to produce more ice.
■ Ice cube jammed in the ice maker ejector arm?
Remove ice from the ejector arm with a plastic utensil.
■ Water filter installed on the refrigerator? Remove lter and
operate ice maker. If ice volume improves, then the lter may
be clogged or incorrectly installed. Replace lter or reinstall it
correctly.
■ Reverse osmosis water filtration system connected to
your cold water supply? This can decrease water pressure.
See “Water Supply Requirements.”
The ice cubes are hollow or small
NOTE: This is an indication of low water pressure.
■ Water shutoff valve not fully open? Turn the water shutoff
valve fully open.
■ Kink in the water source line? A kink in the line can reduce
water ow. Straighten the water source line.
■ Water filter installed on the refrigerator? Remove lter and
operate ice maker. If ice quality improves, then the lter may
be clogged or incorrectly installed. Replace lter or reinstall it
correctly.
■ Reverse osmosis water filtration system connected to
your cold water supply? This can decrease water pressure.
See “Water Supply Requirements.”
■ Questions remain regarding water pressure? Call a
licensed, qualied plumber.
Off-taste, odor or gray color in the ice
■ New plumbing connections? New plumbing connections
can cause discolored or off-avored ice.
■ Ice stored too long? Discard ice. Wash ice bin. Allow 24
hours for ice maker to make new ice.
■ Odor transfer from food? Use airtight, moisture proof
packaging to store food.
■ Are there minerals (such as sulfur) in the water? A water
lter may need to be installed to remove the minerals.
■ Water filter installed on the refrigerator? Gray or dark
discoloration in ice indicates that the water ltration system
needs additional ushing. Flush the water system before using
a new water lter. Replace water lter when indicated. See
“Water Filtration System.”
WARNING
Explosion Hazard
Use nonammable cleaner.
Failure to do so can result in death, explosion, or re.

16
The water and ice dispenser will not operate properly
■ Refrigerator connected to a water supply and the supply
shutoff valve turned on? Connect refrigerator to water
supply and turn water shutoff valve fully open.
■ Kink in the water source line? Straighten the water source
line.
■ New installation? Flush and ll the water system. See “Water
Dispenser.”
■ Is the water pressure at least 35 psi (241 kPa)? The water
pressure to the home determines the ow from the dispenser.
See “Water Supply Requirements.”
■ Water filter installed on the refrigerator? Remove lter and
operate dispenser. If water ow increases, the lter may be
clogged or incorrectly installed. Replace lter or reinstall it
correctly.
■ Water dispenser measured fill feature is not dispensing an
accurate amount of water? Calibrate the water dispenser.
See “Water and Ice Dispensers.”
■ Refrigerator door closed completely? Close the door rmly.
If it does not close completely, see “The doors will not close
completely,” earlier in this section.
■ Recently removed the doors? Make sure the water
dispenser wire/tube assembly has been properly reconnected.
See “Refrigerator Door(s) and Drawer.”
■ Reverse osmosis water filtration system connected to
your cold water supply? This can decrease water pressure.
See “Water Supply Requirements.”
Water is leaking from the dispenser system
NOTE: One or two drops of water after dispensing is normal.
■ Glass not being held under the dispenser long enough?
Hold the glass under the dispenser 2 to 3 seconds after
releasing the dispenser lever.
■ New installation? Flush the water system. See “Water and
Ice Dispenser.”
■ Recently changed water filter? Flush the water system. See
“Water and Ice Dispenser.”
Water from the dispenser is warm
NOTE: Water from the dispenser is only chilled to 50°F (10°C).
■ New installation? Allow 24 hours after installation for the
water supply to cool completely.
■ Recently dispensed large amount of water? Allow 24 hours
for water supply to cool completely.
■ Water not been recently dispensed? The rst glass of water
may not be cool. Discard the rst glass of water.
■ Refrigerator connected to a cold water pipe? Make sure
the refrigerator is connected to a cold water pipe. See “Water
Supply Requirements.”
17
PERFORMANCE DATA SHEETS
Interior Water Filtration System
Model UKF8001AXX-750 Capacity 750 Gallons (2839 Liters)
This system has been tested according to NSF/ANSI Standards 42 and 53 for the reduction of the substances listed below. The
concentration of the indicated substances in water entering the system was reduced to a concentration less than or equal to the
permissible limit for water leaving the system, as specied in NSF/ANSI Standards 42 and 53
Substance Reduction
Aesthetic Effects
NSF
Reduction
Requirements
Average
Influent
Influent Challenge
Concentration
Maximum
Effluent
Average
Effluent
Minimum%
Reduction
Average%
Reduction
Chlorine Taste/Odor
Particulate Class I*
50% reduction
85% reduction
2.00 mg/L
14,000,000 #/mL
2.0 mg/L ± 10%
At least
10,000 particles/mL
0.06 mg/L
370,000 #/mL**
0.050625 mg/L
196,666 #/mL
97.00%
97.40%
97.52%
99.00%
Contaminant
Reduction
NSF Reduction
Requirements
Average
Influent
Influent Challenge
Concentration
Maximum
Effluent
Average
Effluent
Minimum%
Reduction
Average%
Reduction
Lead: @ pH 6.5
Lead: @ pH 8.5
0.010 mg/L
0.010 mg/L
0.150 mg/L
†
0.150 mg/L
†
0.15 mg/L ± 10%
0.15 mg/L ± 10%
< 0.001 mg/L
< 0.001 mg/L
< 0.001 mg/L
< 0.001 mg/L
>99.30%
>99.30%
>99.30%
>99.30%
Mercury: @ pH 6.5
Mercury: @ pH 8.5
0.002 mg/L
0.002 mg/L
0.006 mg/L
0.0059 mg/L
0.006 mg/L ± 10%
0.006 mg/L ± 10%
0.0005 mg/L
0.0018 mg/L
0.0003 mg/L
0.00073 mg/L
91.70%
69.20%
95.00%
88.10%
Benzene 0.005 mg/L 0.0133 mg/L 0.015 mg/L ± 10% 0.0005 mg/L 0.0005 mg/L 96.10% 96.30%
p-Dichlorobenzene 0.075 mg/L 0.210 mg/L 0.225 mg/L ± 10% < 0.0005 mg/L < 0.0005 mg/L >99.80% >99.80%
Carbofuran 0.040 mg/L 0.0753 mg/L 0.08 mg/L ± 10% 0.027 mg/L 0.008 mg/L 64.60% 73.45%
Toxaphene 0.003 mg/L 0.015 mg/L 0.015 ± 10% < 0.001 mg/L < 0.001 mg/L >93.3% >93.3%
Atrazine 0.003 mg/L 0.0102 mg/L 0.009 mg/L ± 10% 0.0027 mg/L 0.00105 mg/L 76.30% 89.40%
Asbestos >99% 126.5 MF/L 10
7
to 10
8
bers/L
††
< 0.17 MF/L < 0.17 MF/L >99.99% >99.99%
Live Cysts
‡
Turbidity
>99.95%
0.5 NTU
122,500 #/L
10.5 NTU
50,000/L min.
11 ± 1 NTU
< 1 #/L
‡
0.30 NTU
< 1 #/L
‡
0.125 NTU
>99.99%
97.30%
>99.99%
98.80%
Lindane 0.0002 mg/L 0.0019 mg/L 0.002 ± 10% < 0.00016 mg/L 0.000035 mg/L 91.80% 97.90%
Tetrachloroethylene 0.005 mg/L 0.015 mg/L 0.015 mg/L ± 10% < 0.0005 mg/L < 0.0005 mg/L >96.6% >96.6%
Test Parameters: pH = 7.5 ± 0.5 unless otherwise noted. Flow = 0.78 gpm (2.9 Lpm). Pressure = 60 psig (413.7 kPa). Temp. = 68°F ± 5°F (20°C ± 3°C).
■ It is essential that operational, maintenance, and lter replacement
requirements be carried out for the product to perform as advertised.
■ The disposable water lter should be replaced at least every 6
months.
■ The lter monitor system measures the amount of water that passes
through the lter and alerts you to replace the lter. When 90% of
the lter’s rated life is used, the yellow (Order) light comes on. When
100% of the lter’s rated life is used, the red (Replace) light comes on,
and it is recommended that you replace the lter. For models without
lter status lights, replace the lter every 6 months. Use replacement
lter model UKF8001AXX-750. 2010 suggested retail price of $44.99
U.S.A./$49.95 Canada. Prices are subject to change without notice.
■ The product is for cold water use only.
■ Do not use with water that is microbiologically unsafe or of unknown
quality without adequate disinfection before or after the system.
Systems certied for cyst reduction may be used on disinfected
waters that may contain lterable cysts.
■ Refer to the “Water Filtration System” section for the Manufacturer’s
name and telephone number.
■ Refer to the “Warranty” section for the Manufacturer’s limited
warranty.
Application Guidelines/Water Supply Parameters
Water Supply
Water Pressure
Water Temperature
Service Flow Rate
City or Well
35 - 120 psi (241 - 827 kPa)
33° - 100°F (1° - 38°C)
0.78 gpm (2.9 L/min.) @ 60 psi*
System tested and certified by NSF International against NSF/ANSI Standard 42 for the
reduction of Chlorine Taste and Odor, Particulate Class I*; and against NSF/ANSI
Standard
53 for the reduction of Lead, Mercury, Atrazine, Benzene, p-Dichlorobenzene,
Carbofuran, To xaphene, Cysts, Turbidity, Asbestos, Tetrachloroethylene and Lindane.
*Class I particle size: >0.5 to <1 um
**Test requirement is at least 100,000 particles/mL of AC Fine Test Dust
†
These contaminants are not necessarily in your water supply. Performance may vary based on local water conditions.
††
Fibers greater than 10 um in length
‡ Based on the use of Cryptosporidium parvum oocysts
®
NSF is a registered trademark of NSF International.
18
Interior Water Filtration System
Model UKF8001AXX-200 Capacity 200 Gallons (757 Liters)
This system has been tested according to NSF/ANSI Standards 42 and 53 for the reduction of the substances listed below. The
concentration of the indicated substances in water entering the system was reduced to a concentration less than or equal to the
permissible limit for water leaving the system, as specied in NSF/ANSI Standards 42 and 53.
Substance Reduction
Aesthetic Effects
NSF
Reduction
Requirements
Average
Influent
Influent Challenge
Concentration
Maximum
Effluent
Average
Effluent
Minimum%
Reduction
Average%
Reduction
Chlorine Taste/Odor
Particulate Class I*
50% reduction
85% reduction
2.00 mg/L
14,000,000 #/mL
2.0 mg/L ± 10%
At least
10,000 particles/mL
0.06 mg/L
370,000 #/mL**
0.050625 mg/L
196,666 #/mL
97.00%
97.40%
97.52%
99.00%
Contaminant
Reduction
NSF Reduction
Requirements
Average
Influent
Influent Challenge
Concentration
Maximum
Effluent
Average
Effluent
Minimum%
Reduction
Average%
Reduction
Lead: @ pH 6.5
Lead: @ pH 8.5
0.010 mg/L
0.010 mg/L
0.150 mg/L
†
0.150 mg/L
†
0.15 mg/L ± 10%
0.15 mg/L ± 10%
< 0.001 mg/L
< 0.001 mg/L
< 0.001 mg/L
< 0.001 mg/L
>99.30%
>99.30%
>99.30%
>99.30%
Mercury: @ pH 6.5
Mercury: @ pH 8.5
0.002 mg/L
0.002 mg/L
0.006 mg/L
0.0059 mg/L
0.006 mg/L ± 10%
0.006 mg/L ± 10%
0.0005 mg/L
0.0018 mg/L
0.0003 mg/L
0.00073 mg/L
91.70%
69.20%
95.00%
88.10%
Benzene 0.005 mg/L 0.0133 mg/L 0.015 mg/L ± 10% 0.0005 mg/L 0.0005 mg/L 96.10% 96.30%
p-Dichlorobenzene 0.075 mg/L 0.210 mg/L 0.225 mg/L ± 10% < 0.0005 mg/L < 0.0005 mg/L >99.80% >99.80%
Carbofuran 0.040 mg/L 0.0753 mg/L 0.08 mg/L ± 10% 0.027 mg/L 0.008 mg/L 64.60% 73.45%
Toxaphene 0.003 mg/L 0.015 mg/L 0.015 ± 10% < 0.001 mg/L < 0.001 mg/L >93.3% >93.3%
Atrazine 0.003 mg/L 0.0102 mg/L 0.009 mg/L ± 10% 0.0027 mg/L 0.00105 mg/L 76.30% 89.40%
Asbestos >99% 126.5 MF/L 10
7
to 10
8
bers/L
††
< 0.17 MF/L < 0.17 MF/L >99.99% >99.99%
Live Cysts
‡
Turbidity
>99.95%
0.5 NTU
122,500 #/L
10.5 NTU
50,000/L min.
11 ± 1 NTU
< 1 #/L
‡
0.30 NTU
< 1 #/L
‡
0.125 NTU
>99.99%
97.30%
>99.99%
98.80%
Lindane 0.0002 mg/L 0.0019 mg/L 0.002 ± 10% < 0.00016 mg/L 0.000035 mg/L 91.80% 97.90%
Tetrachloroethylene 0.005 mg/L 0.015 mg/L 0.015 mg/L ± 10% < 0.0005 mg/L < 0.0005 mg/L >96.6% >96.6%
O-Dichlorobenzene 0.6 mg/L 1.7 mg/L 1.8 mg/L ± 10% < 0.5 mg/L < 0.5 mg/L >99.9% >99.9%
Ethylbenzene 0.7 mg/L 2.2 mg/L 2.1 mg/L ± 10% 0.0048 mg/L 0.11 mg/L 99.80% 99.90%
Chlorobenzene 0.1 mg/L 2.0 mg/L 2.0 mg/L ± 10% 0.0038 mg/L 0.0008 mg/L 99.80% 99.90%
Endrin 0.002 mg/L 0.007 mg/L 0.006 mg/L ± 10% 0.0004 mg/L 0.0002 mg/L 94.30% 96.80%
Test Parameters: pH = 7.5 ± 0.5 unless otherwise noted. Flow = 0.55 gpm (2.08 Lpm). Pressure = 60 psig (413.7 kPa). Temp. = 68°F ± 5°F (20°C ± 3°C).
■ It is essential that operational, maintenance, and lter replacement
requirements be carried out for the product to perform as advertised.
■ The disposable water lter should be replaced at least every 6
months.
■ The lter monitor system measures the amount of water that passes
through the lter and alerts you to replace the lter. When 90% of
the lter’s rated life is used, the yellow (Order) light comes on. When
100% of the lter’s rated life is used, the red (Replace) light comes on,
and it is recommended that you replace the lter. For models without
lter status lights, replace the lter every 6 months. Use replacement
lter model UKF8001AXX-200. 2010 suggested retail price of
$44.99 U.S.A./$49.95 Canada. Prices are subject to change without
notice.
■ The product is for cold water use only.
■ Do not use with water that is microbiologically unsafe or of unknown
quality without adequate disinfection before or after the system.
Systems certied for cyst reduction may be used on disinfected
waters that may contain lterable cysts.
■ Refer to the “Water Filtration System” section for the Manufacturer’s
name and telephone number.
■ Refer to the “Warranty” section for the Manufacturer’s limited
warranty.
Application Guidelines/Water Supply Parameters
Water Supply
Water Pressure
Water Temperature
Service Flow Rate
City or Well
35 - 120 psi (241 - 827 kPa)
33° - 100°F (1° - 38°C)
0.55 gpm (2.08 L/min.) @ 60 psi*
System tested and certified by NSF International against NSF/ANSI Standard42 for the reduction of
Chlorine Ta ste and Odor, Particulate Class I*; and against NSF/ANSI Standard53 for the reduction of
Lead, Mercury, Atrazine, Benzene, p-Dichlorobenzene, Carbofuran, To xaphene, Cysts, Turbidity,
Asbestos, O-Dichlorobenzene, Ethylbenzene, Chlorobenzene, Endrin, Te trachloroethylene and Lindane.
*Class I particle size: >0.5 to <1 um
**Test requirement is at least 100,000 particles/mL of AC Fine Test Dust
†
These contaminants are not necessarily in your water supply. Performance may vary based on local water conditions.
††
Fibers greater than 10 um in length
‡ Based on the use of Cryptosporidium parvum oocysts
®
NSF is a registered trademark of NSF International.

19
1
02/17
IF YOU NEED SERVICE:
1. Before contacting us to arrange service, please determine whether your product requires repair. Some questions can be addressed without
service. Please take a few minutes to review the Troubleshooting section of the Use and Care Guide or visit producthelp.whirlpool.com.
2. All warranty service is provided exclusively by our authorized Whirlpool Service Providers. In the U.S. and Canada, direct all requests for
warranty service to:
Whirlpool Customer eXperience Center
In the U.S.A., call 1-800-253-1301. In Canada, call 1-800-807-6777.
If outside the 50 United States or Canada, contact your authorized Whirlpool dealer to determine whether another warranty applies.
WHIRLPOOL
®
REFRIGERATION LIMITED
WARRANTY
ATTACH YOUR RECEIPT HERE. PROOF OF PURCHASE IS
REQUIRED TO OBTAIN WARRANTY SERVICE.
Please have the following information available when you call the
Customer eXperience Center:
■ Name, address, and telephone number
■ Model number and serial number
■ A clear, detailed description of the problem
■ Proof of purchase, including dealer or retailer name and address
FIVE YEAR LIMITED WARRANTY
WHAT IS COVERED WHAT IS NOT COVERED
ONE YEAR LIMITED WARRANTY
For one year from the date of purchase, when this major
appliance is installed, operated, and maintained according
to instructions attached to or furnished with the product,
Whirlpool Corporation or Whirlpool Canada LP (hereafter
“Whirlpool”) will pay for factory specified replacement parts
and repair labor to correct defects in materials or workmanship
that existed when this major appliance was purchased or,
at its sole discretion, replace the product. In the event of
product replacement, your appliance will be warranted for the
remaining term of the original unit’s warranty period.
SECOND THROUGH FIFTH YEAR LIMITED WARRANTY ON
CAVITY LINER AND SEALED REFRIGERATION SYSTEM
In the second through fifth years from the date of purchase,
when this major appliance is installed, operated, and
maintained according to the instructions attached to or
furnished with the product, Whirlpool brand will pay for factory
specified replacement parts and repair labor for the following
components to correct non-cosmetic defects in materials
and workmanship in this part that prevent function of the
refrigerator and that existed when this major appliance was
purchased:
■ Refrigerator/freezer cavity liner if the part cracks due
to defective materials or workmanship
■ Sealed Refrigeration system (includes compressor,
evaporator, condenser, dryer, and connecting tubing)
YOUR SOLE AND EXCLUSIVE REMEDY UNDER THIS
LIMITED WARRANTY SHALL BE PRODUCT REPAIR AS
PROVIDED HEREIN. Service must be provided by a Whirlpool
designated service company. This limited warranty is valid
only in the United States or Canada and applies only when
the major appliance is used in the country in which it was
purchased. This limited warranty is effective from the date of
original consumer purchase. Proof of original purchase date is
required to obtain service under this limited warranty.
1. Commercial, non-residential, or multiple-family use, or use inconsistent with
published user, operator, or installation instructions.
2. In-home instruction on how to use your product.
3. Service to correct improper product maintenance or installation, installation
not in accordance with electrical or plumbing codes, or correction of
household electrical or plumbing (e.g., house wiring, fuses, or water
inlet hoses).
4. Consumable parts (e.g., light bulbs, batteries, air or water filters, preservation
solutions, etc.).
5. Defects or damage caused by the use of non-genuine Whirlpool parts
or accessories.
6. Damage from accident, misuse, abuse, fire, floods, acts of God, or use with
products not approved by Whirlpool.
7. Repairs to parts or systems to correct product damage or defects caused
by unauthorized service, alteration, or modification of the appliance.
8. Cosmetic damage, including scratches, dents, chips, and other damage to
the appliance finishes, unless such damage results from defects in materials
and workmanship and is reported to Whirlpool within 30 days.
9. Discoloration, rust, or oxidation of surfaces resulting from caustic or
corrosive environments including, but not limited to, high salt concentrations,
high moisture or humidity, or exposure to chemicals.
10. Food or medicine loss due to product failure.
11. Pickup or delivery. This product is intended for in-home repair.
12. Travel or transportation expenses for service in remote locations where
an authorized Whirlpool servicer is not available.
13. Removal or reinstallation of inaccessible appliances or built-in fixtures
(e.g., trim, decorative panels, flooring, cabinetry, islands, countertops,
drywall, etc.) that interfere with servicing, removal, or replacement of
the product.
14. Service or parts for appliances with original model/serial numbers removed,
altered, or not easily determined.
The cost of repair or replacement under these excluded circumstances
shall be borne by the customer.
DISCLAIMER OF IMPLIED WARRANTIES
IMPLIED WARRANTIES, INCLUDING ANY IMPLIED WARRANTY OF MERCHANTABILITY OR IMPLIED WARRANTY OF FITNESS FOR A
PARTICULAR PURPOSE, ARE LIMITED TO FIVE YEARS OR THE SHORTEST PERIOD ALLOWED BY LAW. Some states and provinces do
not allow limitations on the duration of implied warranties of merchantability or fitness, so this limitation may not apply to you. This warranty
gives you specific legal rights, and you also may have other rights that vary from state to state or province to province.
DISCLAIMER OF REPRESENTATIONS OUTSIDE OF WARRANTY
Whirlpool makes no representations about the quality, durability, or need for service or repair of this major appliance other than the
representations contained in this warranty. If you want a longer or more comprehensive warranty than the limited warranty that comes with this
major appliance, you should ask Whirlpool or your retailer about buying an extended warranty.
LIMITATION OF REMEDIES: EXCLUSION OF INCIDENTAL AND CONSEQUENTIAL DAMAGES
YOUR SOLE AND EXCLUSIVE REMEDY UNDER THIS LIMITED WARRANTY SHALL BE PRODUCT REPAIR AS PROVIDED HEREIN.
WHIRLPOOL SHALL NOT BE LIABLE FOR INCIDENTAL OR CONSEQUENTIAL DAMAGES. Some states and provinces do not allow the
exclusion or limitation of incidental or consequential damages, so these limitations and exclusions may not apply to you. This warranty gives
you specific legal rights, and you also may have other rights that vary from state to state or province to province.

20
For additional product information, in the U.S.A., visit www.whirlpool.com
In Canada, visit www.whirlpool.ca
If you do not have access to the Internet and you need assistance using your product or you would like to schedule service, you may
contact Whirlpool at the number below.
Have your complete model number ready. You can find your model number and serial number on the label, located on the inside wall of
the refrigerator compartment.
For assistance or service in the U.S.A., call 1-800-253-1301. In Canada, call 1-800-807-6777.
If you need further assistance, you can write to Whirlpool with any questions or concerns at the address below:
In the U.S.A.: In Canada:
Whirlpool Brand Home Appliances
Customer eXperience Center
553 Benson Road
Benton Harbor, MI 49022-2692
Whirlpool Brand Home Appliances
Customer eXperience Centre
200 – 6750 Century Ave.
Mississauga, Ontario L5N 0B7
Please include a daytime phone number in your correspondence.
Please keep these User Instructions and the model number information for future reference.

21
Nous vous REMERCIONS d’avoir acheté ce produit de grande qualité. Si vous rencontrez un problème non couvert dans la section
DÉPANNAGE, veuillez visiter notre site Web au www.whirlpool.com pour de plus amples renseignements. Si vous avez toujours
besoind’assistance, appelez-nous au 1800253-1301.
Au Canada, visiter notre site Web au www.whirlpool.caou composer le 1800807-6777.
Vous aurez besoin des numéros de modèle et de série situés sur la paroi interne du compartiment de réfrigération.
Para obtener acceso a “Instrucciones para el usuario del refrigerador” en español, o para obtener información adicional acerca de su
producto, visite: www.whirlpool.com.
Necesitará su número de modelo y de serie, ubicado en el interior del compartimiento del refrigerador.
INSTRUCTIONS D’UTILISATION
DU RÉFRIGÉRATEUR
SÉCURITÉ DU RÉFRIGÉRATEUR
Risque possible de décès ou de blessure grave si vous ne
suivez pas immédiatement les instructions.
Risque possible de décès ou de blessure grave si vous
ne suivez pas les instructions.
Tous les messages de sécurité vous diront quel est le danger potentiel et vous disent comment réduire le risque de blessure et
ce qui peut se produire en cas de non-respect des instructions.
Votre sécurité et celle des autres est très importante.
Nous donnons de nombreux messages de sécurité importants dans ce manuel et sur votre appareil ménager. Assurez-vous de
toujours lire tous les messages de sécurité et de vous y conformer.
AVERTISSEMENT
DANGER
Voici le symbole d’alerte de sécurité.
Ce symbole d’alerte de sécurité vous signale les dangers potentiels de décès et de blessures graves à vous
et à d’autres.
Tous les messages de sécurité suivront le symbole d’alerte de sécurité et le mot “DANGER” ou
“AVERTISSEMENT”. Ces mots signifient :

22
AVERTISSEMENT :
Pour réduire le risque d’incendie, de choc électrique ou de blessure dans le cadre de l’utilisation du
réfrigérateur, suivre les consignes de base suivantes :
IMPORTANTES INSTRUCTIONS DE SÉCURITÉ
CONSERVEZ CES INSTRUCTIONS
■
Brancher sur une prise de terre (reliée à la masse).
■
Ne pas retirer la broche de terre.
■
Ne pas utiliser d’adaptateur.
■
Ne pas utiliser de rallonge.
■ Débrancher la source de courant électrique avant l'entretien.
■ Replacer pièces et panneaux avant de faire la remise en marche.
■ Enlever les portes de votre vieux réfrigérateur.
■ Utiliser un produit de nettoyage ininflammable.
■
Ne pas utiliser ou conserver d’essence ni de liquides ou gaz
inflammables à proximité de cet ou d’autres appareils électriques. Les
fumées peuvent causer des incendies ou des explosions.
■
Ne pas conserver de substances explosives, par exemple des bombes
aérosols contenant un agent propulseur, dans ce réfrigérateur.
■
Ne pas utiliser ni placer dans les compartiments du réfrigérateur des
dispositifs électriques d’un type autre que celui expressément autorisé
par le fabricant.
■ Utiliser deux ou plus de personnes pour déplacer et installer le
réfrigérateur.
■ Débrancher le réfrigérateur avant l'installation de la machine à
glaçons (seulement pour modèles prêts à recevoir une machine
à glaçons).
■
Un technicien qualifié doit installer le tuyau d’eau et le
distributeur de glaçons.
Consulter les instructions
d’installation fournies avec la trousse de machine à
glaçons IC13B pour tous les détails.
■
Raccorder uniquement à une arrivée d’eau potable.
■ Utiliser un verre robuste pour prendre des glaçons (sur
certains modèles).
■ Cet appareil ne convient pas à une utilisation par des
personnes (y compris des enfants) à capacités physiques,
sensorielles ou mentales réduites, ou possédant un
manque d'expérience et de connaissances, à moins
qu'elles ne soient placées sous supervision ou qu'elles
aient reçu des instructions concernant l’utilisation de
l'appareil par une personne responsable de leur sécurité.
■ Les enfants doivent être placés sous surveillance afin de
s'assurer qu'ils ne jouent pas avec l'appareil.
■
Pour éviter le risque que des enfants restent enfermés à
l’intérieur et s’asphyxient, ne pas les laisser jouer ou se cacher
dans le réfrigérateur.
■
Si le cordon d’alimentation est endommagé, il doit être remplacé
par le fabricant ou son technicien d’entretien ou une personne
Avertissements de la proposition 65 de l'État de Californie :
AVERTISSEMENT : Ce produit contient au moins un produit chimique connu par l’État de Californie pour être à
l’origine de cancers.
AVERTISSEMENT : Ce produit contient au moins un produit chimique connu par l’État de Californie pour être à
l’origine de malformations et autres déficiences de naissance.
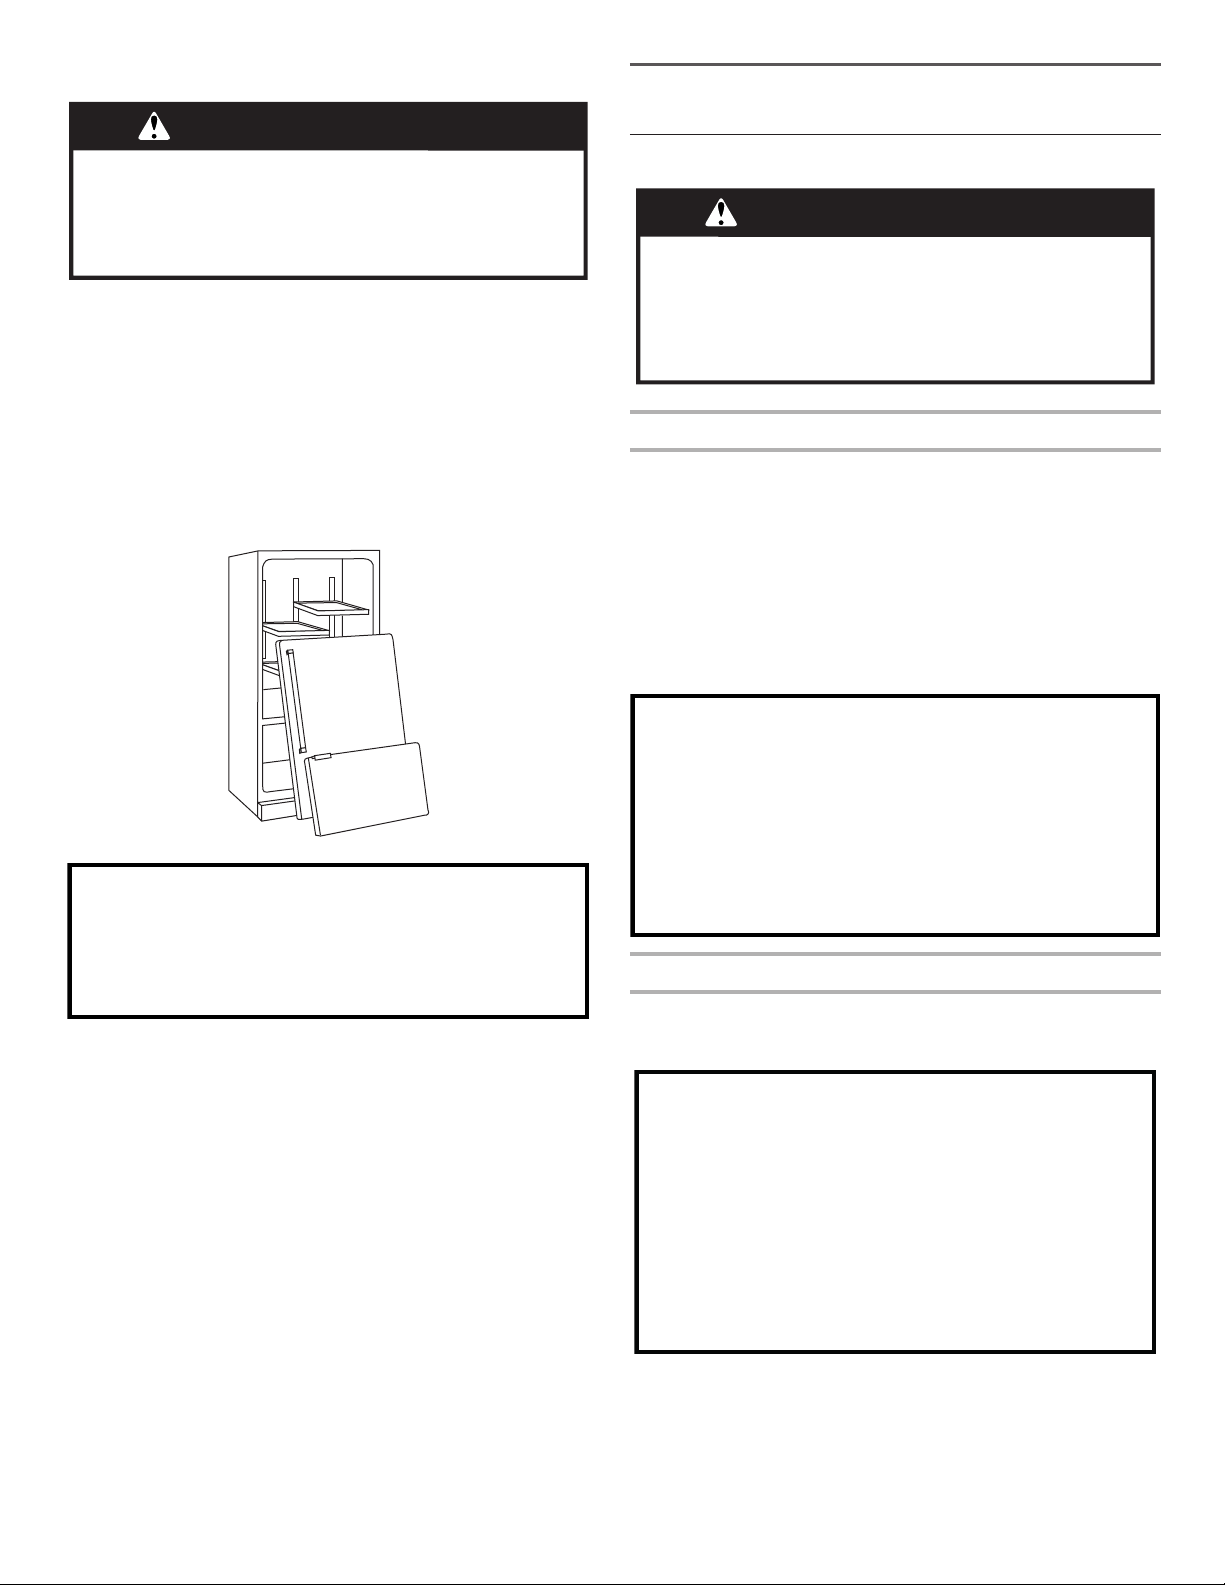
23
Mise au rebut du vieux réfrigérateur
IMPORTANT: Le risque qu’un enfant puisse se retrouver coincé
et suffoquer n’est pas chose du passé. Les réfrigérateurs jetés ou
abandonnés restent dangereux, même s’ils ne restent à l’extérieur
que pour “quelques jours seulement”. Si l’ancien réfrigérateur doit
être mis au rebut, suivre les instructions suivantes an d’éviter les
accidents.
Avant de jeter l’ancien réfrigérateur ou congélateur:
■ Enlever les portes.
■ Laisser les tablettes en place de sorte que les enfants ne
puissent pas y pénétrer facilement.
INSTRUCTIONS D’INSTALLATION
Déballage du réfrigérateur
Retrait des matériaux d’emballage
■ Enlever tout résidu de ruban adhésif et de colle des surfaces
du réfrigérateur avant de le mettre en marche. Frotter une
petite quantité de savon liquide à vaisselle sur l’adhésif avec
les doigts. Rincer à l’eau tiède et sécher.
■ Ne pas utiliser d’instruments coupants, d’alcool à friction,
de liquides inammables ou de nettoyants abrasifs pour
enlever le ruban adhésif ou la colle. Ces produits peuvent
endommager la surface du réfrigérateur. Pour plus de
renseignements, voir la section “Sécurité du réfrigérateur”.
■ Éliminer/recycler tous les matériaux d’emballage.
Nettoyage avant utilisation
Après avoir enlevé tous les matériaux d’emballage, nettoyer
l’intérieur du réfrigérateur avant de l’utiliser. Voir les instructions
de nettoyage dans “Entretien du réfrigérateur”.
AVERTISSEMENT
Risque de suffoquer
Enlever les portes de votre vieux réfrigérateur.
Le non-respect de cette instruction peut causer
un décès ou des lésions cérébrales.
Renseignements importants à propos de la mise au
rebut des fluides réfrigérants :
Mettre le réfrigérateur au rebut conformément à la
réglementation fédérale et locale. Les fluides réfrigérants
doivent être évacués par un technicien certifié et agréé par
l’EPA conformément aux procédures établies.
AVERTISSEMENT
Risque du poids excessif
Utiliser deux ou plus de personnes pour déplacer et
installer le réfrigérateur.
Le non-respect de cette instruction peut causer
une blessure au dos ou d'autre blessure.
Déplacement de votre réfrigérateur :
Votre réfrigérateur est lourd. Lors du déplacement de votre
réfrigérateur pour le nettoyage ou un entretien ou réparation,
veiller à recouvrir le plancher avec du carton ou un panneau
de fibres dures pour éviter qu'il ne subisse tout dommage.
Toujours tirer le réfrigérateur tout droit lors de son
déplacement. Ne pas incliner le réfrigérateur d’un côté ou de
l’autre ni le “faire marcher” en essayant de le déplacer car le
plancher pourrait être endommagé.
Importants renseignements à savoir au sujet des tablettes
et des couvercles en verre :
Ne pas nettoyer les tablettes ou couvercles en verre avec de
l’eau tiède quand ils sont froids. Les tablettes et les
couvercles peuvent se briser s'ils sont exposés à des
changements soudains de température ou à un impact tel
que coup brusque. Le verre trempé est conçu pour éclater
en d’innombrables pièces minuscules. Ceci est normal. Les
tablettes et les couvercles en verre sont lourds. Les saisir à
deux mains lors de leur dépose afin d'éviter de les faire
tomber.
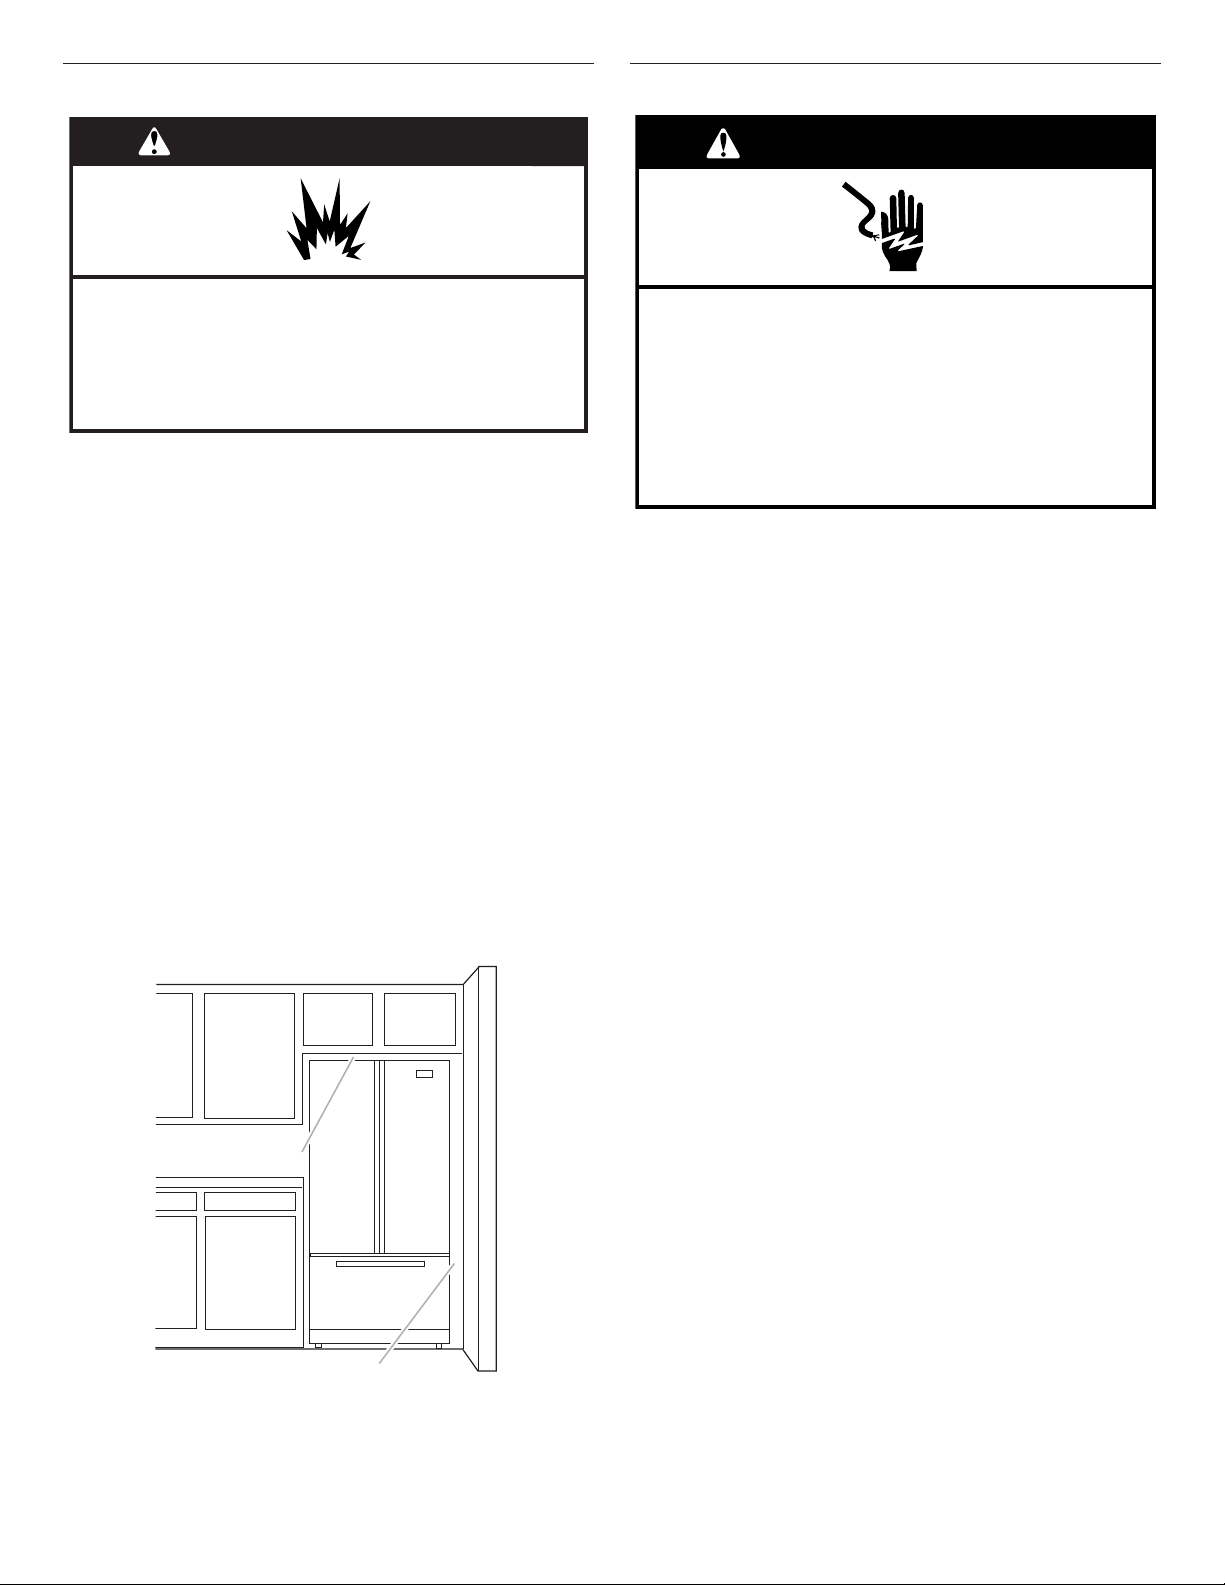
24
Exigences d’emplacement
IMPORTANT: Cet appareil est conçu pour un usage domestique,
à l’intérieur uniquement.
Cet appareil est destiné à un usage domestique et à d’autres
usages similaires comme:
■ espace de cuisine pour personnel de boutiques, bureaux et
autres environnements professionnels;
■ résidences fermières et utilisation par les clients d’hôtels,
demotels et d’autres types de résidences;
■ environnements de type chambres d’hôtes.
■ banquets et autres utilisations non commerciales semblables.
Pour obtenir une aération appropriée pour le réfrigérateur, laisser
un espace de 1/2 po (1,25cm) de chaque côté et au sommet.
Laisser un espace de 1po (2,54cm) derrière le réfrigérateur.
Si le réfrigérateur comporte une machine à glaçons, s’assurer
qu’un espace additionnel est prévu à l’arrière pour permettre
les raccordements des conduits d’eau. En cas d’installation du
réfrigérateur près d’un mur xe, laisser un minimum de 3
3
⁄
4
po
(9,5cm) entre le réfrigérateur et le mur pour permettre à la porte
de s’ouvrir sans obstruction.
REMARQUE: Il est conseillé de ne pas installer le réfrigérateur
près d’un four, d’un radiateur ou de toute autre source de chaleur.
Ne pas installer l’appareil en un endroit où la température pourrait
descendre en dessous de 55°F (13°C).
Spécifications électriques
Avant de placer le réfrigérateur à son emplacement nal, ilest
important de s’assurer d’avoir le raccordement électrique
approprié.
Si le cordon d’alimentation est endommagé, il doit être remplacé
par le fabricant, son agent de service ou toute autre personne
également qualiée. Ne pas utiliser un cordon craquelé ou qui
présente des dommages d’abrasion sur la gaine, la che ou le
connecteur.
Méthode recommandée de liaison à la terre
Chaque appareil doit être alimenté par un circuit à 115V CA à
60Hz relié à la terre et protégé par un fusible de 15A ou 20A.
Onrecommande que le réfrigérateur et les accessoires approuvés
soient alimentés par un circuit indépendant. Utiliser une prise de
courant dont l’alimentation ne peut pas être interrompue par un
interrupteur. Ne pas utiliser de rallonge.
REMARQUE: Avant de procéder à tout type d’installation, de
nettoyage ou de changement d’ampoule, tourner la commande
de refroidissement sur la position OFF (arrêt) comme illustré puis
déconnecter le réfrigérateur de la source d’alimentation. Unefois
l’opération terminée, reconnecter le réfrigérateur à la source
d’alimentation et remettre la commande de refroidissement
surON (marche). Voir la section “Utilisation des commandes”.
Risque d'explosion
Garder les matériaux et les vapeurs inflammables, telle
que l'essence, loin du réfrigérateur.
Le non-respect de cette instruction peut causer
un décès, une explosion ou un incendie.
AVERTISSEMENT
3³⁄₄" (9,5 cm)
1/2" (1,25 cm)
AVERTISSEMENT
Risque de choc électrique
Brancher sur une prise à 3 alvéoles reliée à la terre.
Ne pas enlever la broche de liaison à la terre.
Ne pas utiliser un adaptateur.
Ne pas utiliser un câble de rallonge.
Le non-respect de ces instructions peut causer
un décès, un incendie ou un choc électrique.
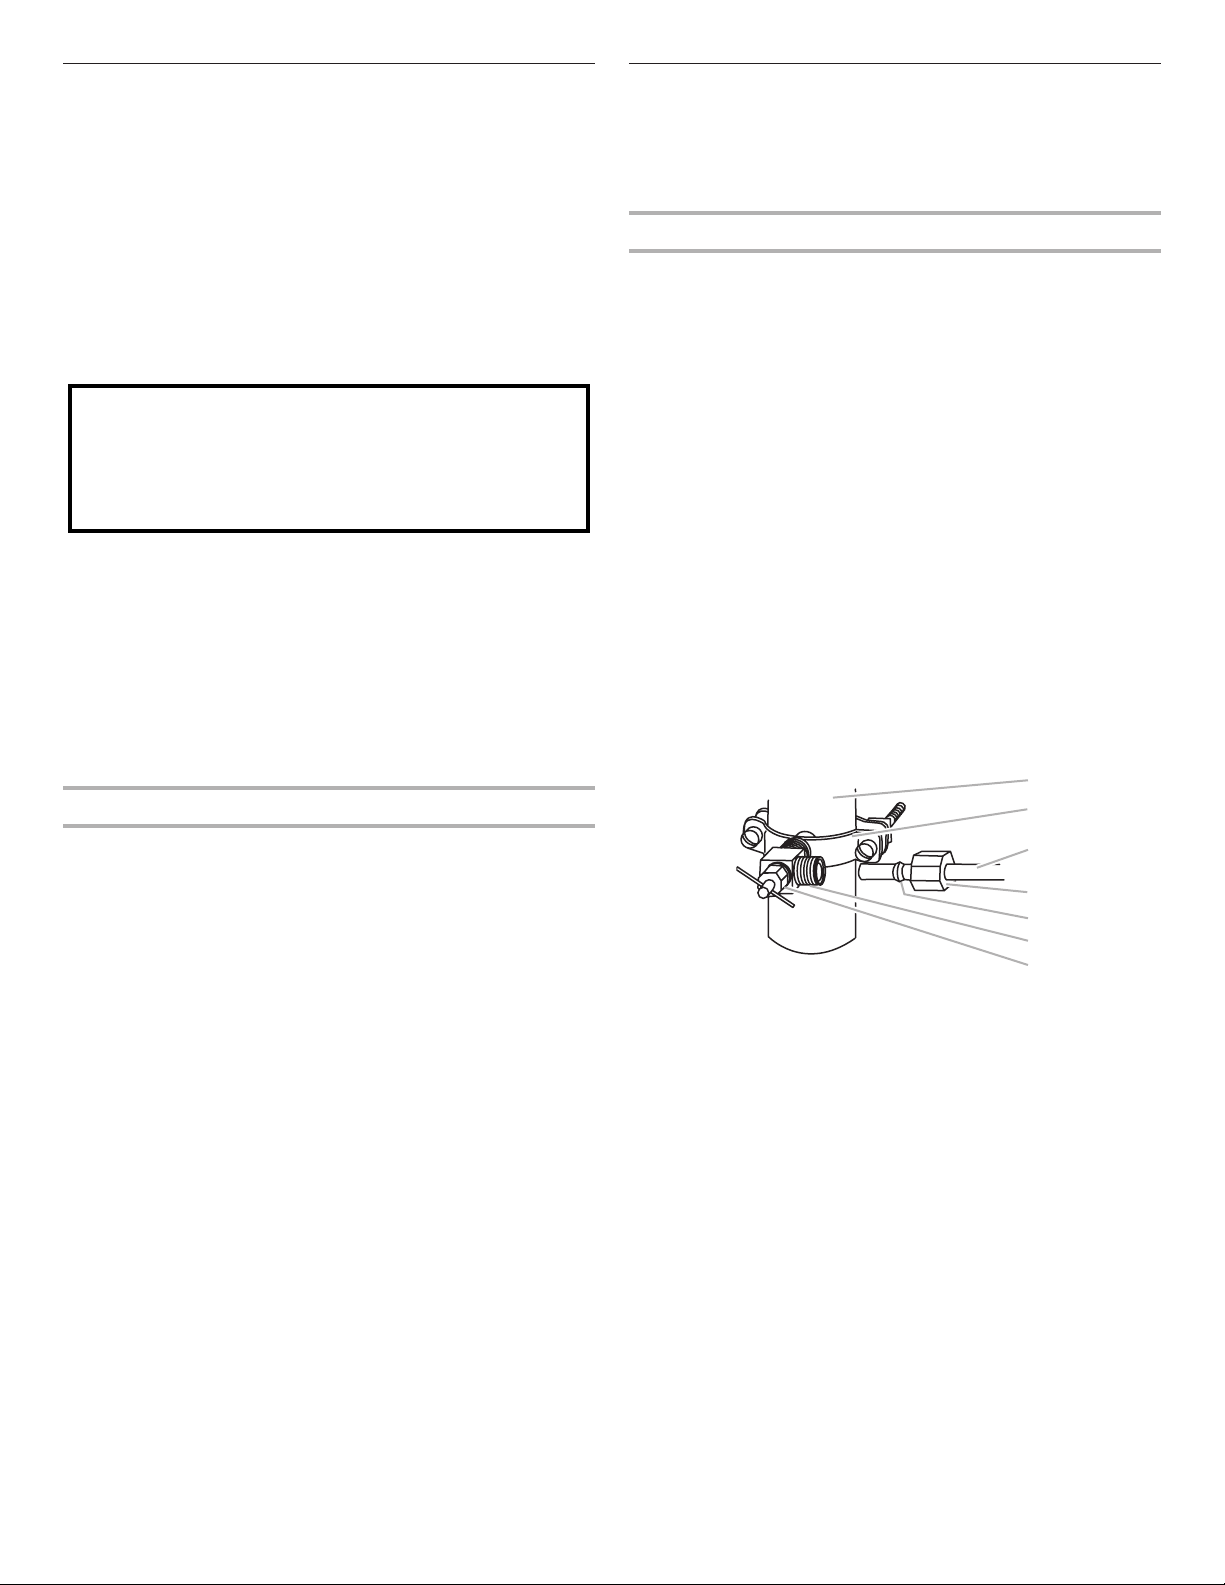
25
Spécifications de l’alimentation en eau
Rassembler les outils et pièces nécessaires avant d’entreprendre
l’installation. Lire et observer les instructions fournies avec
chacun des outils de la liste ci-dessous.
OUTILS REQUIS:
■ Tournevis à lame plate ■ Tourne-écrou de 1/4 po
■ Clés plates de 7/16 po et
1/2po ou deux clés à molette
■ Foret de 1/4 po
■ Perceuse sans l
IMPORTANT:
■ Brancher sur une arrivée d’eau potable uniquement.
■ Toutes les installations doivent être conformes aux exigences
des codes locaux de plomberie.
■ Ne pas employer de robinet d’arrêt à étrier de 3/16 po
(4,76mm) ou de type à percer – ils réduisent le débit d’eau
ets’obstruent plus facilement.
■ Utiliser un tuyau en cuivre et vérier qu’il n’y a pas de
fuite. Installer seulement des tuyaux en cuivre là où les
températures resteront au-dessus du point de congélation.
■ Pour les modèles avec ltre à eau, le ltre à eau jetable doit
être remplacé au moins tous les 6 mois.
Pression d’eau
Une alimentation en eau froide avec une pression entre 35 et
120lb/po² (241 à 827kPa) est nécessaire pour faire fonctionner
le distributeur d’eau et la machine à glaçons. Pour toute question
au sujet de la pression de l’eau, faire appel à un plombier qualié
agréé.
Alimentation en eau par osmose inverse
IMPORTANT: La pression de l’alimentation en eau entre le
système d’osmose inverse et le robinet d’arrivée d’eau du
réfrigérateur doit être entre 35 et 120lb/po² (241 et 827kPa).
Si un système de ltration de l’eau par osmose inverse est
raccordé à l’alimentation en eau froide, la pression de l’eau
au système doit être d’un minimum de 40 à 60lb/po² (276 à
414kPa).
Si la pression d’eau au système de ltration par osmose inverse
est inférieure à 40 - 60lb/po² (276 - 414kPa):
■ Vérier que le ltre à sédiment dans le système à osmose
inverse n’est pas obstrué. Remplacer le ltre si nécessaire.
■ Laisser le réservoir du système d’osmose inverse se remplir
après une utilisation intense.
■ Si le réfrigérateur comporte un ltre à eau, celui-ci peut
réduire la pression de l’eau lorsqu’il est utilisé avec un
système d’osmose inverse. Enlever le ltre à eau. Voir la
section “Système de ltration de l’eau”.
Pour toute question au sujet de la pression de l’eau, faire appel
àun plombier qualié agréé
Raccordement à la canalisation d’eau
Lire toutes les instructions avant de commencer.
IMPORTANT: Si on doit mettre en marche le réfrigérateur avant
que la canalisation d’eau ne soit connectée, placer la machine à
glaçons à OFF (arrêt).
Raccordement à la canalisation d’eau
1. Débrancher le réfrigérateur ou déconnecter la source de
courant électrique.
2. FERMER le robinet principal d’alimentation en eau.
OUVRIRlerobinet le plus proche pendant une période
sufsante pour purger toute l’eau de la canalisation.
3. Identier une canalisation d’eau froide verticale de 1/2 po à
1¹⁄
4
po (12,7mm à 31,8mm) à proximité du réfrigérateur.
IMPORTANT:
■ Vérier qu’il s’agit d’une canalisation d’eau froide.
■ Un conduit horizontal fonctionnera, mais on doit observer
le procédé suivant: Percer par le dessus de la canalisation
et non pas par le dessous. Ainsi, l’eau ne risquera pas
d’arroser la perceuse. Ceci empêche également les
sédiments qu’on trouve normalement dans l’eau de
s’accumuler dans le robinet d’arrêt.
4. Déterminer la longueur de tube de cuivre à utiliser.
Mesurerdepuis le point de connexion (arrière du réfrigérateur)
et la canalisation d’eau. Ajouter 7pi (2,1m) pour permettre les
opérations de nettoyage. Utiliser un tube en cuivre de 1/4 po
(6,35mm) de diamètre extérieur. Veiller à ce que le tube soit
coupé d’équerre aux deux extrémités.
5. À l’aide d’une perceuse sans l, percer un trou de 1/4 po dans
la canalisation d’eau froide sélectionnée.
6. Fixer le robinet d’arrêt sur la canalisation d’eau froide avec
la bride de tuyau. Vérier que le raccord du robinet est bien
engagé dans le trou de 1/4 po percé dans la canalisation
d’eau et que la rondelle d’étanchéité se trouve sous la bride
du tuyau. Serrer l’écrou de serrage. Serrer lentement et
uniformément les vis xant la bride de tuyau sur le tuyau an
d’assurer l’étanchéité du joint. Ne pas serrer excessivement.
7. Enler la bague et l’écrou de compression sur le tube
en cuivre comme illustré. Insérer l’extrémité du tube
directement dans l’extrémité de sortie, aussi loin que
possible. Visserl’écrou de compression sur l’extrémité de
sortie du raccord à l’aide d’une clé à molette. Ne pas serrer
excessivement, car ceci pourrait provoquer l’écrasement du
tube en cuivre.
8. Placer le bout libre du tube dans un contenant ou évier et
ouvrir le robinet principal d’alimentation en eau. Laisser l’eau
s’écouler par le tube jusqu’à ce qu’elle soit limpide. Fermer le
robinet d’arrêt de la canalisation d’eau.
Ne pas utiliser pour le filtrage d'une eau
microbiologiquement polluée ou de qualité inconnue en
l'absence d'un dispositif de désinfection adéquat avant ou
après le système. Les systèmes certifiés pour la réduction
de kyste peuvent être utilisés pour l'eau désinfectée qui
peut contenir des kystes filtrables.
F
G
A
B
C
D
E
A. Canalisation d’eau froide
B. Bride de tuyau
C. Tube en cuivre
D. Écrou de compression
E. Bague de compression
F. Robinet d’arrêt
G. Écrou de serrage
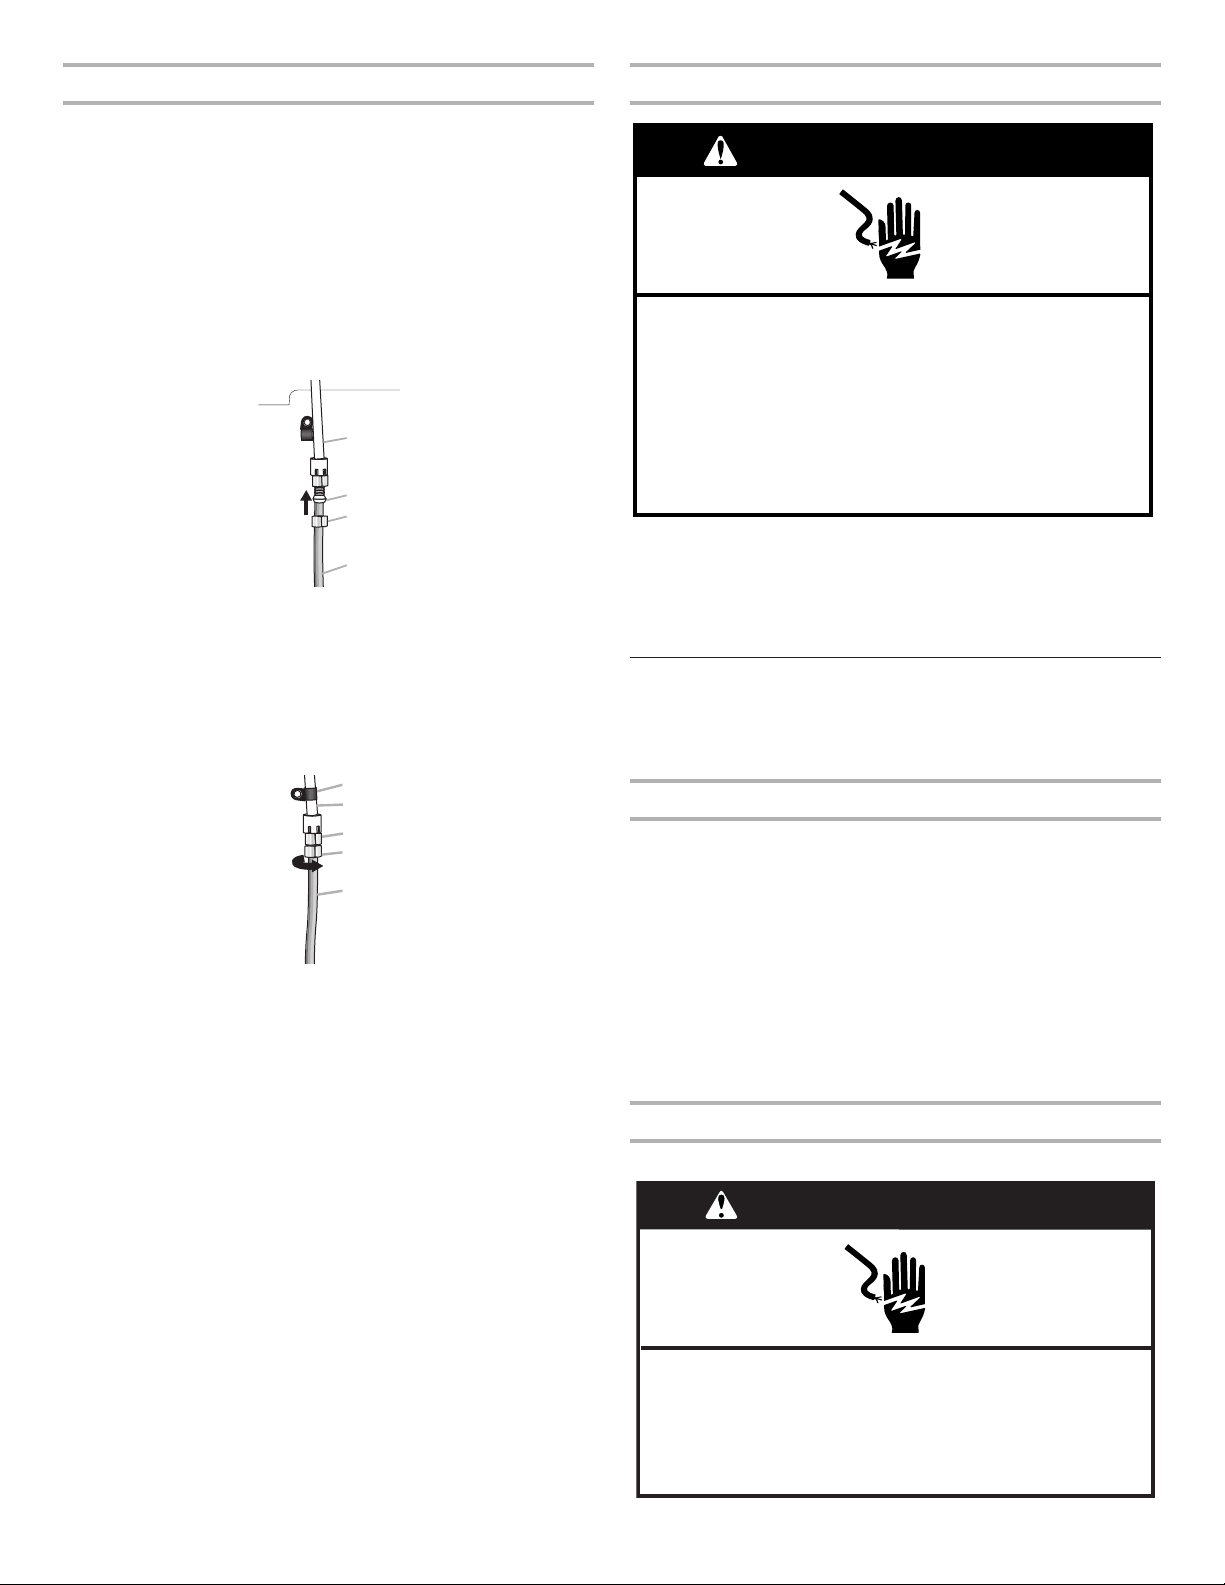
26
Raccordement au réfrigérateur
1. Créer une boucle de service (diamètre minimum de 2pi
[61cm]) avec le tube en cuivre. Éviter de déformer le tube de
cuivre en l’enroulant.
2. Ôter le capuchon de plastique de l’orice d’entrée d’eau.
Placer un écrou et un manchon à compression sur le tube
decuivre.
3. Insérer l’extrémité du tube de cuivre dans l’orice d’entrée
d’eau. Mettre doucement en forme le tube de façon à ce
qu’il pénètre directement dans l’orice an d’éviter les
déformations.
4. Faire glisser l’écrou de compression sur le manchon et le
visser sur l’orice d’entrée d’eau.
5. À l’aide d’une clé à molette, immobiliser l’écrou sur la
canalisation d’eau en plastique pour l’empêcher de se
déplacer. Puis, à l’aide d’une deuxième clé, tourner l’écrou
decompression sur le tube en cuivre dans le sens antihoraire
pour serrer complètement. Ne pas serrer excessivement.
6. Vérier le raccordement en tirant sur le tube en cuivre. Fixer la
canalisation d’eau en plastique à la caisse du réfrigérateur à
l’aide d’une bride en “P”.
7. Ouvrir l’arrivée d’eau alimentant le réfrigérateur et vérier
l’absence de fuites. Éliminer toute fuite détectée.
Achever l’installation
1. Brancher l’appareil sur une prise à 3 alvéoles reliée à la terre.
REMARQUE: Prévoir un délai de 24 heures pour la production
du premier lot de glaçons. Jeter les trois premiers lots de glaçons
produits. Prévoir un délai de 3 jours pour le remplissage complet
du récipient à glaçons.
Portes et tiroir du réfrigérateur
Toutes les illustrations mentionnées dans les instructions
suivantes sont incluses plus loin dans cette section après
“Étapesnales”.
Pour enlever et réinstaller les poignées
Enlever les poignées:
1. Saisir fermement la partie inférieure de la poignée, la faire
glisser vers le haut puis la tirer à l’horizontale pour l’extraire
dela porte. Voir les illustrations1 et 2 de la poignée.
Réinstaller les poignées:
1. Positionner la poignée de façon à ce que les gros trous des
agrafes de montage soient orientés vers le bas, puis aligner
les trous avec les pitons de la porte.
2. Faire pivoter la poignée de façon à ce que les agrafes de
montage reposent à plat contre la porte et faire glisser la
poignée vers le bas pour l’insérer. Voir les illustrations1 et
2de la poignée.
Démontage – Portes et charnières
IMPORTANT:
B
A
C
D
A. Canalisation d’eau en plastique
B. Manchon
C. Écrou à compression
D. Tube en cuivre
C
B
D
E
A
A. Bride en “P”
B. Canalisation d’eau en plastique
C. Orifice d’entrée d’eau
D. Écrou de compression
E. Tube en cuivre
AVERTISSEMENT
Risque de choc électrique
Brancher sur une prise à 3 alvéoles reliée à la terre.
Ne pas enlever la broche de liaison à la terre.
Ne pas utiliser un adaptateur.
Ne pas utiliser un câble de rallonge.
Le non-respect de ces instructions peut causer
un décès, un incendie ou un choc électrique.
AVERTISSEMENT
Risque de choc électrique
Déconnecter la source de courant électrique avant
d'enlever les portes.
Le non-respect de cette instruction peut causer
un décès ou un choc électrique.
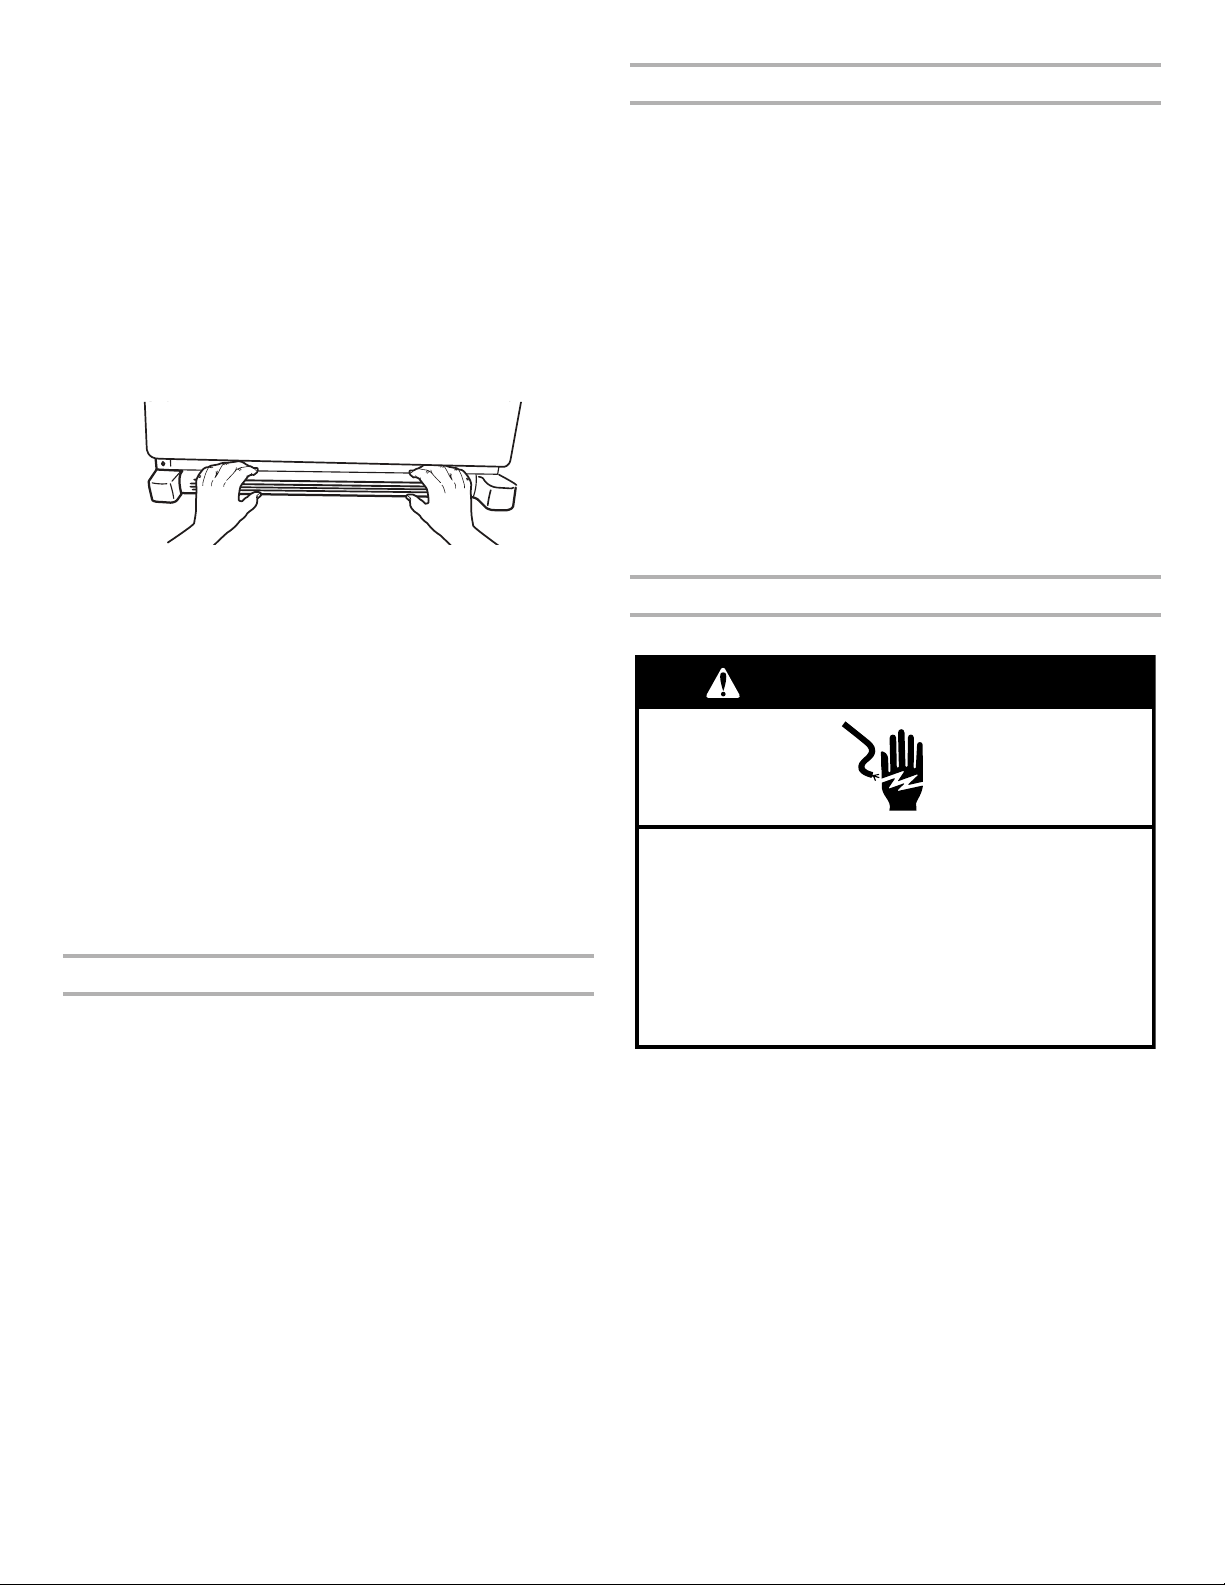
27
■ Retirer les aliments et tous les balconnets de la porte du
réfrigérateur.
■ Laisser les portes du réfrigérateur fermées jusqu’au moment
de les détacher de la caisse.
REMARQUE: Prévoir un support supplémentaire pour la
porte du réfrigérateur pendant le retrait des charnières.
Laforce d’attraction des aimants de la porte ne suft pas
àlamaintenir en place pendant la manutention.
OUTILS REQUIS: Une clé à douille à tête hexagonale de
5/16po, 3/8 po et 1/4 po, un tournevis Torx
†
T20, un tournevis
àtête cruciforme no2 et un tournevis à tête plate.
1. Débrancher le réfrigérateur ou déconnecter la source de
courant électrique.
2. Retirer le casier de la base. Saisir la grille fermement et la tirer
vers soi.
3. En commençant par la porte du côté droit, ôter les pièces
de la charnière supérieure – voir l’illustration de la charnière
supérieure. Soulever la porte du réfrigérateur de l’axe de la
charnière inférieure.
4. Enlever le bouchon d’obturation de la charnière supérieure
surle côté gauche de la porte du réfrigérateur.
5. Déconnecter le câblage situé au-dessus de la charnière
gauche en insérant un tournevis à lame plate ou votre ongle
entre les deux sections. Voir l’illustration de connexions.
6. Débrancher l’entrée d’eau en tirant sur le collet de blocage
tout en retirant le tuyau d’entrée du raccordement d’entrée
d’eau. Voir l’illustration de connexions.
7. Enlever les pièces de la charnière supérieure –
voirl’illustration de la charnière supérieure. Soulever la porte
du côté gauche de l’axe de la charnière inférieure.
8. Retirer les supports de pied de nivellement au bas
de la caisse à l’aide d’une clé hexagonale de 3/8 po.
Conservercesvis pour utilisation ultérieure.
Réinstallation des portes et charnières
1. Assembler les pièces de la charnière supérieure comme
indiqué dans l’illustration de la charnière supérieure. Ne pas
complètement serrer les vis.
2. Réinstaller les pièces pour la charnière inférieure comme
indiqué sur l’illustration de la charnière inférieure.
Resserrerles vis. Replacer la porte du réfrigérateur
REMARQUE: Prévoir un support supplémentaire pour la
porte du réfrigérateur pendant le déplacement des charnières.
La force d’attraction des aimants de la porte ne suft pas à la
maintenir en place pendant la manutention.
3. Aligner la porte de façon à ce que le bas de la porte du
congélateur soit parfaitement aligné avec le sommet du tiroir
de congélation. Serrer toutes les vis.
4. Reconnecter la che de câblage sur la partie supérieure de
laporte du côté gauche du réfrigérateur.
5. Reconnecter la canalisation d’eau en tirant l’anneau du collet
de blocage vers l’arrière tout en enfonçant fermement la
canalisation d’eau dans le conduit de raccordement.
6. Vérier qu’il n’y a pas de fuite. Réinstaller les couvre-charnière
supérieurs.
Retrait et réinstallation du tiroir de congélation
IMPORTANT: Il faudra peut-être deux personnes pour déplacer
et réinstaller le tiroir de congélation. Les illustrations sont incluses
plus loin dans cette section.
Retrait de l’avant du tiroir
1. Ouvrir le tiroir du congélateur complètement.
2. Desserrer les quatre vis xant les glissières de tiroir à l’avant
du tiroir. Voir l’illustration du retrait de l’avant du tiroir.
REMARQUE: Dévisser les vis de trois ou quatre tours.
Garder les vis dans l’avant du tiroir.
3. Soulever l’avant du tiroir et le dégager des vis.
Voirl’illustration du retrait de l’avant du tiroir.
Réinstallation de l’avant du tiroir
1. Retirer les glissières de tiroir du compartiment de congélation
en les faisant glisser. Insérer les vis du sommet de l’avant du
tiroir dans les fentes des supports du tiroir. Voir l’illustration
dela réinstallation de l’avant du tiroir.
2. Tirer les deux supports de tiroir vers soi pour positionner
les deux vis du fond de l’avant du tiroir dans les supports.
Voirl’illustration de la réinstallation de l’avant du tiroir.
3. Serrer complètement les quatre vis.
Étapes finales
1. Réinstaller la grille de base.
2. Brancher l’appareil sur une prise à 3 alvéoles reliée à la terre.
3. Réinstaller toutes les pièces amovibles dans les portes et
le tiroir et remettre les aliments dans le réfrigérateur et le
congélateur.
AVERTISSEMENT
Risque de choc électrique
Brancher sur une prise à 3 alvéoles reliée à la terre.
Ne pas enlever la broche de liaison à la terre.
Ne pas utiliser un adaptateur.
Ne pas utiliser un câble de rallonge.
Le non-respect de ces instructions peut causer
un décès, un incendie ou un choc électrique.
†TORX et T20 sont des marques déposées de Acument Intellectual Properties, LLC.
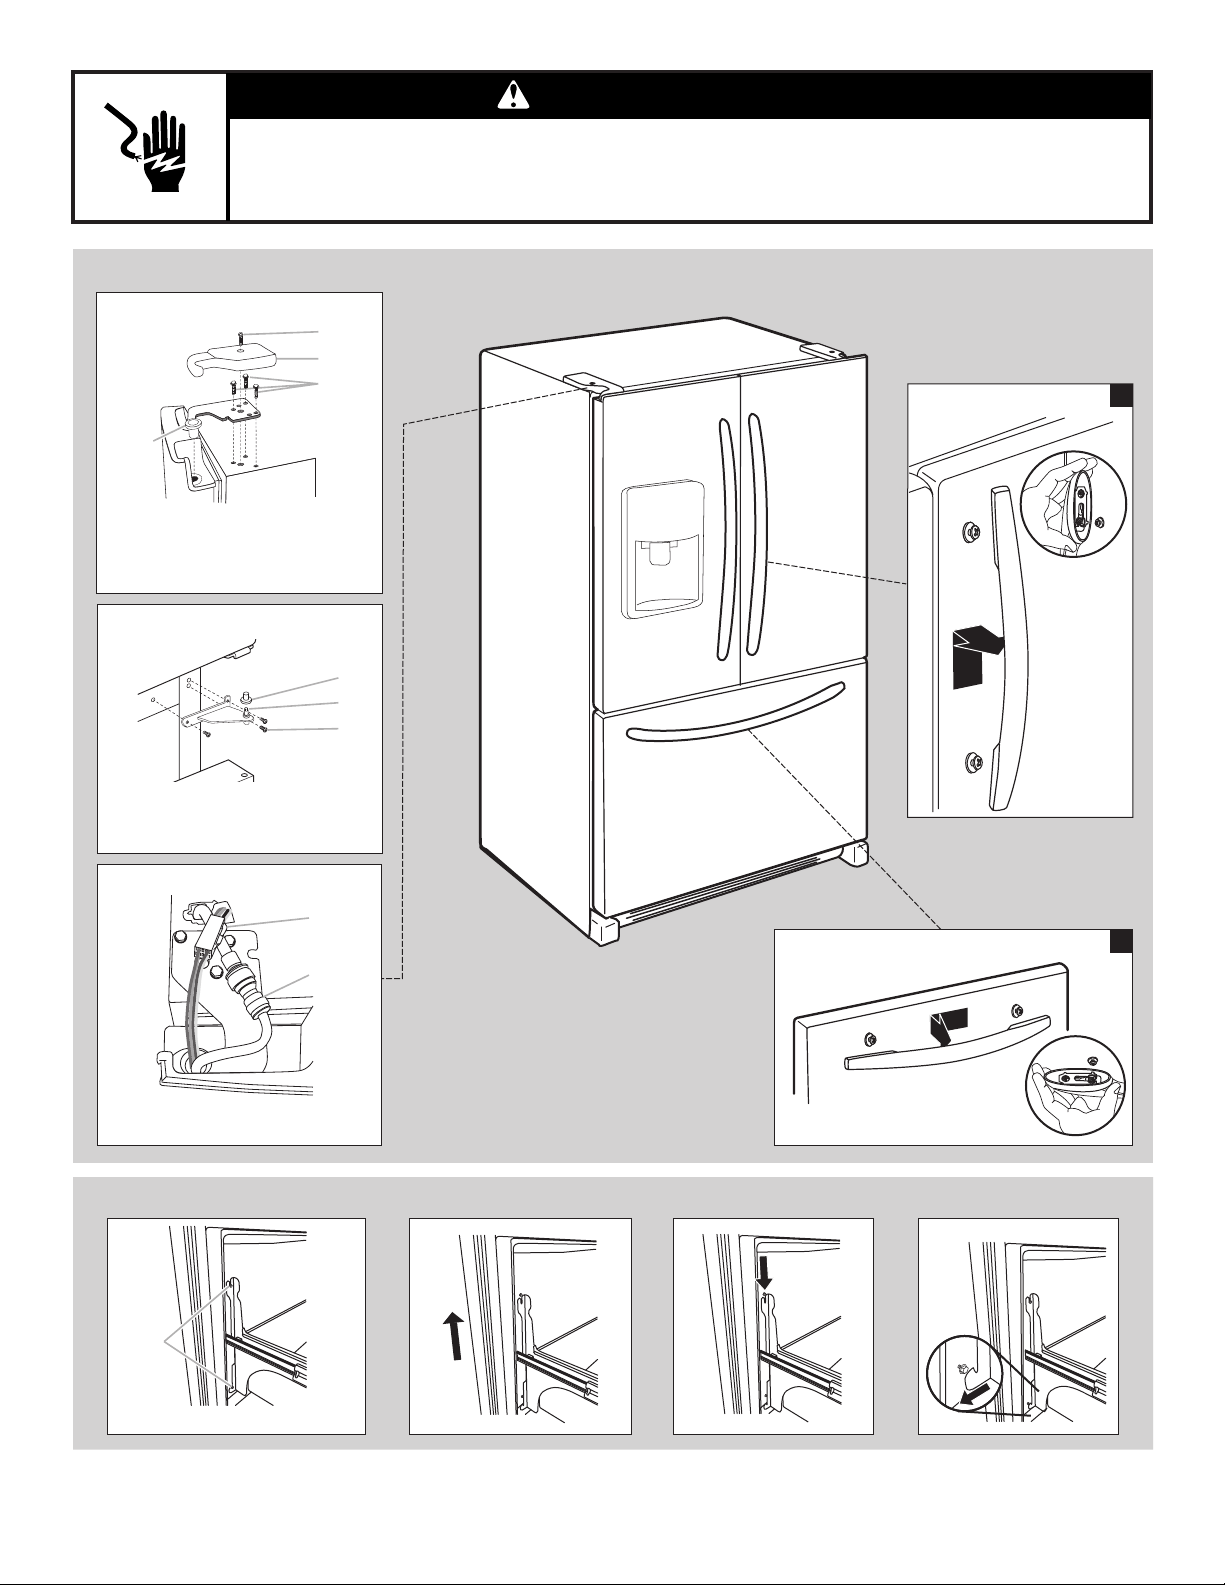
28
AVERTISSEMENT
Risque de choc électrique
Déconnecter la source de courant électrique avant d'enlever les portes.
Le non-respect de cette instruction peut causer un décès ou un choc électrique.
A
A
B
C
1
2
B
A
C
D
A
B
Retrait et réinstallation des portes
Charnières supérieures
Charnières inférieures
Connexions
Retrait du tiroir Réinstallation de l’avant du tiroir
A. Vis du couvre-charnière
B. Couvre-charnière supérieur
C. Vis de charnière à tête hexagonale
de 5/16 po
D. Charnière supérieure
A. Couvercle d’axe de charnière
B. Charnière inférieure
C. Vis de charnière
A. Fiche de câblage
B. Connexion de l’entrée d’eau
A. 4 vis de support de porte desserrées
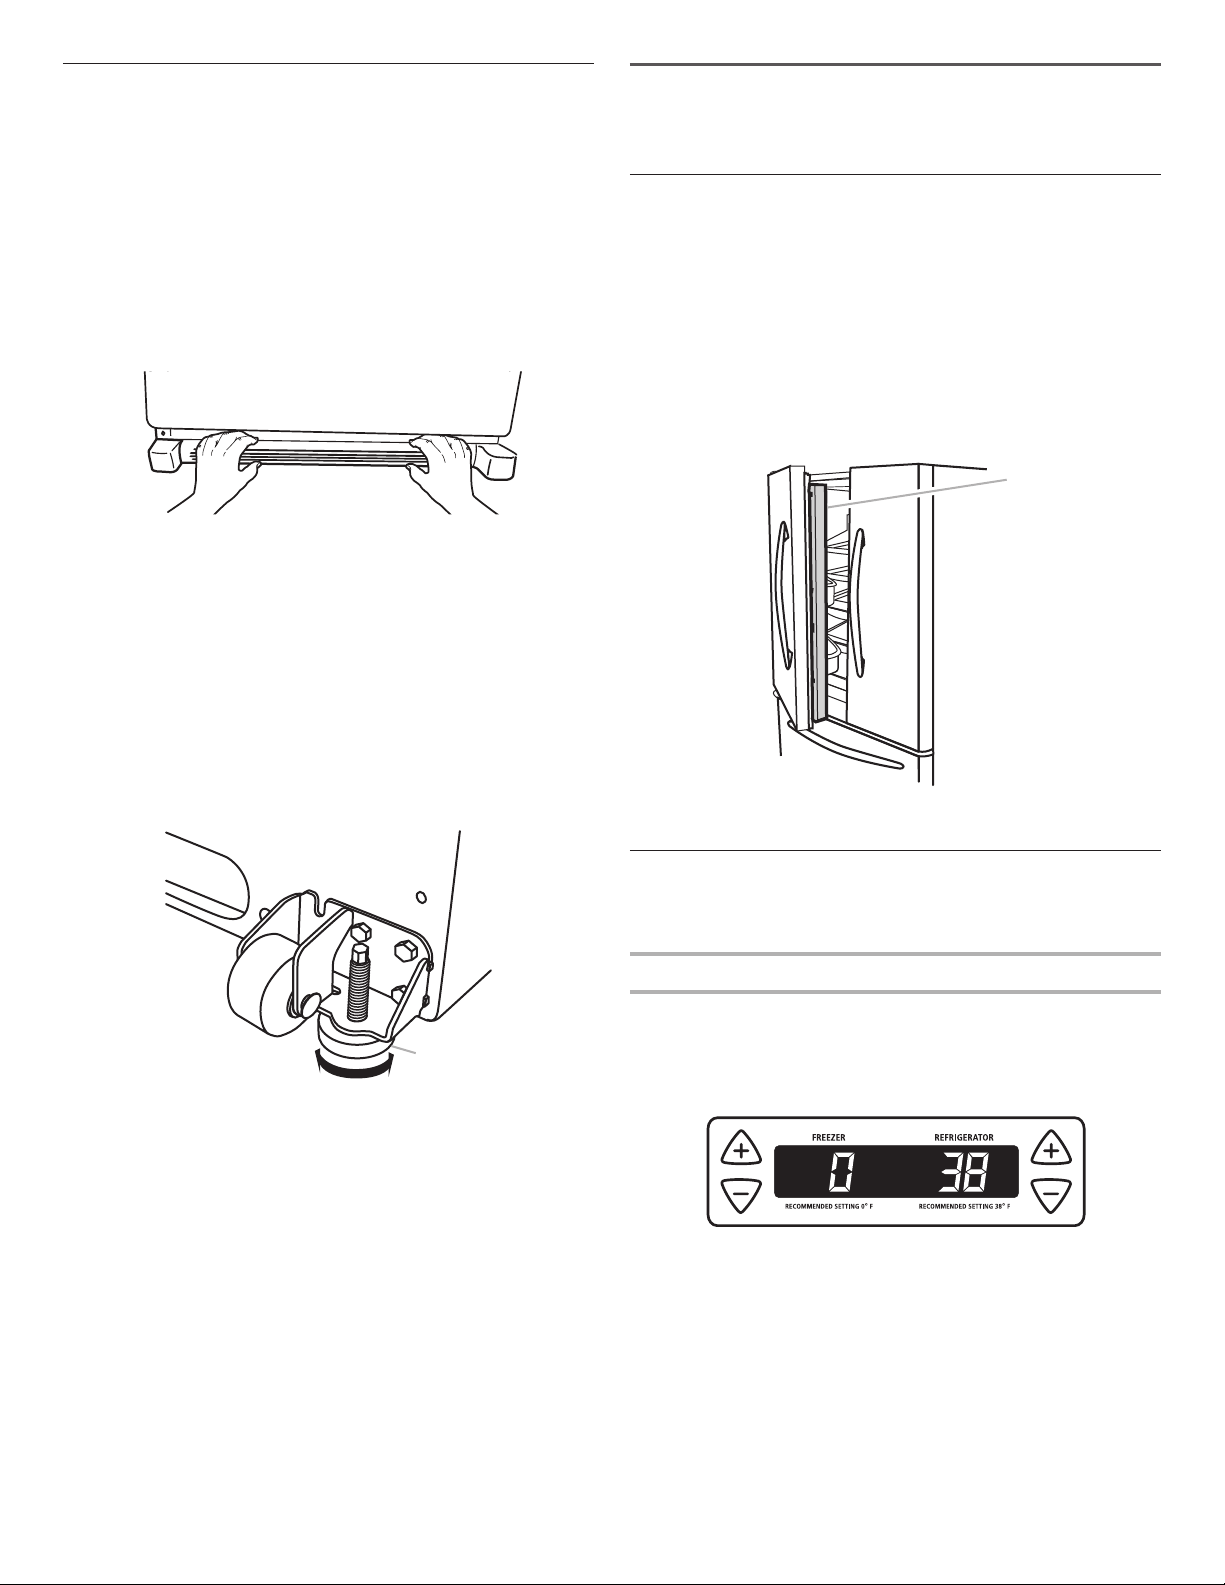
29
Ajuster les portes
IMPORTANT:
■ Ce réfrigérateur est équipé de deux vis de nivellement avant
ajustables – une de chaque côté de la base du réfrigérateur.
Si le réfrigérateur semble instable ou qu’on souhaite pouvoir
fermer la porte plus facilement, utiliser les instructions ci-
dessous.
■ Avant de déplacer le réfrigérateur, relever les vis de
nivellement de façon à ce que les roulettes avant touchent
leplancher.
1. Retirer le casier de la base. Saisir la grille fermement et la tirer
vers soi.
2. Élever ou abaisser la caisse.
À l’aide d’un tourne-écrou de 1/4 po, tourner les vis de
nivellement situées de chaque côté an d’élever ou d’abaisser
ce côté du réfrigérateur.
REMARQUE: Le fait d’exercer une pression contre le dessus
du réfrigérateur permet d’alléger le poids appliqué aux vis de
nivellement. Ceci facilite l’ajustement des vis. Il est possible
qu’il faille appliquer plusieurs tours aux vis de nivellement
pour ajuster l’inclinaison du réfrigérateur.
■ Pour élever, tourner la vis de nivellement dans le sens horaire.
■ Pour abaisser, tourner la vis de nivellement dans le sens
antihoraire.
3. Ouvrir à nouveau la porte pour s’assurer qu’elle ferme comme
désiré. Si ce n’est pas le cas, incliner le réfrigérateur un peu
plus vers l’arrière en tournant les deux vis de nivellement
avant dans le sens horaire. Plusieurs tours peuvent être
nécessaires et il convient de tourner les deux vis de
nivellement de façon égale.
4. Réinstaller la grille de base.
UTILISATION DU
RÉFRIGÉRATEUR
Ouverture et fermeture des portes
Il y a deux portes pour le compartiment de réfrigération.
Les portes peuvent être ouvertes et fermées séparément ou
ensemble.
Il y a sur la porte de gauche du réfrigérateur un joint à charnière
verticale.
■ Lors de l’ouverture de la porte du côté gauche, le joint à
charnière se replie automatiquement vers l’intérieur pour
qu’iln’y ait pas d’interférence.
■ Lorsque les deux portes sont fermées, le joint à charnière
assure automatiquement l’étanchéité entre les deux portes.
Utilisation des commandes
Le centre de commande est situé à l’avant du distributeur de
glaçons et d’eau.
Commandes de température
À titre de commodité, les commandes de température sont
préréglées à l’usine. Lors de l’installation initiale du réfrigérateur,
s’assurer que les commandes sont encore préréglées aux points
de réglage recommandés comme illustré.
Réglages recommandés
IMPORTANT:
■ Lorsque l’appareil est sous tension, l’afcheur de température
indique la température réglée du compartiment.
■ Attendre 24 heures pour que le réfrigérateur refroidisse
complètement avant d’y placer des aliments. Si on ajoute
des aliments avant que le réfrigérateur ne soit complètement
refroidi, les aliments risquent de se gaspiller.
REMARQUE: Le fait de placer les commandes de
température du réfrigérateur et du congélateur à un réglage
plus froid que le réglage recommandé ne refroidira pas les
compartiments plus rapidement.
A
A. Vis de nivellement
A
A. Joint à charnière
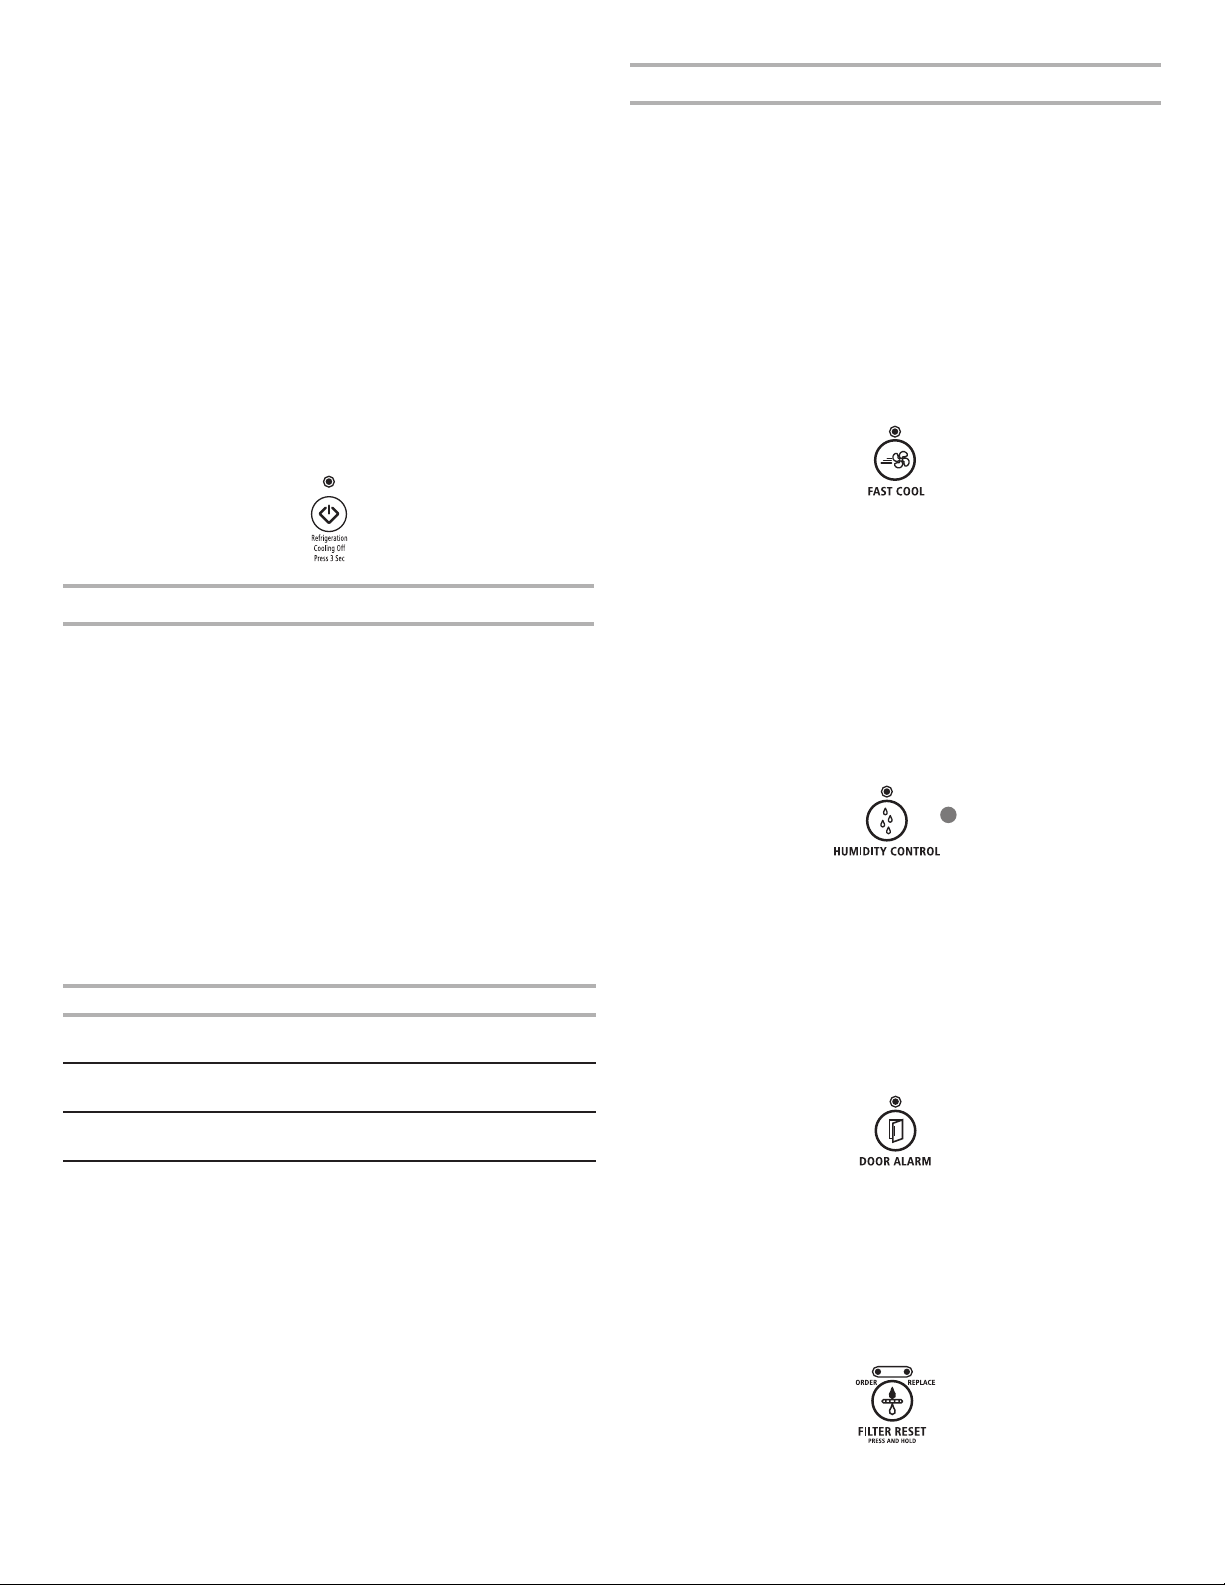
30
■ Les réglages recommandés devraient être corrects pour une
utilisation domestique normale du réfrigérateur. Les réglages
sont faits correctement lorsque le lait ou le jus sont aussi
froids que désiré et lorsque la crème glacée est ferme.
■ Si la température est trop tiède ou trop froide dans le
réfrigérateur ou le congélateur, vérier d’abord les évents
pour s’assurer qu’ils ne sont pas bloqués, avant de régler les
commandes.
Marche/arrêt du refroidissement:
■ La commande marche/arrêt du refroidissement sert à
désactiver le refroidissement pour les deux compartiments.
La commande ne déconnecte pas le réfrigérateur de
l’alimentation électrique.
■ Appuyer sur Cooling On/Off (marche/arrêt du refroidissement)
pendant 3 secondes. La DEL s’allume pour indiquer que le
refroidissement est désactivé. Appuyer à nouveau sur le
bouton Cooling On/Off (marche/arrêt du refroidissement)
pouractiver le refroidissement. La DEL s’éteint.
Réglage des commandes
La commande du RÉFRIGÉRATEUR règle la température du
compartiment de réfrigération. La commande du CONGÉLATEUR
règle la température du compartiment de congélation.
Pour modier la température du compartiment de réfrigération
ou de congélation, utiliser les réglages indiqués dans le tableau
comme guide.
Pour modifier les points de réglage de température:
Lorsqu’on appuie une première fois sur la touche (+) ou (–),
lepoint de réglage actuel de la température s’afche.
■ Appuyer sur les touches (+) ou (–) jusqu’à l’afchage du point
de réglage désiré de la température.
REMARQUE: Ne pas régler les commandes de température de
plus d’un cran à la fois, sauf lors de la mise en marche initiale du
réfrigérateur. Attendre 24 heures entre chaque réglage pour que
latempérature puisse se stabiliser.
CONDITION: RÉGLAGE DE LA TEMPÉRATURE:
RÉFRIGÉRATEUR trop
tiède
Commande RÉFRIGÉRATEUR
1°plus bas
CONGÉLATEUR trop tiède/
trop peu de glaçons
CONGÉLATEUR Commande
1° plus bas
RÉFRIGÉRATEUR trop
froid
RÉFRIGÉRATEUR Commande
1°plus élevé
CONGÉLATEUR trop froid CONGÉLATEUR Commande
1° plus élevé
Autres caractéristiques du centre de commandes
Refroidissement rapide
La caractéristique de refroidissement rapide est utile lors de
périodes d’utilisation intense du réfrigérateur, de l’ajout d’une
grande quantité d’aliments ou de l’élévation temporaire de la
température de la pièce.
■ Appuyer sur la touche Fast Cool (refroidissement rapide)
pour placer le congélateur et le réfrigérateur aux réglages
de température les plus bas. Appuyer à nouveau sur la
touche Fast Cool pour revenir au point de réglage normal
duréfrigérateur.
REMARQUE: La caractéristique Fast Cool s’éteint
automatiquement au bout de 2 heures environ. Lorsque la
caractéristique Fast Cool (refroidissement rapide) est en
marche, la température ne peut pas être réglée.
Humidity control (contrôle de l’humidité)
La caractéristique de commande d’humidité met en marche un
dispositif de chauffage pour aider à réduire l’humidité sur le joint
de la charnière de porte. À utiliser dans des environnements
humides ou en cas d’observation d’humidité sur le joint de la
charnière de porte. Le réfrigérateur consomme plus d’énergie
lorsque la commande d’humidité est activée.
■ Appuyer sur Humidity Control (réglage de l’humidité) pour
activer l’avertisseur. Appuyer de nouveau sur le bouton
Humidity Control (réglage de l’humidité) pour éteindre le
radiateur portatif. La DEL est allumée lorsque la commande
d’humidité est activée.
Door Alarm (alarme de la porte)
La caractéristique Door Alarm (alarme de la porte) fait retentir
une sonnerie toutes les quelques secondes lorsque la porte
du réfrigérateur a été laissée ouverte continuellement pendant
5minutes. La sonnerie retentira jusqu’à ce que la porte soit
fermée ou que la caractéristique Door Alarm (alarme de la porte)
soit désactivée.
■ Appuyer sur la touche Door Alarm pour activer ou désactiver
cette caractéristique. Le témoin lumineux est allumé lorsque
la caractéristique Door Alarm est activée.
Réinitialisation du filtre
La commande de réinitialisation du ltre à eau permet de
réinitialiser la caractéristique de suivi du statut du ltre à
eau chaque fois qu’on change le ltre à eau. Voir la section
“Systèmede ltration de l’eau”.
■ Appuyer sur la touche de réinitialisation du ltre pendant
3secondes, jusqu’à ce que le témoin lumineux Order
(commander) ou Replace (changer) s’éteigne.
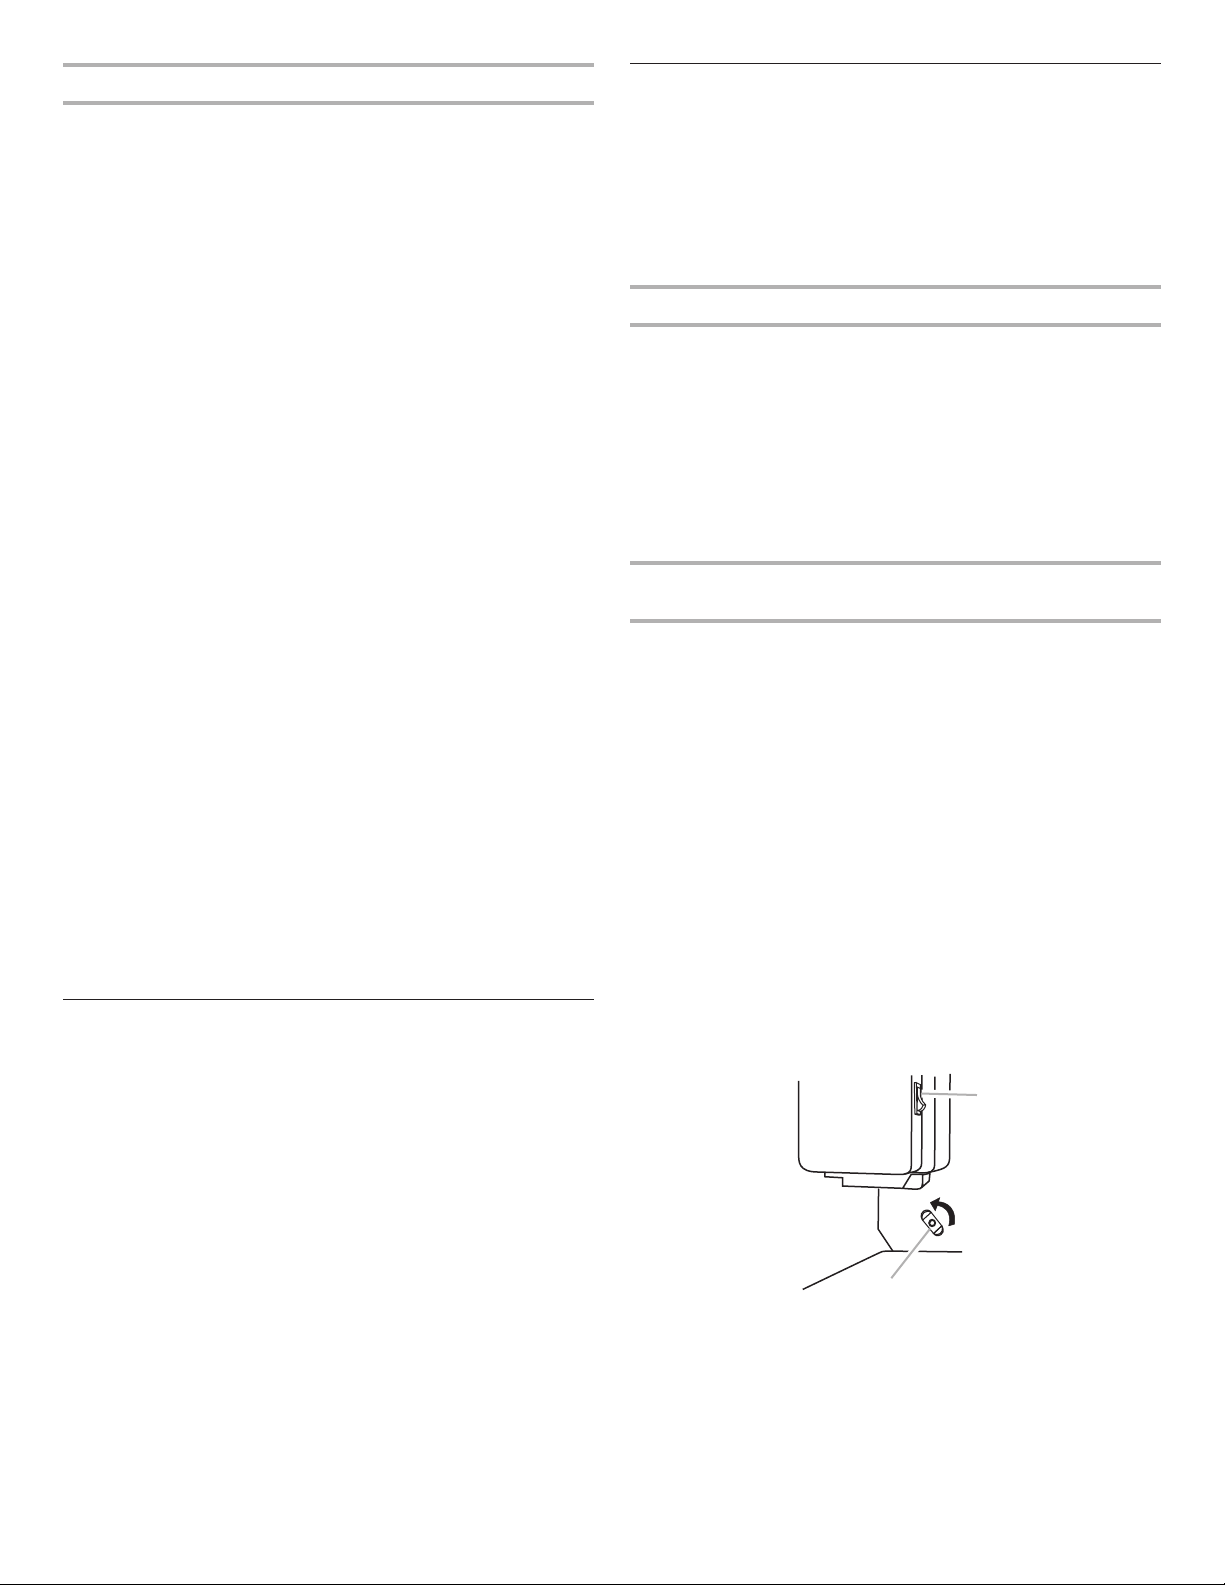
31
Préférences de l’utilisateur
Le centre de commandes permet à l’utilisateur de régler ses
préférences, au besoin.
Affichage de la température (F_C)
Cette préférence permet à l’utilisateur de modier l’afchage de
latempérature.
F – Température en degrés Fahrenheit
C – Température en degrés Celsius
Alarme (AL)
Cette préférence permet à l’utilisateur de désactiver le son de
toutes les alarmes.
ON (marche) – Le son de l’alarme sera audible.
OFF (arrêt) – Le son de l’alarme ne sera pas audible.
Auto Light Level Selection (LL) (sélection du niveau de
luminosité automatique)
Cette préférence permet à l’utilisateur de régler le niveau
d’éclairage du distributeur du plus faible au plus lumineux
(réglages 1 à 9).
REMARQUE: La caractéristique Auto Light (éclairage
automatique) du centre de commande doit être sélectionnée
pouractiver cette préférence.
Mode Sabbath (SAB)
ON (marche) – Toutes les lumières du centre de commande,
l’éclairage intérieur et tous les signaux sonores sont désactivés.
OFF (arrêt) – Toutes les lumières du centre de commande,
l’éclairage intérieur et tous les signaux sonores sont activés.
REMARQUE: Appuyer sur la touche Door Alarm (alarme de
porte) pendant 3 secondes pour rétablir toutes les lumières.
Pour accéder au menu des préférences de l’utilisateur:
1. Appuyer sur la touche Door Alarm (avertisseur de la porte)
pendant 3 secondes. Le nom de la préférence apparaît sur
l’afchage du congélateur et le statut de la préférence (F/C)
ou (ON/OFF) apparaît sur l’afchage du réfrigérateur.
2. Utiliser les touches (+) ou (–) du congélateur pour faire déler
les noms de préférence. Lorsque le nom de la préférence
désirée s’afche, appuyer sur les touches (+) ou (–) du
réfrigérateur pour modier le statut de la préférence.
3. Enregistrer les préférences en appuyant sur la touche Door
Alarm (alarme de la porte) pendant 3 secondes.
Réglage de l’humidité dans le tiroir à légumes
Le degré d’humidité dans le tiroir à légumes étanche peut
être contrôlé. Selon le modèle, la commande peut être placée
à n’importe quel réglage entre FRUIT (fruit) et VEGETABLES
(légumes) ou LOW (faible) et HIGH (élevé).
FRUIT/LOW (fruit/faible) (ouvert) pour une meilleure conservation
des fruits et légumes à pelures.
VEGETABLES/HIGH (légumes/élevé) (fermé) pour une meilleure
conservation des légumes à feuilles frais.
Machine à glaçons et bac d’entreposage à glaçons
IMPORTANT:
■ Purger le système d’approvisionnement en eau avant de
mettre en marche la machine à glaçons. Voir la section
“Distributeur d’eau et de glaçons”.
■ La machine à glaçons et le bac d’entreposage se trouvent
dans la partie supérieure gauche du compartiment de
réfrigération.
Mise en marche/arrêt de la machine à glaçons
Le commutateur On/Off (marche/arrêt) est situé sur la machine
àglaçons.
Pour mettre en marche la machine à glaçons, appuyer sur le
commutateur à la position ON (marche).
Pour arrêter manuellement la machine à glaçons, appuyer sur
lecommutateur à la position OFF (arrêt).
REMARQUE: La machine à glaçons comporte un système
d’arrêt automatique. Les détecteurs de machines à glaçons
arrêteront automatiquement la production de glaçons, mais
lacommande demeurera à la position ON (marche).
Pour retirer et réinstaller le bac d’entreposage
àglaçons
Retrait du bac d’entreposage à glaçons:
1. Maintenir la base du bac d’entreposage et appuyer sur le
bouton d’éjection situé dans le coin inférieur droit.
2. Tirer sur le bac à glaçons jusqu’à ce qu’on sente une
résistance. Soulever l’avant du bac d’entreposage à glaçons
et le retirer.
3. Appuyer sur le commutateur à la position OFF (arrêt)
Réinstallation du bac d’entreposage à glaçons:
IMPORTANT: Il faudra peut-être tourner la vis autobloquante
située derrière le bac à glaçons dans le sens antihoraire pour
que le bac à glaçons soit correctement aligné avec la vis
autobloquante. Le bac à glaçons doit être bien emboîté pour
queles glaçons soient correctement distribués.
1. Appuyer sur le commutateur à la position ON (marche)
2. Faire glisser le bac à glaçons dans les glissières situées
dechaque côté du logement.
3. Enfoncer le bac à glaçons jusqu’à ce qu’on sente une
résistance. Soulever légèrement l’avant et enfoncer le
bacàglaçons jusqu’à ce qu’on entende un déclic.
A
B
A. Position ON (marche)
B. Vis autobloquante

32
Taux de production des glaçons
■ Prévoir un délai de 24 heures pour la production du premier
lot de glaçons. Jeter les trois premiers lots de glaçons
produits.
■ La machine à glaçons devrait produire approximativement 8
à12 lots de glaçons au cours d’une période de 24 heures.
■ Pour augmenter la production de glaçons, diminuer la
température du congélateur et du réfrigérateur. Voir la section
“Utilisation des commandes”. Attendre 24 heures entre les
réglages.
Ne pas oublier
■ La qualité des glaçons dépend de la qualité de l’eau fournie
à la machine à glaçons. Éviter de connecter la machine à
glaçons à une alimentation en eau adoucie. Les produits
chimiques adoucisseurs d’eau (comme le sel) peuvent
endommager certaines pièces de la machine à glaçons et
entraîner une mauvaise qualité de glaçons. Si l’alimentation en
eau adoucie ne peut être évitée, s’assurer que l’adoucisseur
d’eau fonctionne bien et qu’il est bien entretenu.
■ Ne pas utiliser d’objet pointu pour briser les glaçons dans
le bac. Ceci peut endommager le bac d’entreposage et le
mécanisme du distributeur.
■ Ne pas entreposer quoi que ce soit sur le dessus de la
machine à glaçons ou dans le bac à glaçons.
Distributeur d’eau et de glaçons
IMPORTANT:
■ Après avoir connecté le réfrigérateur à une source
d’alimentation en eau, vidanger le système d’eau. Utiliser un
récipient robuste pour appuyer sur la plaque du distributeur
d’eau pendant 5 secondes, puis relâcher pendant 5 secondes.
Répéter l’opération jusqu’à ce que l’eau commence à couler.
Une fois que l’eau commence à couler, continuer d’appuyer
et de relâcher la plaque du distributeur (appui pendant
5secondes, relâchement pendant 5secondes) jusqu’à ce
qu’un total de 4gal (15L) ait été distribué. Ceci évacue l’air
du ltre et du système de distribution d’eau et rend le ltre à
eau opérationnel. Un amorçage supplémentaire peut s’avérer
nécessaire dans certains domiciles. Pendant l’évacuation de
l’air du système, de l’eau peut gicler du distributeur.
REMARQUE: Après 5 minutes de distribution continue,
ledistributeur cesse de distribuer de l’eau an d’éviter une
inondation. Pour poursuivre la distribution, enlever le récipient
et appuyer à nouveau sur le levier de distribution.
■ Le distributeur distribue de l’eau ou des glaçons.
■ Attendre 24heures pour que le réfrigérateur et l’eau
refroidissent. Puiser une quantité sufsante d’eau chaque
semaine pour maintenir un approvisionnement frais.
■ Prévoir un délai de 24 heures pour la production du premier
lot de glaçons. Jeter les trois premiers lots de glaçons
produits.
Distribution d’eau et de glaçons
1. Sélectionner l’eau ou les glaçons en appuyant sur le bouton
correspondant du tableau de commande. Un témoin au-
dessus du bouton indique la sélection effectuée.
2. Appuyer un récipient robuste contre le levier de distribution
deglaçons.
IMPORTANT: Il n’est pas nécessaire d’appliquer beaucoup
de pression au levier pour activer le distributeur. Une pression
forte n’entraînera pas une distribution plus rapide ou plus
importante de glaçons.
3. Retirer le récipient pour arrêter la distribution.
Lumière de distributeur
REMARQUES:
■ Les lampes du distributeur sont des DEL qui ne devraient pas
nécessiter de remplacement.
■ Lorsqu’on utilise le distributeur, le levier allume automatiquement
la lumière. Pour avoir la lumière allumée en permanence,
sélectionner On (marche) ou Auto (automatique).
Auto (automatique): La lampe du distributeur s’allume à moitié
de sa puissance lorsque le capteur de la lampe détecte que
la luminosité est faible dans la pièce. Pour mettre en marche
l’éclairage du distributeur, appuyer sur le bouton Light (lampe).
Letémoin lumineux Auto s’allumera.
Marche: Pour un éclairage en continu, appuyer sur le bouton
Light (lampe) une deuxième fois. Le témoin lumineux On (marche)
s’allumera.
Arrêt: Pour fermer l’éclairage du distributeur, appuyer une
troisième fois sur le bouton Light (lampe).
Risque de coupure
Utiliser un verre robuste pour prendre des glaçons.
Le non-respect de cette instruction peut causer
des coupures.
AVERTISSEMENT
33
Verrouillage du distributeur
Le distributeur peut être verrouillé pour faciliter le nettoyage ou
pour éviter la distribution involontaire par de jeunes enfants ou
par des animaux de compagnie.
REMARQUE: Le verrouillage du distributeur n’interrompt pas
l’alimentation électrique à l’appareil, la machine à glaçons ou la
lampe du distributeur. Il désactive seulement toutes les fonctions
des touches.
Verrouillage et déverrouillage du distributeur:
Appuyer et maintenir enfoncé la touche Lock/Unlock (verrouillage/
déverrouillage) pendant 3 secondes pour verrouiller le distributeur.
Le témoin lumineux s’allume lorsque le distributeur est verrouillé.
Appuyer et maintenir enfoncé la touche Lock/Unlock (verrouillage/
déverrouillage) pendant 3 secondes pour déverrouiller le
distributeur. Le témoin lumineux s’éteint.
Système de filtration d’eau
Le ltre à eau se trouve dans l’angle supérieur droit du
compartiment de réfrigération.
IMPORTANT: Le ltre à eau jetable doit être remplacé au moins
tous les 6 mois. Si le débit d’eau au distributeur d’eau ou à la
machine à glaçons diminue de façon marquée avant que 6 mois
ne se soient écoulés, remplacer le ltre à eau plus souvent.
Remplacer le filtre à eau
Pour acheter des ltres à eau de remplacement,
modèleUKF8001AXX-750 ou UKF8001AXX-200, communiquer
avec votre fournisseur ou composer le
1800253-1301 aux É.-U. ou le 1800807-6777 au Canada.
IMPORTANT: De l’air piégé dans le système d’alimentation en
eau peut entraîner l’éjection de l’eau et du ltre. Toujours faire
couler l’eau pendant au moins 2 minutes avant de retirer le ltre
ou le bouchon de dérivation bleu.
1. Tourner le ltre dans le sens antihoraire pour le retirer.
2. Retirer l’étiquette de scellement du ltre de rechange et
insérer l’extrémité du ltre dans la tête du ltre.
3. Faire pivoter le ltre dans le sens horaire jusqu’à la butée
d’arrêt. Fermer le couvercle du ltre en l’emboîtant.
4. Rincer le système de distribution d’eau. Voir la section
“Distributeur d’eau et de glaçons”.
REMARQUE: La fonction du distributeur peut être utilisée sans
qu’un ltre à eau soit installé. L’eau ne sera pas ltrée. Si on
choisit cette option, remettre le ltre en place avec le bouchon
dedérivation bleu.
ENTRETIEN DU RÉFRIGÉRATEUR
Nettoyage
Les sections de réfrigération et de congélation se dégivrent
automatiquement. Toutefois, nettoyer les deux compartiments
environ une fois par mois an d’éviter toute accumulation
d’odeurs. Essuyer les renversements immédiatement.
IMPORTANT:
■ Comme l’air circule entre les deux sections, toutes les
odeurs formées dans une section seront transférées à
l’autre. Lesdeux sections doivent être nettoyées avec soin
pour éliminer les odeurs. Pour éviter le transfert d’odeurs
et l’assèchement des aliments, envelopper ou recouvrir
hermétiquement les aliments.
■ Ne pas utiliser de nettoyants puissants ou abrasifs tels que les
nettoyants à vitre en atomiseurs, nettoyants à récurer, liquides
inammables, cires nettoyantes, détergents concentrés,
dissolvants pour les ongles, agents de blanchiment ou
nettoyants contenant du pétrole. Ne pas utiliser d’essuie-
tout, tampons à récurer ou autres outils de nettoyage abrasifs
susceptibles d’éraer ou d’endommager les matériaux.
Nettoyage de l’intérieur
1. Débrancher le réfrigérateur ou déconnecter la source de
courant électrique.
2. Utiliser une éponge propre ou un linge doux et un détergent
doux dans de l’eau tiède, laver à la main, rincer et sécher
soigneusement les pièces amovibles et les surfaces
intérieures.
3. Brancher le réfrigérateur ou reconnecter la source de courant
électrique.
Nettoyer l’écran d’affichage tactile du tableau de
distribution
1. Pour éviter de modier involontairement les réglages,
s’assurer que le réfrigérateur est débranché ou que le courant
électrique est déconnecté avant d’essuyer l’écran.
2. Préparer un mélange avec du détergent doux et de l’eau
tiède. Humecter un chiffon doux sans charpie du mélange et
essuyer doucement l’écran.
Ne pas utiliser pour le filtrage d'une eau
microbiologiquement polluée ou de qualité inconnue en
l'absence d'un dispositif de désinfection adéquat avant ou
après le système. Les systèmes certifiés pour la réduction
de kyste peuvent être utilisés pour l'eau désinfectée qui
peut contenir des kystes filtrables.
AVERTISSEMENT
Risque d'explosion
Utiliser un produit de nettoyage ininflammable.
Le non-respect de cette instruction peut causer un décès,
une explosion ou un incendie.
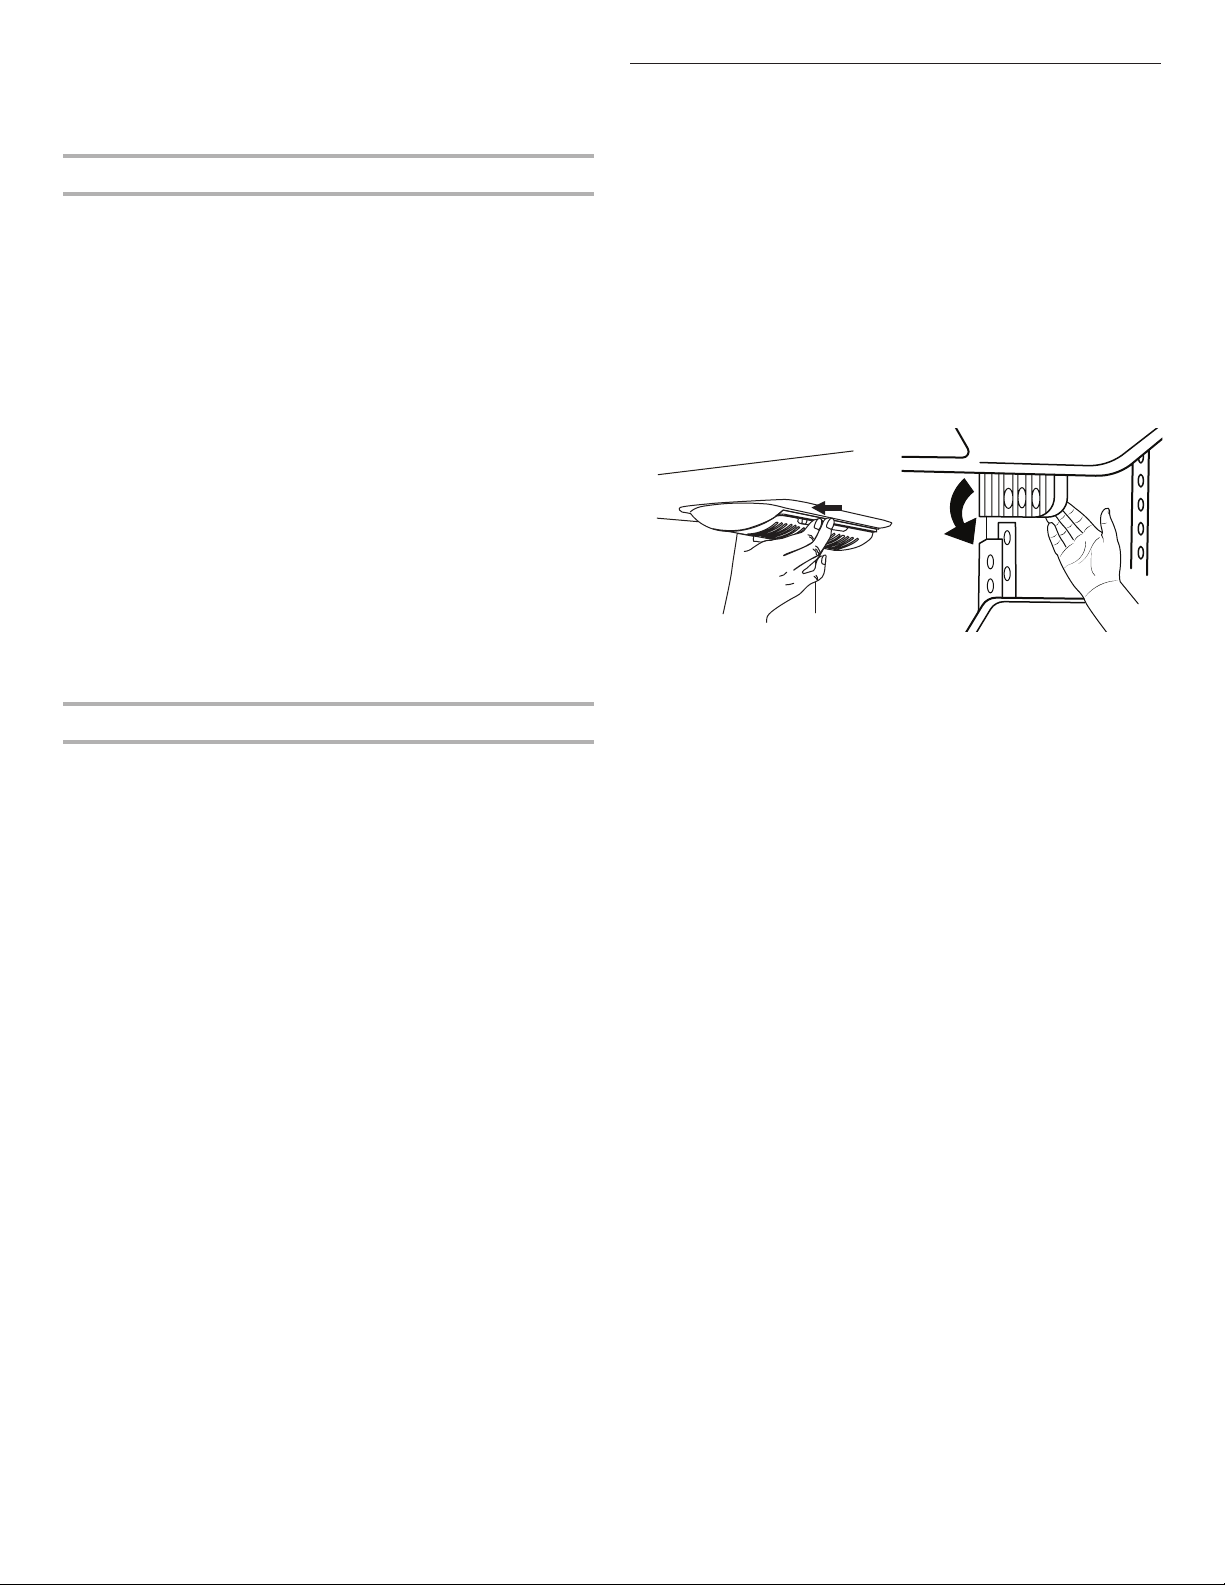
34
REMARQUE: Ne pas vaporiser ni essuyer de liquides
directement sur l’écran, et ne pas saturer le chiffon de produit.
3. Brancher le réfrigérateur ou reconnecter la source de courant
électrique.
Nettoyage des surfaces extérieures
1. Débrancher le réfrigérateur ou déconnecter la source de
courant électrique.
2. À l’aide d’une éponge propre ou d’un chiffon doux et d’un
détergent doux dans de l’eau tiède, laver, rincer et sécher
soigneusement les pièces extérieures en acier inoxydable et
surfaces métalliques peintes.
■ Pour que le réfrigérateur en acier inoxydable conserve son
aspect neuf et pour enlever les petites égratignures ou
marques, il est suggéré d’utiliser le nettoyant et poli pour
acier inoxydable approuvé par le fabricant, numéro de
pièce4396920. Pour commande du nettoyant, composer
le 1800422-1230 (États-Unis) ou le 1800807-6777
(Canada).
IMPORTANT: Ce nettoyant doit être utilisé sur les pièces en
acier inoxydable uniquement!
Veiller à ce que le nettoyant et poli pour acier inoxydable
n’entre pas en contact avec les pièces de plastique comme
les garnitures, couvercles de distributeurs ou joints de porte.
En cas de contact non intentionnel, nettoyer la pièce de
plastique avec une éponge et un détergent doux dans de
l’eau tiède. Sécher soigneusement avec un chiffon doux.
3. Brancher le réfrigérateur ou reconnecter la source de courant
électrique.
Nettoyage du condensateur
Le condensateur n’a pas besoin d’être nettoyé souvent dans
des conditions de fonctionnement domestique normales. Si
l’environnement est particulièrement graisseux, poussiéreux ou
s’il y a des animaux domestiques dans la maison, le condenseur
devrait être nettoyé tous les 2 ou 3mois pour assurer une
efcacité maximum.
Nettoyage du condensateur:
1. Débrancher le réfrigérateur ou déconnecter la source de
courant électrique.
2. Retirer le casier de la base.
3. Utiliser un aspirateur à brosse douce pour nettoyer la grille,
les endroits ouverts derrière la grille et la surface à l’avant du
condensateur.
4. Replacer la grille de la base après avoir terminé.
5. Brancher le réfrigérateur ou reconnecter la source de courant
électrique.
Remplacer l’ampoule d’éclairage
IMPORTANT: Le réfrigérateur et le congélateur utilisent des
ampoules à DEL, incandescentes ou une combinaison des deux.
Si les lampes ne s’allument pas lorsqu’on ouvre la porte du
réfrigérateur ou du congélateur, composer les numéros fournis
pour assistance ou dépannage. Consulter la “garantie” pour
connaître les numéros de téléphone.
1. Débrancher le réfrigérateur ou déconnecter la source de
courant électrique.
2. Retirer le protège-ampoule (sur certains modèles).
■ Sommet du compartiment de réfrigérateur – Presser les côtés
du protège-ampoule tout en le tirant vers le bas pour le retirer.
■ Sous le bac à glaçons (sur certains modèles) – Presser le long
du rebord supérieur du protège-ampoule et faire tourner le
protège-ampoule vers l’avant pour l’enlever.
3. Remplacer les ampoules grillées à l’aide d’ampoules de la
même taille, forme et puissance.
■ Pour remplacer l’ampoule à DEL grillée par une ampoule à
DEL, commander le numéro de pièceW10565137 (3,6 W).
REMARQUE: Certaines ampoules DEL de rechange
ne sont pas recommandées pour des environnements
humides/mouillés. Les compartiments de réfrigération et de
congélation sont considérés comme des environnements
humides/mouillés. Si on utilise une marque d’ampoules
DEL différente de celle recommandée, lire et suivre toutes
les instructions de l’emballage des ampoules DEL avant de
procéder à l’installation.
■ Pour remplacer une ampoule incandescente, utiliser
uniquement des ampoules incandescentes pour les
appareils ménagers d’une puissance maximum de 40 W.
■ Replacer le protecteur/l’enveloppe d’ampoule après avoir
remplacé l’ampoule incandescente.
4. Brancher le réfrigérateur ou reconnecter la source de courant
électrique.
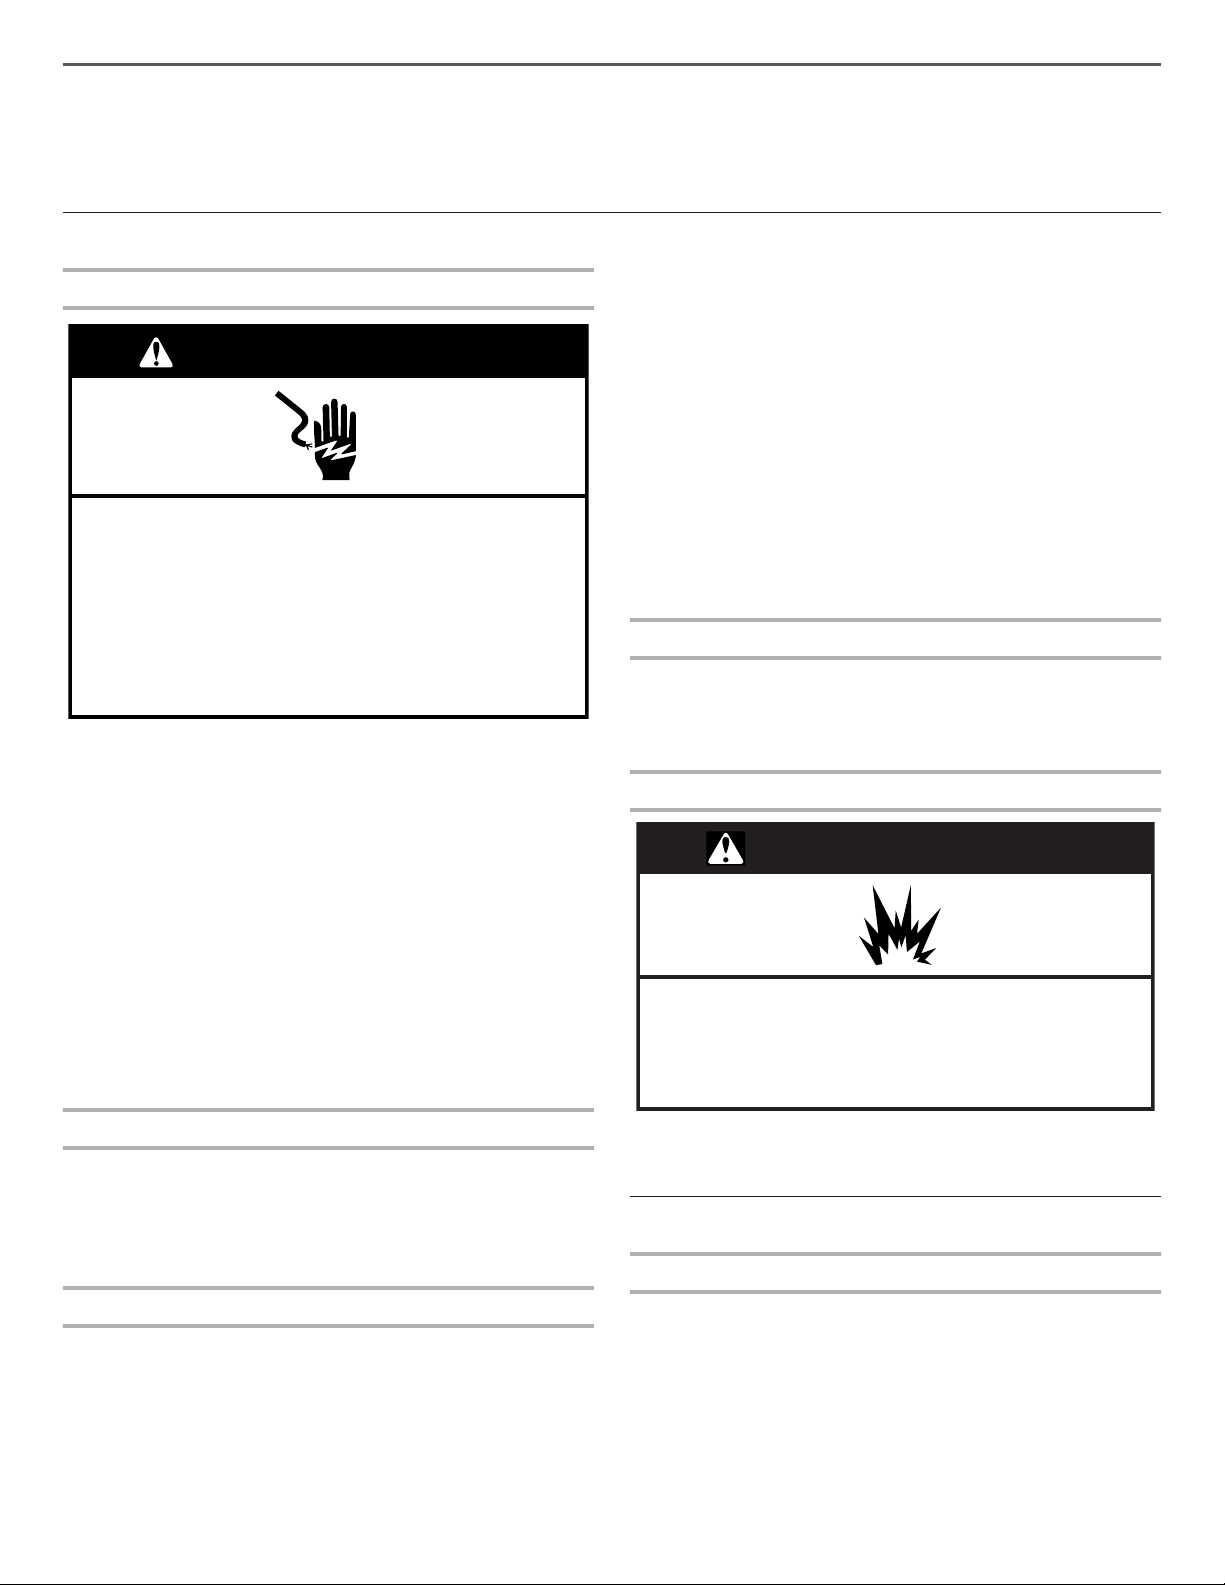
35
DÉPANNAGE
Essayer d’abord les solutions suggérées ici ou visiter notre site Web et consulter la FAQ (Foire aux questions)
pour tenter d’éviter le coût d’une visite de service.
Aux É.-U., www.whirlpool.com Au Canada www.whirlpool.ca
Fonctionnement du réfrigérateur
Le réfrigérateur ne fonctionne pas
■ Le cordon d’alimentation électrique est-il débranché?
Brancher l’appareil sur une prise à 3 alvéoles reliée à la terre.
■ La prise électrique fonctionne-t-elle? Brancher une lampe
pour voir si la prise fonctionne.
■ Un fusible du domicile est-il grillé ou un disjoncteur s’est-
il ouvert? Remplacer le fusible ou réenclencher le disjoncteur.
Si le problème persiste, appeler un électricien.
■ Les commandes sont-elles activées? S’assurer que les
commandes du réfrigérateur sont sur ON (allumés). Voir la
section “Utilisation des commandes”.
■ S’agit-il d’une nouvelle installation? Accorder 24heures
après l’installation pour que le réfrigérateur se refroidisse
complètement.
REMARQUE: Le fait de placer les commandes de
température sur le réglage le plus froid ne refroidira pas
lecompartiment plus rapidement.
Le moteur semble fonctionner excessivement
Il se peut que ce nouveau réfrigérateur fonctionne plus longtemps
que l’ancien en raison du compresseur et des ventilateurs à haute
efcacité. L’appareil peut fonctionner plus longtemps encore si
la température de la pièce est élevée, si une grande quantité de
nourriture a été ajoutée, si les portes sont fréquemment ouvertes
ou si elles ont été laissées ouvertes.
Le réfrigérateur semble bruyant
Le bruit émis par les réfrigérateurs a été réduit au cours des
années. Du fait de cette réduction, il est possible d’entendre
des bruits intermittents provenant du nouveau réfrigérateur qui
n’avaient pas été décelés avec l’ancien modèle. Voici une liste de
sons normaux, accompagnée d’explications.
■ Bourdonnement – entendu lorsque le robinet d’arrivée d’eau
s’ouvre pour remplir la machine à glaçons
■ Pulsation – les ventilateurs/le compresseur se règlent an
d’optimiser la performance
■ Sifflement/cliquetis - écoulement de liquide réfrigérant,
mouvement des conduites d’eau ou d’objets posés sur le
dessus du réfrigérateur
■ Grésillement/gargouillement – de l’eau tombe sur l’élément
de chauffage durant le programme de dégivrage
■ Bruit d’éclatement – contraction/expansion des parois
internes, particulièrement lors du refroidissement initial
■ Bruit d’écoulement d’eau – peut être entendu lorsque la
glace fond lors du programme de dégivrage et que l’eau
s’écoule dans le plateau de dégivrage
■ Grincement/craquement – se produit lorsque les glaçons
sont éjectés du moule
Les portes ne ferment pas complètement
■ La porte est-elle bloquée en position ouverte? Déplacer les
emballages d’aliments pour libérer la porte.
■ Un compartiment ou une tablette bloquent-ils le passage?
Replacer le compartiment ou la tablette en position correcte.
Les portes sont difficiles à ouvrir
■ Les joints d’étanchéité sont-ils sales ou collants?
Nettoyerles joints et les surfaces de contact au savon doux
età l’eau tiède. Rincer et sécher avec un linge doux.
Température et humidité
La température est trop élevée
■ S’agit-il d’une nouvelle installation? Accorder 24heures
après l’installation pour que le réfrigérateur se refroidisse
complètement.
■ Porte(s) ouverte(s) souvent ou laissée(s) ouverte(s)?
Cecipermet à l’air chaud de pénétrer dans le réfrigérateur.
Réduire les ouvertures de porte et garder les portes
complètement fermées.
AVERTISSEMENT
Risque de choc électrique
Brancher sur une prise à 3 alvéoles reliée à la terre.
Ne pas enlever la broche de liaison à la terre.
Ne pas utiliser un adaptateur.
Ne pas utiliser un câble de rallonge.
Le non-respect de ces instructions peut causer
un décès, un incendie ou un choc électrique.
AVERTISSEMENT
Risque d'explosion
Utiliser un produit de nettoyage ininflammable.
Le non-respect de cette instruction peut causer un décès,
une explosion ou un incendie.

36
■ A-t-on ajouté une grande quantité d’aliments?
Attendrequelques heures pour permettre au réfrigérateur
derevenir à une température normale.
■ Les réglages sont-ils corrects pour les conditions
existantes? Régler les commandes à un cran plus froid.
Vérier la température au bout de 24 heures. Voir la section
“Utilisation des commandes”.
La température est trop basse dans le réfrigérateur
■ L’évent du réfrigérateur est-il obstrué? Si l’ouverture
d’évacuation située à l’angle supérieur gauche du
compartiment de réfrigération est obstruée par des articles
placés directement devant, le réfrigérateur sera trop froid.
Éloigner les objets de l’ouverture d’évacuation.
■ Le bac d’entreposage à glaçons est-il correctement
positionné? Voir la section “Machine à glaçons et bac
d’entreposage”.
■ Les réglages sont-ils corrects pour les conditions
existantes? Régler les commandes à un cran plus chaud.
Vérier la température au bout de 24 heures. Voir la section
“Utilisation des commandes”.
Il y a accumulation d’humidité à l’intérieur
REMARQUE: Une certaine accumulation d’humidité est normale.
■ La pièce est-elle humide? Ceci contribue à l’accumulation
de l’humidité.
■ Porte(s) ouverte(s) souvent ou laissée(s) ouverte(s)?
Cecipermet à l’air chaud de pénétrer dans le réfrigérateur.
Réduire les ouvertures de porte et garder les portes
complètement fermées.
Glaçons et eau
La machine à glaçons ne produit pas ou pas
suffisamment de glaçons
■ Le réfrigérateur est-il connecté à l’alimentation en
eauet le robinet d’arrêt d’eau est-il ouvert? Brancher le
réfrigérateur à l’alimentation en eau et ouvrir le robinet d’arrêt
d’eau complètement.
■ La canalisation de la source d’eau du domicile
comporte-t-elle une déformation? Une déformation dans
la canalisation peut réduire l’écoulement d’eau. Redresser la
canalisation d’eau.
■ La machine à glaçons est-elle allumée? S’assurer que la
machine à glaçons est en marche. Voir la section “Machine à
glaçons et bac d’entreposage”.
■ S’agit-il d’une nouvelle installation? Attendre 24 heures
après l’installation de la machine à glaçons pour que la
production de glaçons commence. Attendre 72 heures
pourque la production de glaçons soit complète.
■ Porte du congélateur complètement fermée? Bien fermer
la porte. Si elle ne ferme pas complètement, voir la section
“Les portes ne ferment pas complètement”.
■ A-t-on récemment prélevé une grande quantité de
glaçons? Attendre 24 heures pour que la machine à glaçons
produise plus de glaçons.
■ Un glaçon est-il coincé dans le bras éjecteur de la
machine à glaçons? Enlever le glaçon du bras éjecteur avec
un ustensile en plastique.
■ Un filtre à eau est-il installé sur le réfrigérateur? Enlever
le ltre et faire fonctionner la machine à glaçons. Si le volume
de glace augmente, le ltre est probablement obstrué ou mal
installé. Remplacer le ltre ou le réinstaller correctement.
■ Un système de filtration de l’eau à osmose inverse
est-il connecté à l’alimentation en eau froide? Ceci peut
réduire la pression de l’eau. Voir la section “Spécications de
l’alimentation en eau”.
Les glaçons sont creux ou petits
REMARQUE: Cela indique une faible pression d’eau.
■ La valve de la canalisation d’eau n’est-elle pas
complètement ouverte? Ouvrir le robinet d’arrêt
complètement.
■ La canalisation de la source d’eau du domicile
comporte-t-elle une déformation? Une déformation dans
la canalisation peut réduire l’écoulement d’eau. Redresser la
canalisation d’eau.
■ Un filtre à eau est-il installé sur le réfrigérateur? Enlever
le ltre et faire fonctionner la machine à glaçons. Si la qualité
des glaçons s’améliore, le ltre est probablement obstrué ou
mal installé. Remplacer le ltre ou le réinstaller correctement.
■ Un système de filtration de l’eau à osmose inverse
est-il connecté à l’alimentation en eau froide? Ceci peut
réduire la pression de l’eau. Voir la section “Spécications de
l’alimentation en eau”.
■ D’autres questions concernant la pression de l’eau?
Appeler un plombier agréé et qualié.
Goût, odeur ou couleur grise des glaçons
■ Les raccords de plomberie sont-ils neufs? Des raccords
de plomberie neufs peuvent entraîner une décoloration ou un
mauvais goût des glaçons.
■ Les glaçons ont-ils été gardés trop longtemps? Jeter les
glaçons. Laver le compartiment à glaçons. Attendre 24 heures
pour la fabrication de nouveaux glaçons.
■ Y a-t-il un transfert d’odeurs de nourriture? Utiliser des
emballages hermétiques et à l’épreuve de l’humidité pour
conserver les aliments.
■ L’eau contient-elle des minéraux (tels que le soufre)?
L’installation d’un ltre à eau peut être requise an d’enlever
les minéraux.
■ Un filtre à eau est-il installé sur le réfrigérateur?
Unedécoloration grise ou foncée des glaçons indique
que le système de ltration de l’eau nécessite un rinçage
supplémentaire. Rincer le circuit d’eau avant d’utiliser un
nouveau ltre. Remplacer le ltre à eau à la date indiquée.
Voirla section “Système de ltration de l’eau”.
Le distributeur d’eau et de glaçons ne fonctionne
pascorrectement
■ Le réfrigérateur est-il connecté à l’alimentation en
eau et le robinet d’arrêt d’eau est-il ouvert? Brancher
le réfrigérateur à l’alimentation en eau et ouvrir le robinet
d’arrêtd’eau complètement.
■ La canalisation de la source d’eau du domicile comporte-
t-elle une déformation? Redresser la canalisation d’eau.
■ S’agit-il d’une nouvelle installation? Rincer et remplir le
système de distribution d’eau. Voir la section “Distributeur
d’eau”.
■ La pression en eau est-elle d’au moins 35lb/po²
(241kPa)? La pression de l’eau du domicile détermine
l’écoulement d’eau du distributeur. Voir la section
“Spécications de l’alimentation en eau”.

37
■ Un filtre à eau est-il installé sur le réfrigérateur? Enlever
le ltre et faire fonctionner le distributeur. Si le débit d’eau
augmente, le ltre est probablement obstrué ou mal installé.
Remplacer le ltre ou le réinstaller correctement.
■ La caractéristique de remplissage du distributeur d’eau ne
distribue-t-elle pas une quantité précise d’eau? Calibrerle
distributeur d’eau. Voir la section “Distributeurs d’eau et de
glaçons”.
■ Porte du congélateur complètement fermée? Bien fermer
la porte. Si elle ne ferme pas complètement, voir le point
“Lesportes ne ferment pas complètement” plus haut dans
cette section.
■ A-t-on récemment ôté les portes? Vérier que l’assemblage
câble/tuyau du distributeur d’eau a été correctement
reconnecté. Voir la section “Portes du réfrigérateur et tiroir”.
■ Un système de filtration de l’eau à osmose inverse
est-il connecté à l’alimentation en eau froide? Ceci peut
réduire la pression de l’eau. Voir la section “Spécications de
l’alimentation en eau”.
De l’eau suinte du système de distribution
REMARQUE: Il est normal de constater l’apparition d’une ou
deux gouttes d’eau après la distribution d’eau.
■ Le verre n’a pas été maintenu sous le distributeur assez
longtemps? Maintenir le verre sous le distributeur2 à
3secondes après avoir relâché le levier du distributeur.
■ S’agit-il d’une nouvelle installation? Rincer le système de
distribution d’eau. Voir la section “Distributeur d’eau et de
glaçons”.
■ Le filtre à eau a-t-il été récemment changé? Rincer le
système de distribution d’eau. Voir la section “Distributeur
d’eau et de glaçons”.
L’eau du distributeur est tiède
REMARQUE: L’eau du distributeur est seulement réfrigérée à
50°F (10°C).
■ S’agit-il d’une nouvelle installation? Attendre 24heures
après l’installation pour que l’alimentation en eau refroidisse
complètement.
■ A-t-on récemment distribué une grande quantité d’eau?
Attendre 24 heures pour que l’alimentation d’eau refroidisse
complètement.
■ Y a-t-il longtemps que de l’eau n’a pas été servie?
Lepremier verre d’eau peut ne pas être froid. Jeter le premier
verre d’eau.
■ Le réfrigérateur est-il raccordé à la canalisation d’arrivée
d’eau froide? S’assurer que le réfrigérateur est raccordé
à la canalisation d’arrivée d’eau froide. Voir la section
“Spécications de l’alimentation en eau”.
38
FEUILLES DE DONNÉES SUR LA PERFORMANCE
Système de filtration d’eau intérieur
ModèleUKF8001AXX-750 d’une capacité de 750 gallons (2839 litres)
Ce produit a été testé selon les normes 42 et 53 NSF/ANSI pour la réduction des substances énumérées ci-dessous. La concentration
des substances indiquées dans l’eau entrant dans le système a été réduite à une concentration inférieure ou égale à la limite permissible
pour l’eau qui quitte le système, comme spécié par les normes ANSI/NSF 42 et 53.
Réduction concentration
produits de désinfection
Critères de
réduction NFS
Affluent moyen Concentration
dans l’eau à traiter
Effluent
maximal
Effluent
moyenne
% de réd.
minimale
Réduction du
pourcentage
moyen
Goût/odeur de chlore
Particules Classe I*
Réduction de
50% réduction
de 85%
2,00mg/L
14000000 #/mL
2,0mg/L± 10 %
Au moins
10000particules/mL
0,06mg/L
370000 #/mL**
0,050 625mg/L
196666 #/mL
97,00%,
97,40%
97,52%,
99,00%
Réduction des
contaminants
Critères de
réduction NFS
Affluent moyen Concentration
dans l’eau à traiter
Effluent
maximal
Effluent
moyenne
% de réd.
minimale
Réduction du
pourcentage
moyen
Plomb: à pH6,5
Plomb: à pH8,5
0,010mg/L
0,010mg/L
0,150mg/L
†
0,150mg/L
†
0,15mg/L± 10 %
0,15mg/L± 10 %
< 0,001mg/L
< 0,001mg/L
< 0,001mg/L
< 0,001mg/L
>99,30%
>99,30%
>99,30%
>99,30%
Mercure: à pH6,5
Mercure: à pH8,5
0,002mg/L
0,002mg/L
0,006mg/L
0,0059mg/L
0,006mg/L± 10 %
0,006mg/L± 10 %
0,0005mg/L
0,0018mg/L
0,0003mg/L
0,00073mg/L
91,70%
69,20%
95,00%
88,10%
Benzène 0,005mg/L 0,0133mg/L 0,015mg/L± 10 % 0,000 5mg/L 0,0005mg/L 96,10% 96,30%
p-dichlorobenzène 0,075mg/L 0,210mg/L 0,225mg/L± 10 % < 0,0005mg/L < 0,0005mg/L > 99,80% > 99,80%
Carbofurane 0,040mg/L 0,075 3mg/L 0,08mg/L± 10 % 0,027mg/L 0,008mg/L 64,60% 73,45%
Toxaphène 0,003mg/L 0,015mg/L 0,015 10% < 0,001mg/L < 0,001mg/L > 93,3% > 93,3%
Atrazine 0,003mg/L 0,0102mg/L 0,009mg/L± 10 % 0,002 7mg/L 0,001 05mg/L 76,30% 89,40%
Amiante > 99% 126,5 MF/L 10
7
à 10
8
bres/L
††
<0,17 MF/L <0,17 MF/L > 99,99% > 99,99%
Kystes opérationnels
‡
Turbidité
>99,95%
0,5NTU
122 500 #/L
10,5NTU
50000/L min.
11 ± 1NTU
< 1 #/L
‡
0,30NTU
< 1 #/L
‡
0,125NTU
>99,99 %
97,30 %
>99,99 %
98,80 %
Lindane 0,0002mg/L 0,0019mg/L 0,002± 10% < 0,00016mg/L
0,000035mg/L
91,80% 97,90%
Tétrachloroéthène 0,005mg/L 0,015mg/L 0,015mg/L± 10 % < 0,0005mg/L < 0,0005mg/L > 96,6% > 96,6%
Paramètres de tests: pH = 7,5 ± 0,5 à moins d’indications contraires. Débit = 0,78 gpm (2,9 Lpm). Pression = 60lb/po² (413,7kPa). Temps. = 20°C ±3°C
(68°F ± 5°F).
■ Il est essentiel que les exigences de fonctionnement, d’entretien et de
remplacement de ltre soient respectées pour que ce produit donne
le rendement annoncé.
■ Le ltre à eau jetable doit être remplacé au moins tous les 6 mois.
■ Le système de contrôle du ltre mesure la quantité d’eau qui passe
par le ltre et indique quand remplacer le ltre. Lorsque 90% de la
vie estimée du ltre sont utilisés, le témoin jaune (order/commander)
s’allume. Lorsque 100% de la vie estimée du ltre sont utilisés,
letémoin rouge (replace/remplacer) s’allume et il est recommandé
de remplacer le ltre. Pour les modèles sans témoin d’état de ltre,
remplacer le ltre tous les 6 mois. Utiliser le modèle de ltre de
rechangeUKF8001AXX-750. Prix suggéré au détail en 2010 de 44,99$
US/49,95 $ CAN. Les prix sont indiqués sous réserve de modication.
■ Le produit doit être utilisé pour l’eau froide seulement.
■ Ne pas utiliser ce produit pour ltrer une eau microbiologiquement
polluée ou de qualité inconnue en l’absence d’un dispositif de
désinfection adéquat en amont ou en aval du système. Les systèmes
certiés pour la réduction des kystes peuvent être utilisés pour une
eau désinfectée susceptible de contenir des kystes ltrables.
■ Consulter la section “Système de ltration de l’eau” pour obtenir
lenom, l’adresse et le numéro de téléphone du fabricant.
■ Consulter la section “Garantie” pour voir la garantie limitée du fabricant.
Directives d’application/
paramètres d’approvisionnement en eau
Source d’eau
Pression d’eau
Température de l’eau
Débit nominal
Ville ou puits
35 à 120lb/po
2
(241 à 827kPa)
1°C à 38°C (33°F à 100°F)
0,78gpm (2,9 L/min) à 60lb/po²*
Système testé et certifié par NSF International en vertu de la norme NSF/ANSI 42 (réduction du
goût et de l'odeur du chlore, et particules (classe I*)); et en vertu de la norme NSF/ANSI 53
(réduction de plomb, mercure, atrazine, benzène, p-dichlorobenzène, carbofuran, toxaphène,
kystes, turbidité, amiante, tétrachloroéthylène et lindane).
*Classe I – taille des particules: >0,5 à <1um
** Exigence de test: au moins 100000 particules/mL (poussière de test ne AC)
†
Ces contaminants ne sont pas nécessairement présents dans l’approvisionnement d’eau. Le rendement peut varier selon les caractéristiques de l’eau locale.
††
Fibres de longueur supérieure à 10um
‡ Cas de la ltration de kystes de Cryptosporidium parvum
®
NSF est une marque déposée de NSF International.
39
Système de filtration d’eau intérieur
ModèleUKF8001AXX-200 d’une capacité de 200 gallons (757 litres)
Ce produit a été testé selon les normes 42 et 53 NSF/ANSI pour la réduction des substances énumérées ci-dessous. La concentration
des substances indiquées dans l’eau entrant dans le système a été réduite à une concentration inférieure ou égale à la limite permissible
pour l’eau qui quitte le système, comme spécié par les normes ANSI/NSF42 et 53.
Réduction concentration
produits de désinfection
Critères de
réduction NFS
Affluent moyen Concentration
dans l’eau à traiter
Effluent
maximal
Effluent
moyenne
% de réd.
minimale
Réduction du
pourcentage
moyen
Goût/odeur de chlore
Particules Classe I*
Réduction de
50% réduction
de 85%
2,00mg/L
14000000 #/mL
2,0mg/L± 10 %
Au moins
10000particules/mL
0,06mg/L
370000 #/mL**
0,050 625mg/L
196666 #/mL
97,00%,
97,40%
97,52%,
99,00%
Réduction des
contaminants
Critères de
réduction NFS
Affluent moyen Concentration
dans l’eau à traiter
Effluent
maximal
Effluent
moyenne
% de réd.
minimale
Réduction du
pourcentage
moyen
Plomb: à pH6,5
Plomb: à pH8,5
0,010mg/L
0,010mg/L
0,150mg/L
†
0,150mg/L
†
0,15mg/L± 10 %
0,15mg/L± 10 %
< 0,001mg/L
< 0,001mg/L
< 0,001mg/L
< 0,001mg/L
>99,30%
>99,30%
>99,30%
>99,30%
Mercure: à pH6,5
Mercure: à pH8,5
0,002mg/L
0,002mg/L
0,006mg/L
0,0059mg/L
0,006mg/L± 10 %
0,006mg/L± 10 %
0,0005mg/L
0,0018mg/L
0,0003mg/L
0,00073mg/L
91,70%
69,20%
95,00%
88,10%
Benzène 0,005mg/L 0,0133mg/L 0,015mg/L± 10 % 0,000 5mg/L 0,0005mg/L 96,10% 96,30%
p-dichlorobenzène 0,075mg/L 0,210mg/L 0,225mg/L± 10 % < 0,0005mg/L < 0,0005mg/L > 99,80% > 99,80%
Carbofurane 0,040mg/L 0,075 3mg/L 0,08mg/L± 10 % 0,027mg/L 0,008mg/L 64,60% 73,45%
Toxaphène 0,003mg/L 0,015mg/L 0,015 10% < 0,001mg/L < 0,001mg/L > 93,3% > 93,3%
Atrazine 0,003mg/L 0,0102mg/L 0,009mg/L± 10 % 0,002 7mg/L 0,001 05mg/L 76,30% 89,40%
Amiante > 99% 126,5 MF/L 10
7
à 10
8
bres/L
††
<0,17 MF/L <0,17 MF/L > 99,99% > 99,99%
Kystes opérationnels
‡
Turbidité
>99,95%
0,5NTU
122 500 #/L
10,5NTU
50000/L min.
11 ± 1NTU
< 1 #/L
‡
0,30NTU
< 1 #/L
‡
0,125NTU
>99,99 %
97,30 %
>99,99 %
98,80 %
Lindane 0,0002mg/L 0,0019mg/L 0,002± 10% < 0,00016mg/L
0,000035mg/L
91,80% 97,90%
Tétrachloroéthène 0,005mg/L 0,015mg/L 0,015mg/L± 10 % < 0,0005mg/L < 0,0005mg/L > 96,6% > 96,6%
O-dichlorobenzène 0,6mg/L 1,7mg/L 1,8mg/L± 10 % < 0,5mg/L < 0,5mg/L > 99,9% > 99,9%
Éthylbenzène 0,7mg/L 2,2mg/L 2,1mg/L± 10 % 0,004 8mg/L 0,11mg/L 99,80% 99,90%
Chlorobenzène 0,1mg/L 2,0mg/L 2,0mg/L± 10 % 0,003 8mg/L 0,000 8mg/L 99,80% 99,90%
Endrin 0,002mg/L 0,007mg/L 0,006mg/L± 10 % 0,000 4mg/L 0,0002mg/L 94,30% 96,80%
Paramètres de tests: pH = 7,5 ± 0,5 à moins d’indications contraires. Débit = 0,55 gpm (2,08 Lpm). Pression = 60lb/po² (413,7kPa). Temps. = 20°C ± 3°C
(68°F ± 5°F).
■ Il est essentiel que les exigences de fonctionnement, d’entretien et de
remplacement de ltre soient respectées pour que ce produit donne
le rendement annoncé.
■ Le ltre à eau jetable doit être remplacé au moins tous les 6 mois.
■ Le système de contrôle du ltre mesure la quantité d’eau qui passe
par le ltre et indique quand remplacer le ltre. Lorsque 90% de la
vie estimée du ltre sont utilisés, le témoin jaune (order/commander)
s’allume. Lorsque 100% de la vie estimée du ltre sont utilisés,
letémoin rouge (replace/remplacer) s’allume et il est recommandé
de remplacer le ltre. Pour les modèles sans témoin d’état de ltre,
remplacer le ltre tous les 6 mois. Utiliser le modèle de ltre de
rechangeUKF8001AXX-200. Prix suggéré au détail en 2010 de 44,99$
US/49,95 $ CAN. Les prix sont indiqués sous réserve de modication.
■ Le produit doit être utilisé pour l’eau froide seulement.
■ Ne pas utiliser ce produit pour ltrer une eau microbiologiquement
polluée ou de qualité inconnue en l’absence d’un dispositif de
désinfection adéquat en amont ou en aval du système. Les systèmes
certiés pour la réduction des kystes peuvent être utilisés pour une
eau désinfectée susceptible de contenir des kystes ltrables.
■ Consulter la section “Système de ltration de l’eau” pour obtenir
lenom, l’adresse et le numéro de téléphone du fabricant.
■ Consulter la section “Garantie” pour voir la garantie limitée du fabricant.
Directives d’application/
paramètres d’approvisionnement en eau
Source d’eau
Pression d’eau
Température de l’eau
Débit nominal
Ville ou puits
35 à 120lb/po
2
(241 à 827kPa)
1°C à 38°C (33°F à 100°F)
0,55gpm (2,08 L/min) à 60lb/po²*
Système testé et certifié par NSF International en vertu de la norme NSF/ANSI 42 (réduction du goût
et de l'odeur du chlore, et particules (classe I*)); et en vertu de la norme NSF/ANSI 53 (réduction de
plomb, mercure, atrazine, benzène, p-dichlorobenzène, carbofuran, toxaphène, kystes, turbidité,
amiante, O-dichlorobenzène, éthylbenzène, chlorobenzène, endrine, tétrachloroéthylène et lindane).
*Classe I – taille des particules: >0,5 à <1um
** Exigence de test: au moins 100000 particules/mL (poussière de test ne AC)
†
Ces contaminants ne sont pas nécessairement présents dans l’approvisionnement d’eau. Le rendement peut varier selon les caractéristiques de l’eau locale.
††
Fibres de longueur supérieure à 10um
‡ Cas de la ltration de kystes de Cryptosporidium parvum
®
NSF est une marque déposée de NSF International.
40
SI VOUS AVEZ BESOIN DE SERVICE :
1. Avant de nous contacter pour obtenir un dépannage, veuillez déterminer si des réparations sont nécessaires pour votre produit.
Certains problèmes peuvent être résolus sans intervention de dépannage. Prenez quelques minutes pour parcourir la section
Dépannage ou Résolution de problèmes du guide d’utilisation et d’entretien ou rendez-vous sur le site http://www.whirlpool.ca.
2. Tout service sous garantie doit être effectué exclusivement par nos fournisseurs de dépannage autorisés Whirlpool.
Aux É.-U. et au Canada, dirigez toutes vos demandes de service sous garantie au :
Centre d’eXpérience de la clientèle Whirlpool
Aux É.-U., composer le 1 800 253-1301. Au Canada, composer le 1 800 807-6777.
Si vous résidez à l’extérieur du Canada et des 50 États des États-Unis, contactez votre marchand Whirlpool autorisé pour déterminer
si une autre garantie s’applique.
GARANTIE LIMITÉE DES
APPAREILS DE
RÉFRIGÉRATION
WHIRLPOOL
®
ATTACHEZ ICI VOTRE REÇU DE VENTE. UNE PREUVE D’ACHAT EST
OBLIGATOIRE POUR OBTENIR L’APPLICATION DE LA GARANTIE.
Lorsque vous appelez le centre d’eXpérience à la clientèle, veuillez
garderà disposition les renseignements suivants :
■ Nom, adresse et numéro de téléphone
■ Numéros de modèle et de série
■ Une description claire et détaillée du problème rencontré
■ Une preuve d’achat incluant le nom et l’adresse du marchand
oududétaillant
GARANTIE LIMITÉE DE CINQ ANS
CE QUI EST COUVERT CE QUI N’EST PAS COUVERT
GARANTIE LIMITÉE DE UN AN
Pendant un an à compter de la date d’achat, lorsque ce
gros appareil ménager est installé, utilisé et entretenu
conformément aux instructions jointes à ou fournies avec
le produit, Whirlpool Corporation ou Whirlpool Canada
LP (ci-après désignées “Whirlpool”) décidera à sa seule
discrétion de remplacer le produit ou de couvrir le coût des
pièces de remplacement spéciées par l’usine et de la main-
d’oeuvre nécessaires pour corriger les vices de matériaux
ou de fabrication qui existaient déjà lorsque ce gros appareil
ménager a été acheté. S’il est remplacé, votre appareil restera
sous garantie pour la durée restant à courir de la période de
garantie sur le produit d’origine.
GARANTIE LIMITÉE DE LA DEUXIÈME
À LA CINQUIÈME ANNÉE INCLUSIVEMENT
SUR LA DOUBLURE DE LA CAVITÉ ET SUR
LE SYSTÈME DE RÉFRIGÉRATION SCELLÉ
De la deuxième à la cinquième année inclusivement à
compter de la date d’achat initiale, lorsque ce gros appareil
ménager est installé, utilisé et entretenu conformément aux
instructions jointes au produit ou fournies avec, la marque
Whirlpool paiera pour les pièces de rechange spéciées
par l’usine et la main d’oeuvre concernant les composants
suivants pour corriger les défauts non esthétiques de
matériau ou de fabrication de ladite pièce qui empêchent
le réfrigérateur de fonctionner et qui étaient déjà présents
lorsque ce gros appareil ménager a été acheté :
■ Doublure de la cavité du réfrigérateur/congélateur si
la pièce se ssure en raison d’un vice de matériau ou
de fabrication.
■ Système de réfrigération scellé (y compris le compresseur,
l’évaporateur, le condenseur, le séchoir et les conduits
de connexion).
LE SEUL ET EXCLUSIF RECOURS DU CLIENT DANS LE
CADRE DE LA PRÉSENTE GARANTIE LIMITÉE CONSISTE
EN LA RÉPARATION PRÉVUE PAR LA PRÉSENTE. Le service
doit être fourni par une compagnie de service désignée par
Whirlpool. Cette garantie limitée est valide uniquement aux
États-Unis ou au Canada et s’applique exclusivement lorsque
le gros appareil ménager est utilisé dans le pays où il a été
acheté. La présente garantie limitée est valable à compter de
la date d’achat initial par le consommateur. Une preuve de
la date d’achat initial est exigée pour obtenir un dépannage
dans le cadre de la présente garantie limitée.
1. Usage commercial, non résidentiel ou par plusieurs familles, ou non-respect
des instructions d’utilisation, de fonctionnement ou d’installation.
2. Visite à domicile pour montrer à l’utilisateur comment utiliser l’appareil.
3. Visites de service pour rectier une installation ou un entretien fautifs
du produit, une installation non conforme aux codes d’électricité ou de
plomberie, ou la rectication de l’installation électrique ou de la plomberie
du domicile (ex : câblage électrique, fusibles ou tuyaux d’arrivée d’eau du
domicile).
4. Pièces consomptibles (ex : ampoules, piles, ltres à air ou à eau, solutions
de conservation, etc.).
5. Défauts ou dommage résultant de l’utilisation de pièces ou accessoires
Whirlpool non authentiques.
6. Dommages causés par : accident, mésusage, abus, incendie, inondations,
catastrophe naturelle ou l’utilisation de produits non approuvés par
Whirlpool.
7. Réparations aux pièces ou systèmes dans le but de rectier un dommage
ou des défauts résultant d’une réparation, altération ou modication non
autorisée faite à l’appareil.
8. Défauts d’apparence, notamment les éraures, traces de choc, ssures ou
tout autre dommage subi par le ni de l’appareil ménager, à moins que ces
dommages ne résultent de vices de matériaux ou de fabrication et ne soient
signalés à Whirlpool dans les 30 jours suivant la date d’achat.
9. Décoloration, rouille ou oxydation des surfaces résultant d’environnements
caustiques ou corrosifs incluant des concentrations élevées de sel, un haut
degré d’humidité ou une exposition à des produits chimiques (exemples non
exhaustifs).
10. Perte d’aliments ou de médicaments due à la défaillance du produit.
11. Enlèvement ou livraison. Ce produit est conçu pour être réparé à l’intérieur
du domicile.
12. Frais de déplacement et de transport pour le dépannage/la réparation dans
une région éloignée où une compagnie de service Whirlpool autorisée n’est
pas disponible.
13. Retrait ou réinstallation d’appareils inaccessibles ou de dispositifs
préinstallés (ex : garnitures, panneaux décoratifs, plancher, meubles, îlots
de cuisine, plans de travail, panneaux de gypse, etc.) qui entravent le
dépannage, le retrait ou le remplacement du produit.
14. Service et pièces pour des appareils dont les numéros de série et de modèle
originaux ont été enlevés, modiés ou ne peuvent pas être facilement
identiés.
Le coût d’une réparation ou d’un remplacement dans le cadre de ces
circonstances exclues est à la charge du client.

05/18
Printed in U.S.A.
Imprimé aux É.-U.
W10329360B
SP PN W10329361A
®
/™ ©2018 Whirlpool. All rights reserved. Used under license in Canada.
Tous droits réservés. Utilisé sous licence au Canada.
Pour des renseignements complémentaires concernant le produit (aux É.-U.) consultez le www.whirlpool.com
Au Canada, visitez le www.whirlpool.ca
Si vous n’avez pas accès à Internet et que avez besoin d’aide pour l’utilisation de votre produit ou si vous souhaitez prendre rendez-
vous pour un dépannage, vous pouvez contacter Whirlpool au numéro ci-dessous.
Vous devez disposer du numéro de modèle complet. Vous trouverez les numéros de modèle et de série sur l’étiquette située sur la paroi
interne du compartiment de réfrigération.
Pour de l’aide ou un dépannage aux États-Unis, composer le 1800253-1301. Au Canada, composer le 1800807-6777.
Pour plus d’aide, vous pouvez écrire à Whirlpool en soumettant toute question ou préoccupation àl’adresse ci-dessous:
Aux États-Unis: Au Canada:
Whirlpool Brand Home Appliances
Customer eXperience Center
553 Benson Road
Benton Harbor, MI 49022-2692
Whirlpool Brand Home Appliances
Customer eXperience Centre
200 – 6750 Century Ave.
Mississauga, Ontario L5N 0B7
Veuillez indiquer dans votre correspondance un numéro de téléphone où l’on peut vous joindre dans la journée.
Veuillez conserver les Instructions d’utilisation et les renseignements sur le numéro de modèle pour référence ultérieure.
02/17
CLAUSE D’EXONÉRATION DE RESPONSABILITÉ AU TITRE DES GARANTIES IMPLICITES
LES GARANTIES IMPLICITES, Y COMPRIS LES GARANTIES APPLICABLES DE QUALITÉ MARCHANDE OU D’APTITUDE À UN USAGE
PARTICULIER, SONT LIMITÉES À CINQ ANS OU À LA PLUS COURTE PÉRIODE AUTORISÉE PAR LA LOI. Certains États et certaines provinces
ne permettent pas de limitation sur la durée des garanties implicites de qualité marchande ou d’aptitude à un usage particulier, de sorte que la
limitation ci-dessus peut ne pas être applicable dans votre cas. Cette garantie vous confère des droits juridiques spéciques et vous pouvez
également jouir d’autres droits qui peuvent varier d’une juridiction à l’autre.
EXONÉRATION DE RESPONSABILITÉ DANS LES DOMAINES NON COUVERTS PAR LA GARANTIE
Whirlpool décline toute responsabilité au titre de la qualité, de la durabilité ou en cas de dépannage ou de réparation nécessaire sur ce gros
appareil ménager autre que les responsabilités énoncées dans la présente garantie. Si vous souhaitez une garantie plus étendue ou plus
complète que la garantie limitée fournie avec ce gros appareil ménager, adressez-vous à Whirlpool ou à votre détaillant pour obtenir les
modalités d’achat d’une garantie étendue.
LIMITATION DES RECOURS; EXCLUSION DES DOMMAGES FORTUITS OU INDIRECTS
LE SEUL ET EXCLUSIF RECOURS DU CLIENT DANS LE CADRE DE LA PRÉSENTE GARANTIE LIMITÉE CONSISTE EN LA RÉPARATION
PRÉVUE PAR LA PRÉSENTE. WHIRLPOOL N’ASSUME AUCUNE RESPONSABILITÉ POUR LES DOMMAGES FORTUITS OU INDIRECTS.
Certains États et certaines provinces ne permettent pas l’exclusion ou la limitation des dommages fortuits ou indirects de sorte que ces
limitations et exclusions peuvent ne pas être applicables dans votre cas. Cette garantie vous confère des droits juridiques spéciques et vous
pouvez également jouir d’autres droits qui peuvent varier d’une juridiction à l’autre.