
© 2021 Sunbeam Products, Inc. All rights reserved. Distributed by Sunbeam
Products, Inc. Boca Raton, Florida 33431. Made in China.
BVMC-DT100_20ESM1 (US)
GCDS-MRC1383826-LD
ART0000882509
www.mrcoffee.com
1 0 CUP PRO GRAMMABLE COF F E E M A K E R
USER MANUAL

1.
INTRODUCTION
Welcome and congratulations on the purchase of your new Mr. Coffee®
Programmable Thermal Coffeemaker. Your new coffeemaker will wake up with
you in the morning and provide you breaks and treats during your hectic daily
activities.
How you enjoy your Mr. Coffee® Coffeemaker is up to you!
TABLE OF CONTENTS
Introduction................................................................................................................
1
Important Safeguards................................................................................................
2
Special Cord Set Instructions....................................................................................
3
Parts Diagram..............................................................................................................
5
CoffeemakerFeaturesandBenets.........................................................................
7
Clean Your Coffeemaker Before Using the First Time...........................................
7
Setting The Clock.......................................................................................................
8
Preparing for Use
• Suggested Coffee Measurement Chart................................................................
8
• Water Filtration System..........................................................................................
8
• Adding Water and Ground Coffee........................................................................
9
How To Brew Coffee Now..........................................................................................
9
How to Use the Strong Brew Function…………………….....................................
10
Brewing Coffee Later……….......................................……......................................
10
Cleaning and Maintaining Your Coffeemaker.......................……........................
10
Troubleshooting Your Mr. Coffee® Coffeemaker....................…..........................
12
Service, Maintenance...............................................................................................
14

2.
IMPORTANT SAFEGUARDS
When using electrical appliances, basic safety precautions should always be
followedtoreducetheriskofre,electricshock,and/orinjurytopersons
including the following:
1. Read all instructions.
2. Do not touch hot surfaces. Use handles or knobs.
3. To protect against electric shock, do not place or immerse cord, plugs, or
appliance in water or other liquid.
4. This appliance is not intended for use by children or by persons with
reduced physical, sensory, or mental capabilities, or lack of experience
and knowledge. Close supervision is necessary when any appliance is
used near children. Children should be supervised to ensure that they do
not play with the appliance. Keep the appliance and its cord out of reach
of children.
5. Unplug from outlet when either the appliance or display clock (if provided)
is not in use, and before cleaning. Allow to cool before putting on or
taking off parts, and before cleaning the appliance.
6. Do not operate any appliance with a damaged cord or plug or after the
appliance malfunctions, or has been damaged in any manner. Return
appliance to an Authorized Service Center for examination, repair or
adjustment. Do not attempt to replace or splice a damaged cord.
7. The use of an accessory not recommended by the appliance manufacturer
forusewiththisappliancemayresultinre,electricshockorinjuryto
persons.
8. Do not use outdoors.
9. Do not let cord hang over edge of table or counter, or touch hot surfaces.
10. Do not place on or near a hot gas or electric burner, or in a heated oven.
11. Alwaysattachplugtoappliancerst,thenplugcordintothewalloutlet
(for appliances with detachable cords). To disconnect, turn any control to
the off position, then remove plug from wall outlet.
12. Do not use appliance for other than intended use.
13. All lids should be closed during use.
14. Scalding may occur if the lid is removed or brew basket door is opened
during or immediately after the brewing cycles. Contents may be hot.
Allow to cool before opening the lid.
For appliances with glass containers:
15. The container is designed for use with this appliance. It must never be
used on a range top.
16. Do not set a hot container on a wet or cold surface.
17. Avoidsuddentemperaturechanges,suchasrinsing,washing,lling,or
immersing a hot container with cold liquids.
18. Do not use a cracked or chipped container or a container having a loose or
weakened handle.
19. Do not clean container with cleansers, steel wool pads, or other abrasive
material.
3.
SAVE THESE INSTRUCTIONS
HOUSEHOLD USE ONLY
POWER CORD INSTRUCTIONS
A short power supply cord (or detachable power-supply cord) may be
provided to reduce risks resulting from becoming entangled in or tripping
over a longer cord. Longer detachable power-supply cords or extension
cords are available and may be used if care is exercised in their use. If a long
detachable power-supply cord or extension cord is used:
a. The marked electrical rating of the detachable power-supply cord or
extension cord should be at least as great as the electrical rating of the
appliance;
b. If the appliance is of the grounded type, the extension cord should be a
grounding type 3-wire cord; and
c. The longer cord should be arranged so that it will not drape over the
counter top or table where it can be pulled on by children or tripped over
unintentionally.
Do not pull, twist or otherwise abuse the power cord.
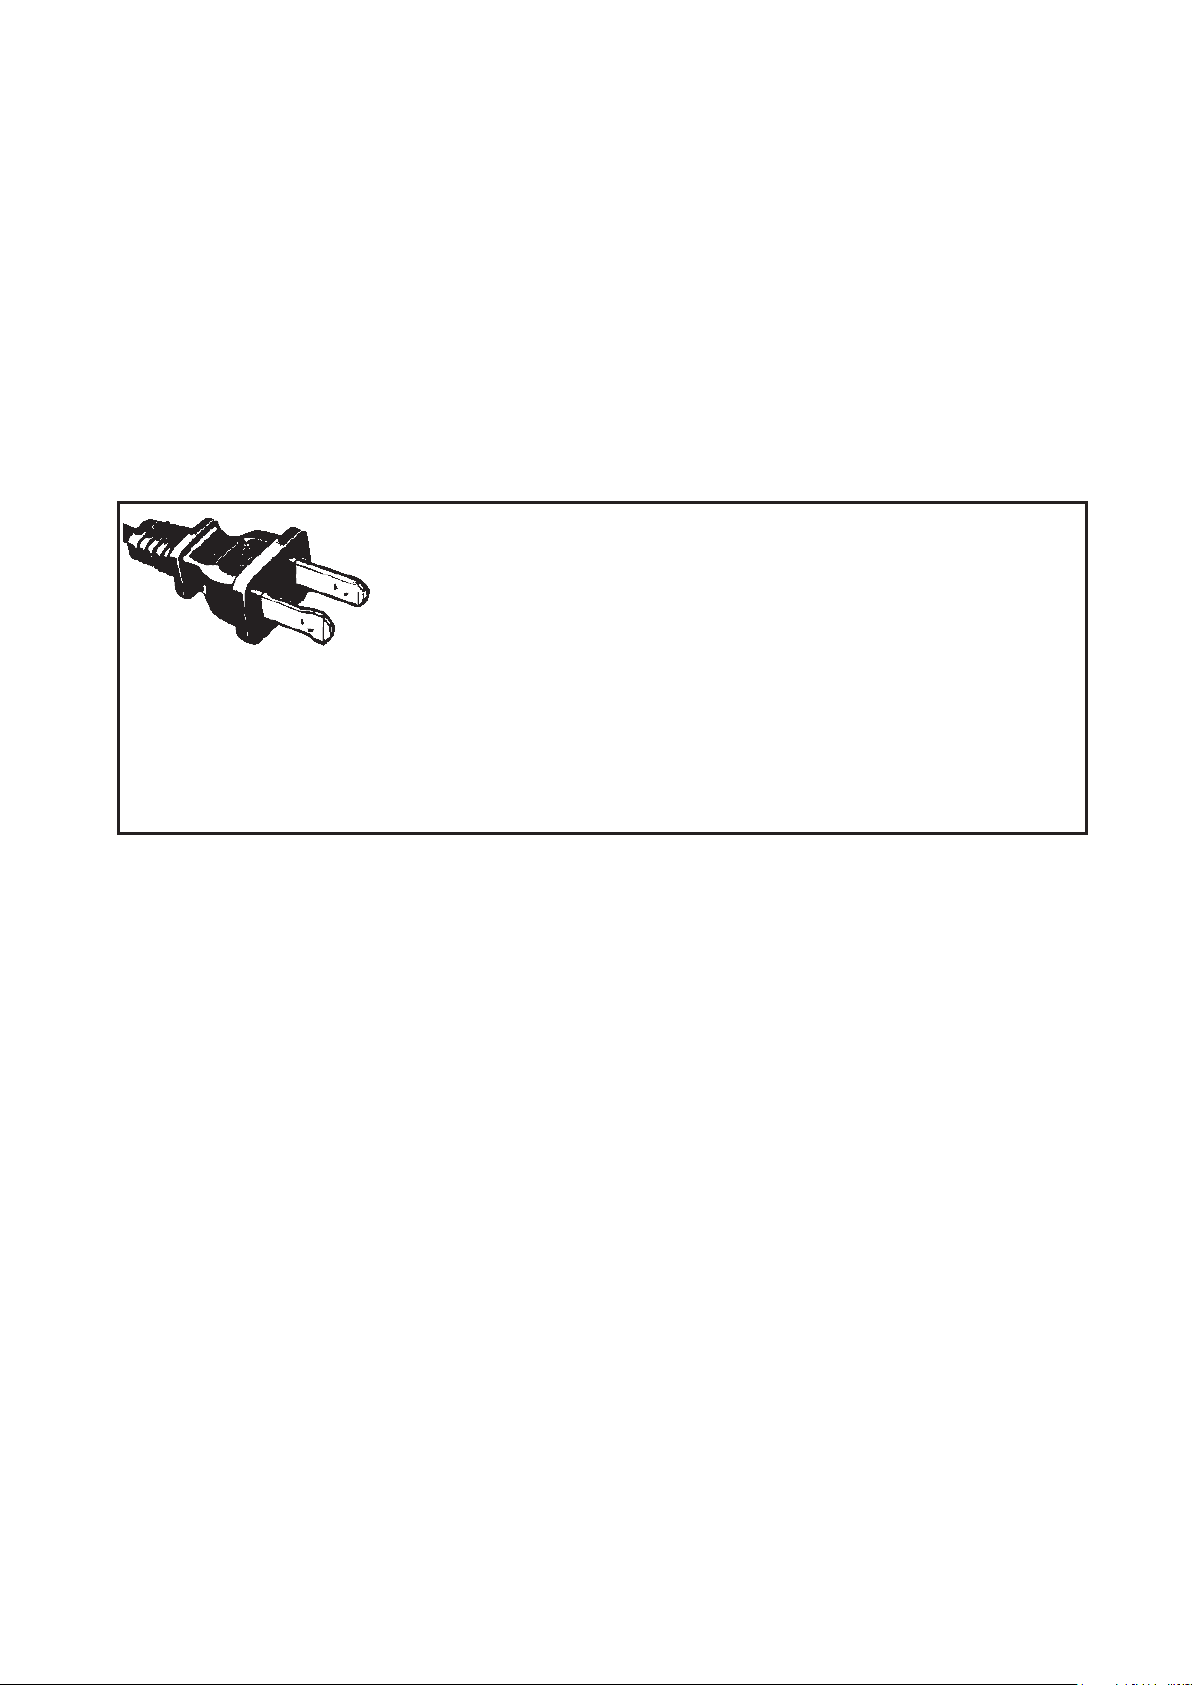
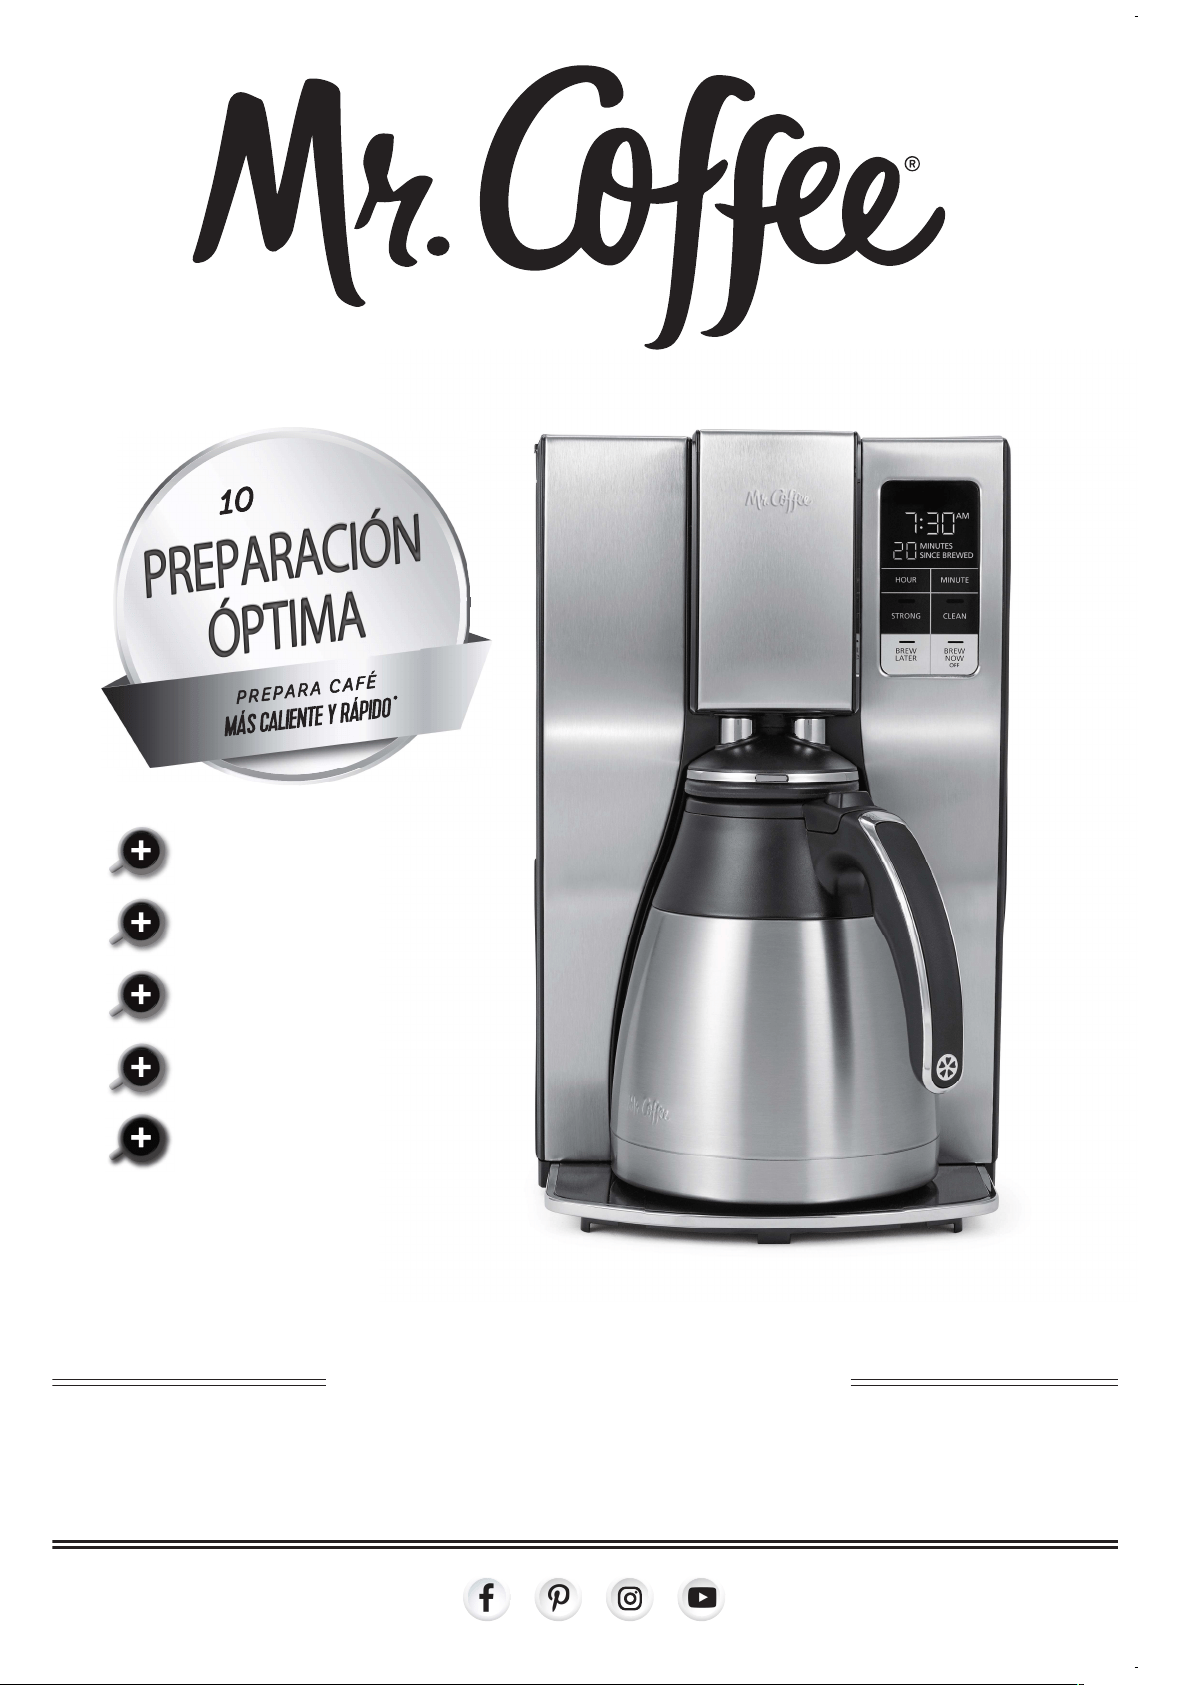
POLARIZED PLUG
This appliance has a polarized plug, (one blade is
wider than the other). As a safety feature to reduce
theriskofelectricalshock,thisplugisintendedtot
inapolarizedoutletonlyoneway.Iftheplugdoesnottfullyintheoutlet,
reversetheplug.Ifitstilldoesnott,contactaqualiedelectrician.Donot
attempt to defeat this safety feature or modify the plug in any way. If the
plugtslooselyintotheACoutletoriftheACoutletfeelswarmdonotuse
that outlet.
For appliances with service panels:
20. WARNING: TO REDUCE THE RISK OF FIRE OR ELECTRIC SHOCK, DO
NOT REMOVE THIS COVER. NO USER–SERVICEABLE PARTS INSIDE.
REPAIR SHOULD BE DONE BY AUTHORIZED SERVICE PERSONNEL ONLY.

4.
PRODUCT NOTICES
1. Placetheapplianceonahard,�at,levelsurfacetoavoidinterruptionof
air�owunderneaththecoffeemaker.
2. Glass decanters only: Discard the decanter immediately if it is ever boiled
dry.
3. Glass decanters only: Protect the decanter from sharp blows, scratches or
rough handling.
4. Do not operate the appliance with an empty water tank.
5. Keep the area above the appliance clear during use, as hot steam will
escape the appliance.

5.
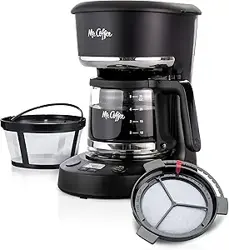
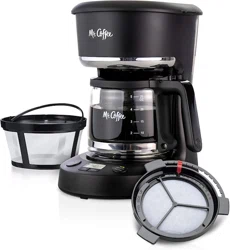
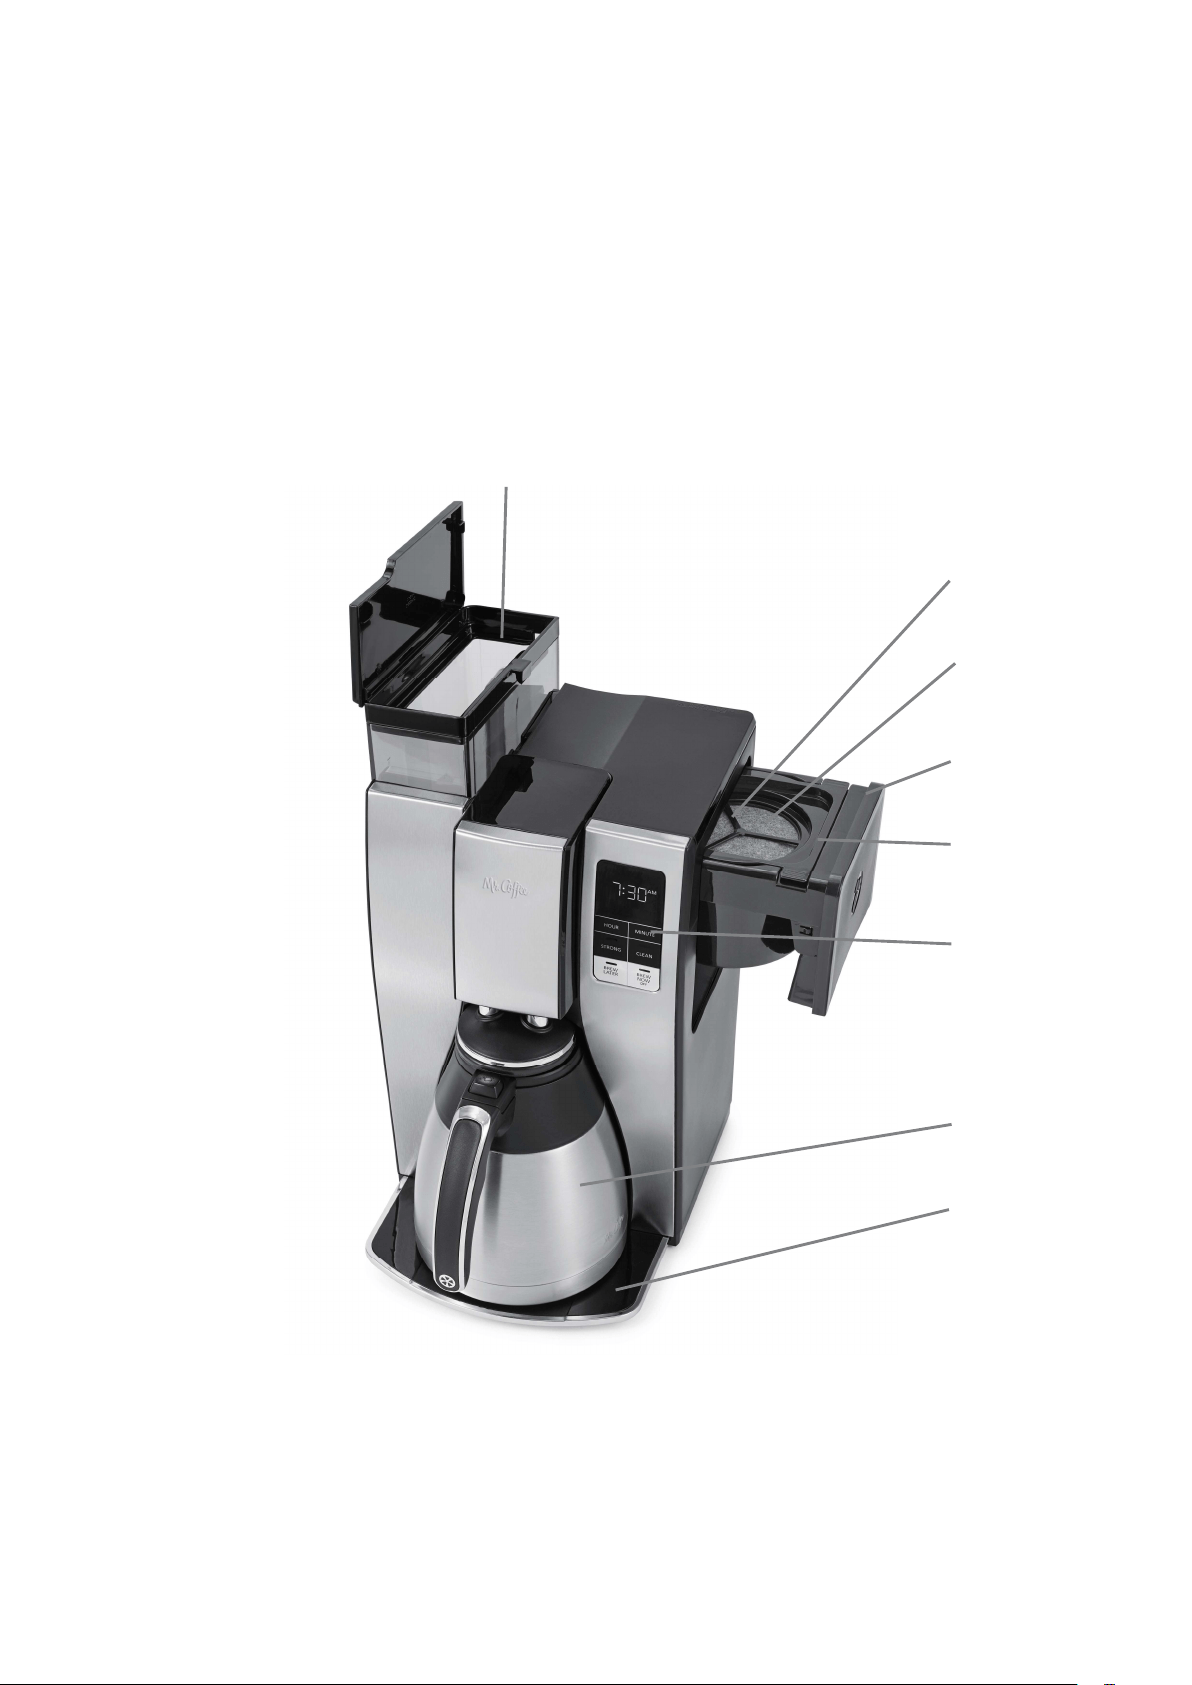
GET TO KNOW YOUR COFFEEMAKER
1. Removable Water
Reservoir
2. Brew Basket Drawer
3. Brew Basket
4. Control Panel
5. Thermal Carafe
6. Platform
7. Water Filter Frame
8. Water Filter Disk
1
7
2
3
4
5
6
8
6.
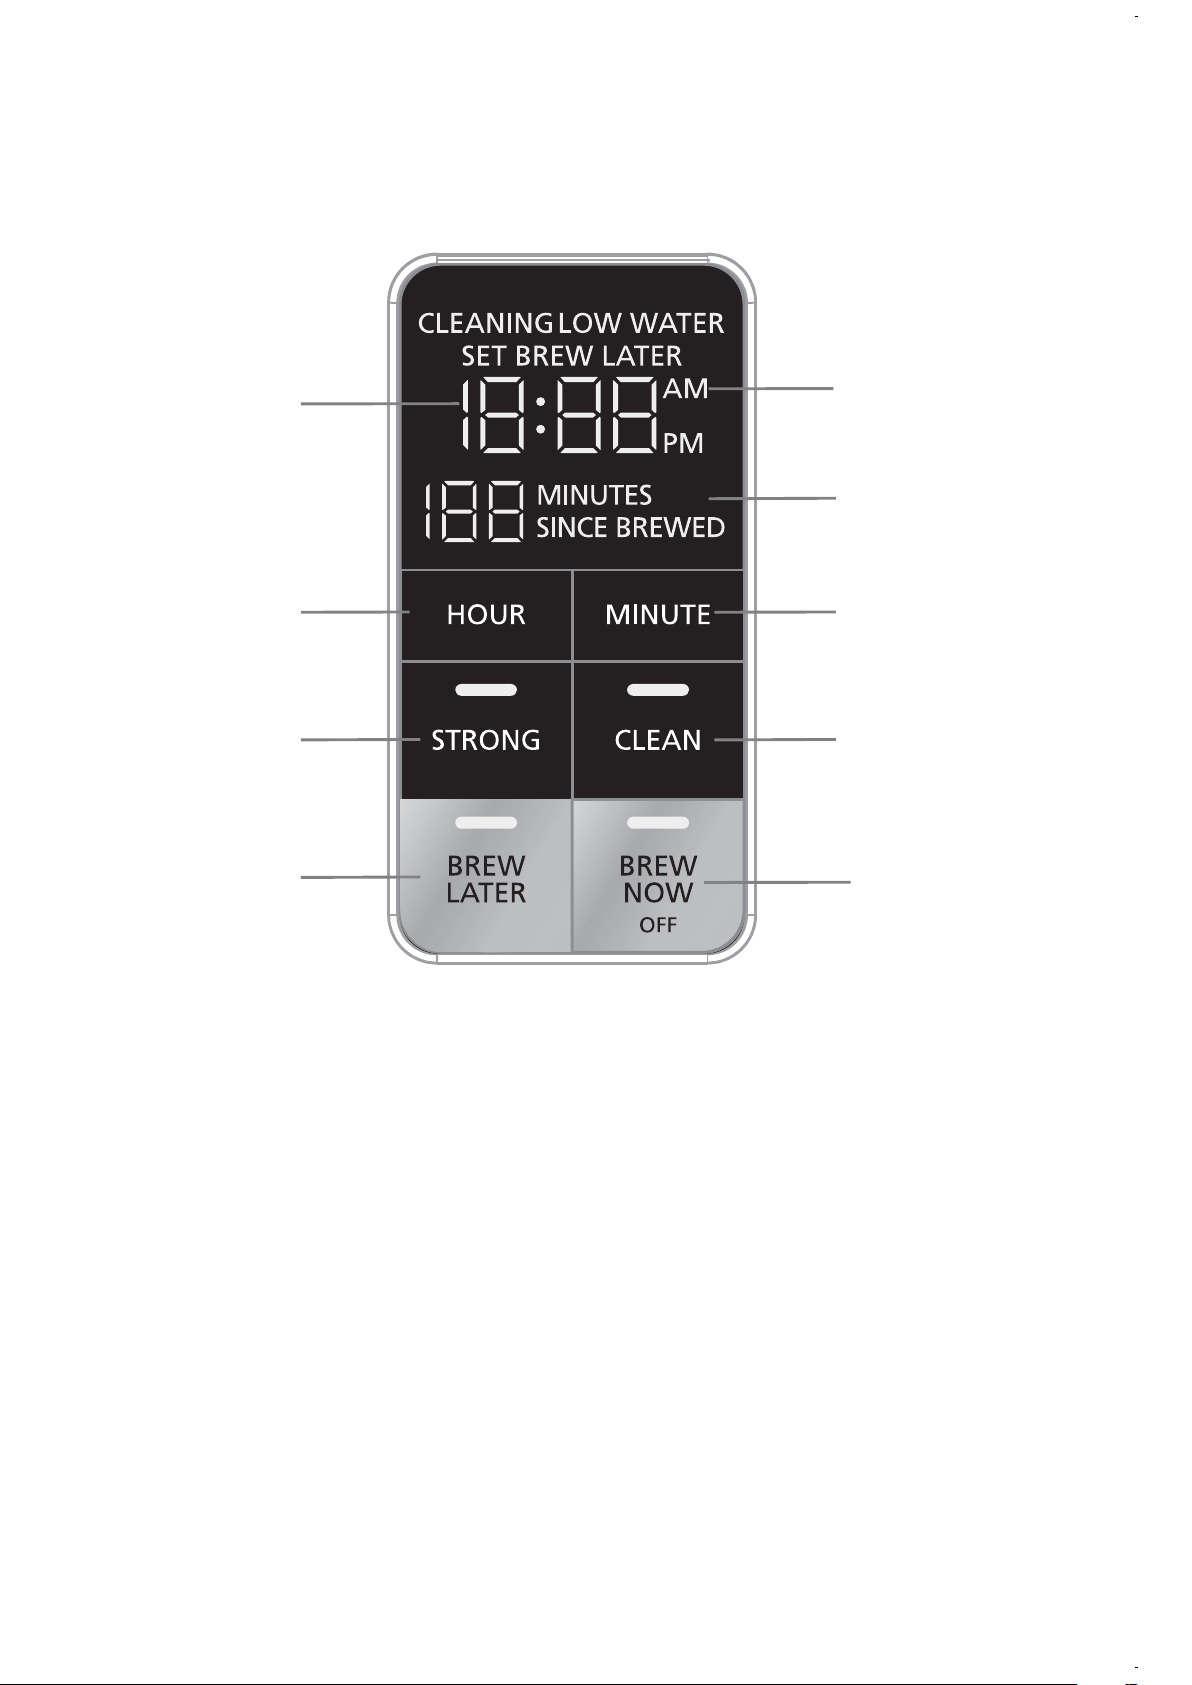
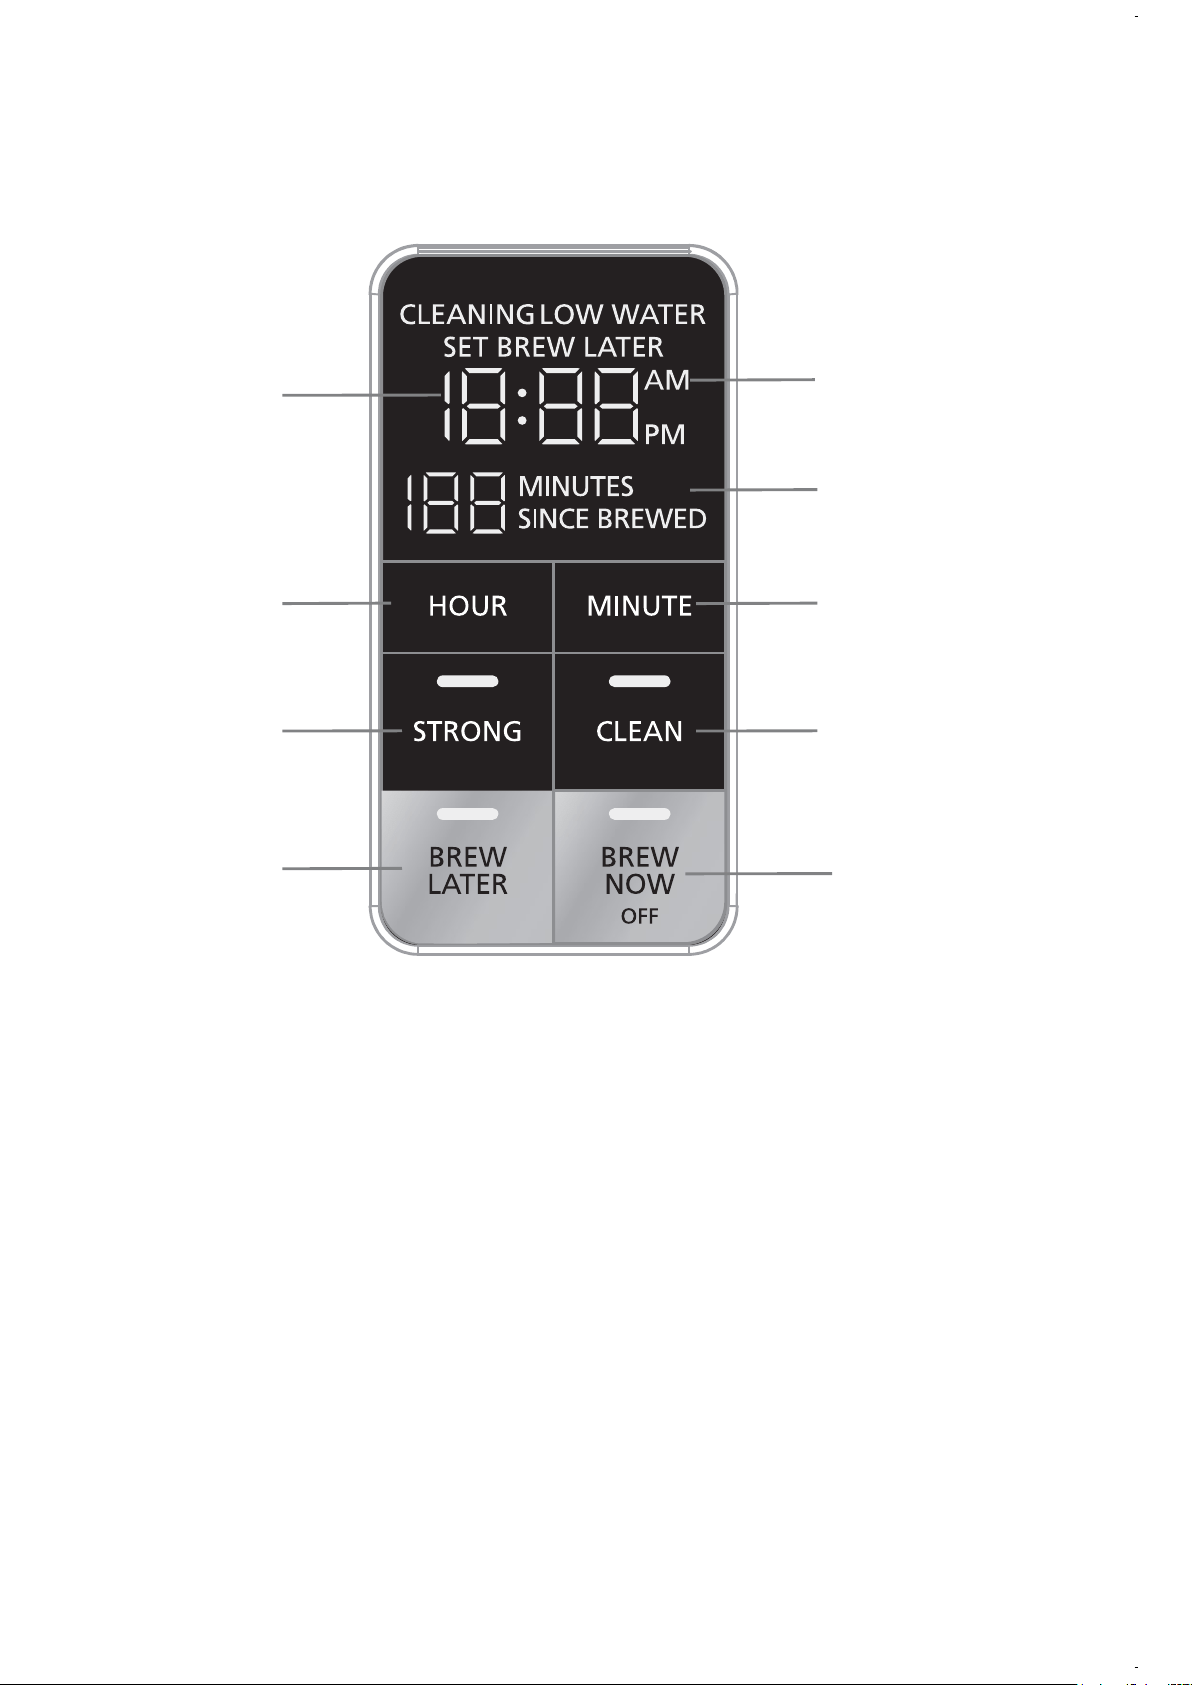
UNDERSTAND YOUR CONTROL PANEL
A. BrewNow/OFFButton/Indicator
B. BrewLaterButton/Indicator
C. CleanButton/Indicator
D. StrongBrewButton/Indicator
E. Minute Button
F. Hour Button
G. Freshness Timer Display
H. Clock Display
I. AM/PMIndicator
H
F
D
B
I
G
E
C
A

7.
COFFEEMAKER FEATURES AND BENEFITS
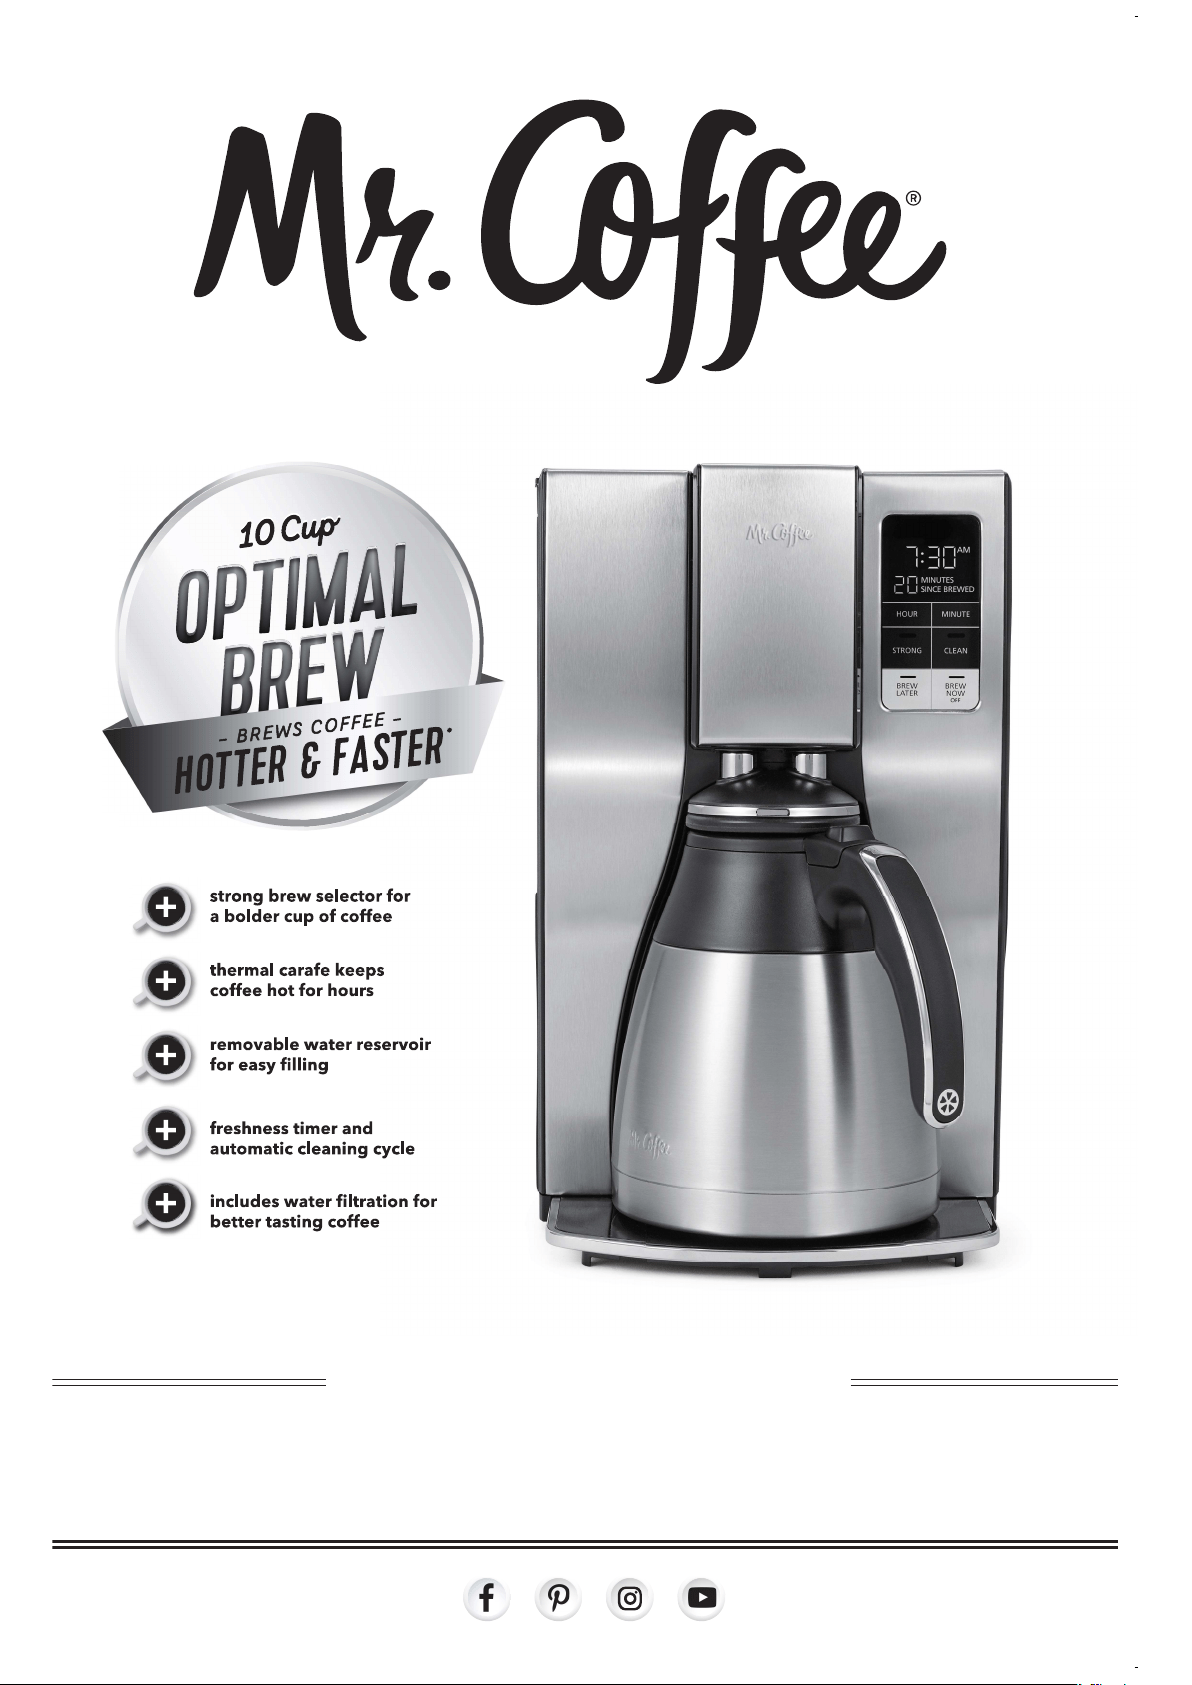
Your new Mr. Coffee® 10-cup programmable thermal coffeemaker has the
following features:
• Brewing Capacity – 10 Cups
• Optimal Brew – Brews coffee 20% faster at a higher temperature of up to
205 degrees for richer taste.
• Strong Brew – Select strong brew for a bolder cup of coffee.
• Brew Later – Set it ahead and wake up to fresh brewed coffee.
• Double Walled Stainless-Steel Thermal Carafe – Holds temperature and
fresh�avorofcoffeesoeverycuptastesjustbrewed.
• Removable Filter Basket–Thelterbasketpullsoutforfastandeasy
cleaningandlling.
• Removable Water Reservoir – Allows you to take the water reservoir out for
easylling.
• Freshness Timer – Monitors how fresh the coffee is from the time it’s
brewed.
• Automatic Clean Cycle – Easily removes calcium and mineral deposits from
the water tank and heater.
• Grab-A-Cup Auto Pause – Stops the brewing cycle to allow you to grab a
cupbeforebrewingisnished.
• Includes Water Filtration – Removes up to 97% of the chlorine from the
water and improves the taste of your coffee.
• Cord Storage – Safely stores excess cord to keep your countertop neat.
CLEAN YOUR COFFEEMAKER BEFORE USING
THE FIRST TIME
MakesureyourrstcupofcoffeeisasgoodascanbebycleaningyourMr.
Coffee®Coffeemakerbeforeitsrstuse.Justfollowthesesimplesteps:
1. Washthecarafe,carafelidandthelterbasketinamixtureofmild
detergent and water. Rinse each thoroughly (please refer to the Parts
Diagram).
2. Replace all the parts and attach the water reservoir. Then, run a brew cycle
withwateronly,withoutaddingcoffeeandcoffeelter.
3. When brewing is complete, turn your coffeemaker off, discard the water
inthecarafeandrinsethecarafe,carafelid,andlterbasket.Your
coffeemaker is now ready to use. Enjoy it!
8.
SETTING THE CLOCK
To Set the Clock:
1. Plugthepowercordintoastandardelectricaloutlet.Theclockwill�ash
on the control panel to indicate that the time has not been set yet.
2. Press the HOUR and MINUTE buttons until you reach the current time.
Note the AM or PM indicator.
The clock is now set!
NOTE: Pressing any button before setting the clock will cause the clock to start
keeping time from 12:00 a.m. You must set the clock if you want to use the
Brew Later feature.
PREPARING FOR USE
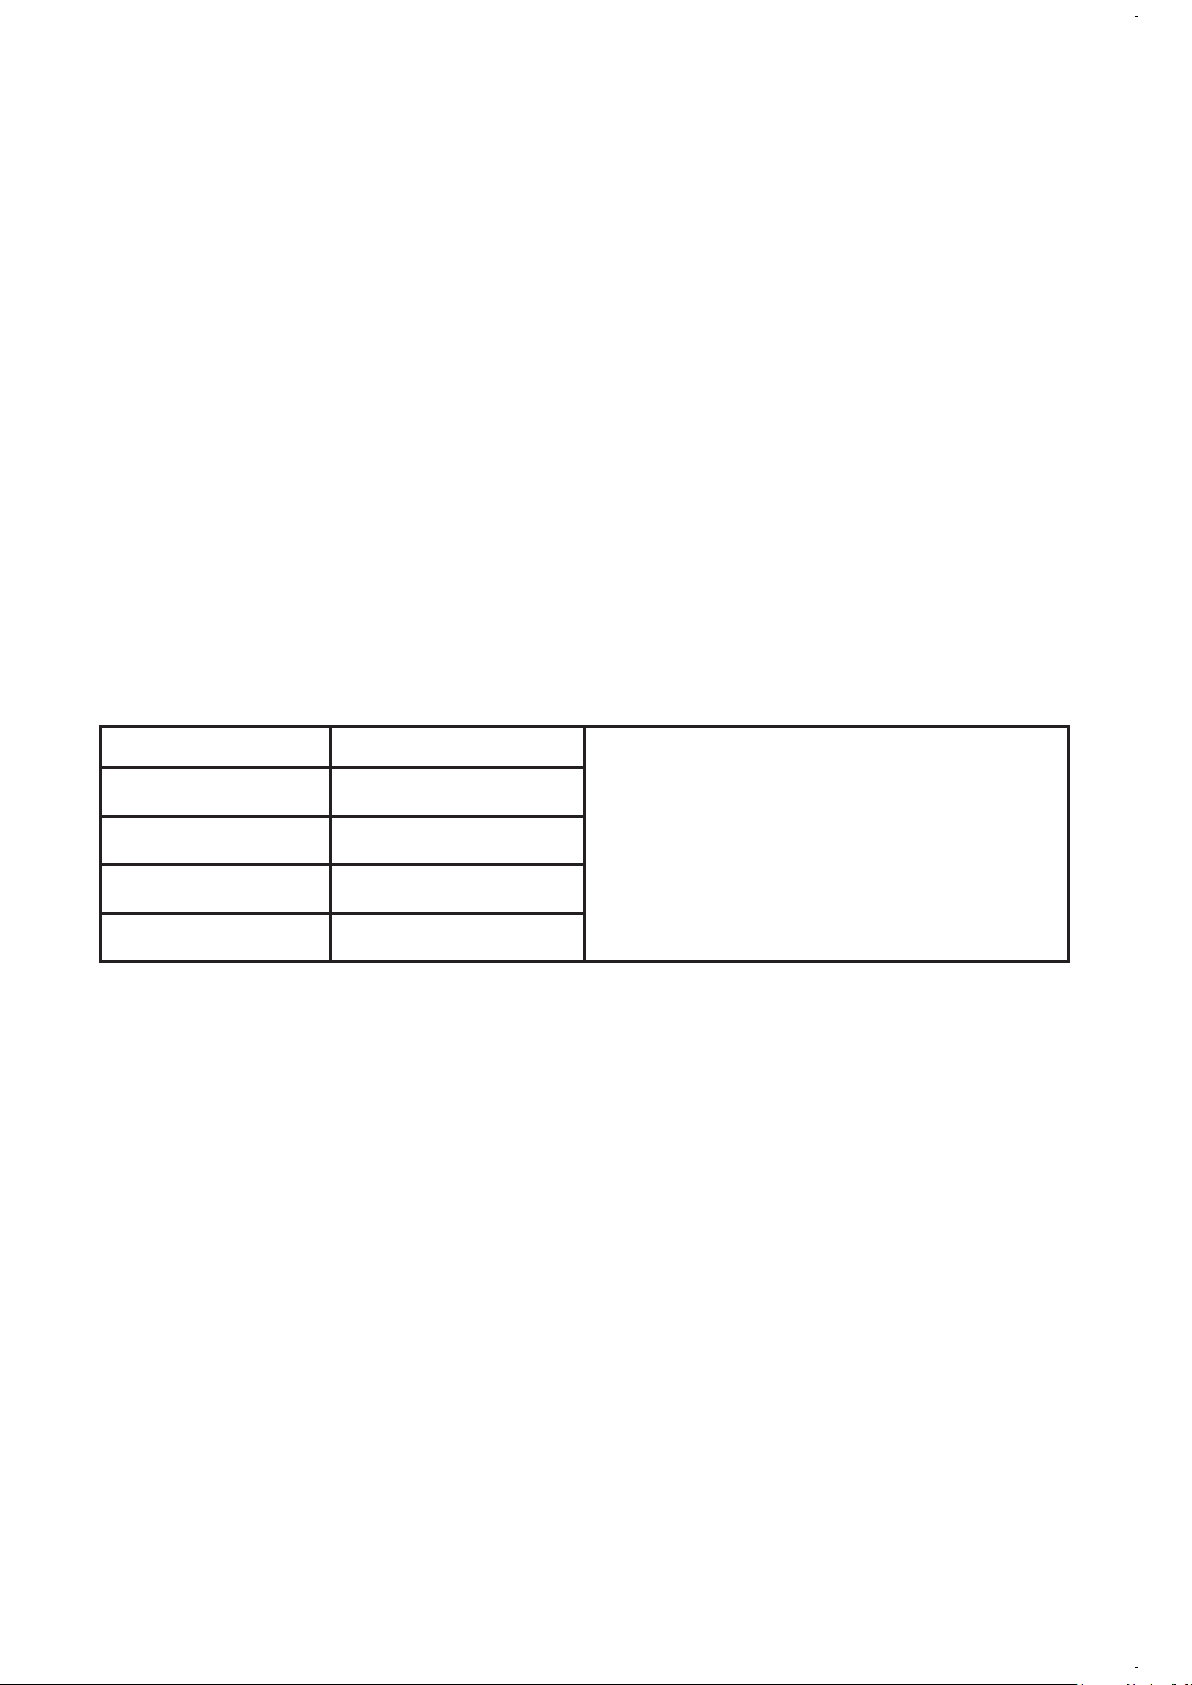
A. Suggested Coffee Measurement Chart
For best results, use a level tablespoon for ground coffee measurement. Make
sure you use medium grind coffee for a perfect brew.
To Brew Ground Coffee
1leveltablespoon(tbsp)=5gr./0.17
oz.
1cup=5�.oz.ofbrewedcoffee
Vary the amount of coffee you use to
suit your taste
10 cups 7.5 tbs.
8 cups 6.5 tbs.
6 cups 4.5 tbs.
4 cups 3 tbs.
B. Water Filtration System
YouaretheownerofaMr.Coffee®waterltrationsystem.UsingtheMr.
Coffee®carbon-basedwaterlterimprovesthetasteofyourcoffeeby
removing up to 97% of the chlorine from the water you may use to brew your
coffee.TousethewaterltrationsysteminyourMr.Coffee®Coffeemaker,
please follow these steps:
1. Aligntheredindicatoronthewaterlterframeattachedtothebrew
basket, to the letter that corresponds with the month that you are using the
disk. This serves to remind you to change the disk every month (approx. 30
brewing cycles).
NOTE:Foroptimumresults,usethewaterltrationsystemwitha
permanentlter(soldseparately.)
2. Rinsethewaterlterdiskinfreshwaterbeforerstuse.
3. Toplacethewaterlterdisks,twistthegraydiskcoverfromyourwaterltration
system. Insert the new disk into the frame and twist the cover back into place.
4. Follow “Adding Water and Ground Coffee” instructions.
5. Whenyouaredonebrewingyourcoffee,rinsethewaterlterdiskwith
freshwater.Donotputyourwaterlterdiskinthedishwasher.

9.
C. Adding Water and Ground Coffee
1. Open the brew basket drawer.
2. PlaceaMr.Coffee®brand10–12cuppaperbasket-stylelteroraMr.
Coffee®permanentlterintotheremovablelterbasket.
NOTE:Ifusingpaperlters,itisimportantthatthesidesoftheltert
�ushagainstthesideofthelterbasket.Ifltercollapseoccurs,dampen
thelterbeforeplacinginthelterbasketandaddinggroundcoffeeand
water.
3. Add the desired amount of coffee and gently shake to level the coffee. See
the Suggested Coffee Measurement Chart.
4. Slide the brew basket back into place.
5. Fill the removable water reservoir with cold, fresh water to the desired
capacity(1cupequals5ounces.)Foreasyandaccuratelling,thewater
markings on the removable water reservoir shows the amount of water
neededtomakethecorrespondingdesirednumberofcups.Donotll
pastthe“10cupMAXline”orwaterwill�owoutofthecoffeemaker.
NOTE: The amount of coffee brewed will always be slightly less than the
amount of water poured in the water reservoir. This is due to the minimum
absorption of water by the coffee grounds.
HOW TO BREW COFFEE NOW
1. After completing the steps in the “Adding Water and Coffee” section and
withthecarafeandthelterbasketsecurelyinplace,turnthecoffeemaker
on by pressing the BREW NOW button once. The BREW NOW light will
turn on to signal that the coffeemaker is on and brewing.
2. There will be an audible signal when the brewing is complete.
3. Aftertheusedcoffeegroundshavecooled,carefullyremovethelter
basket and discard them.
NOTE: The brew basket drawer is hot after brewing. Always allow the
coffeemaker to cool down before cleaning.
4. Prior to making a second pot of coffee, turn the coffeemaker off. This will
reset the Freshness Timer feature. To turn the coffeemaker off, press the
BREWNOW/OFFbutton.
5. Make sure the carafe is empty before starting to brew coffee.
6. Be sure to turn your coffeemaker off when no longer using it.
The Freshness Timer Feature
The Freshness Timer feature lets you know how long your coffee has been
waiting for you. At the start of the brew cycle, the Freshness Timer feature
will automatically be activated. The timer will appear in the display under the
clock. This display will be visible any time you are brewing coffee.

10.
HOW TO USE THE STRONG BREW FUNCTION
To enjoy a richer and bolder cup of coffee, follow these steps:
1. Start by completing the steps in the “Adding Water and Coffee” section.
2. Then, press the STRONG button once. The indicator light will turn on.
3. Press BREW NOW. The indicator light for BREW NOW will also turn on and
your coffeemaker will begin brewing.
4. There will be an audible signal when the brewing is complete.
5. Enjoy!
HOW TO BREW COFFEE LATER
1. Youmustrstsetthetimeforwhenyouwouldlikethecoffeemakerto
begin brewing your coffee.
2. Simply press the BREW LATER button and set the brew time by pressing
the HOUR and MINUTE buttons. Note the AM or PM indicator.
3. Within a few seconds the display will change to the current time.
4. The BREW LATER time is now set.
5. Prepare your coffeemaker as described in Adding Water and Ground
Coffee section.
6. At the pre-set time, the BREW NOW indicator light will turn on and the
BREW LATER indicator light will turn off, indicating the brewing has started
in the selected brew strength. The Freshness Timer feature will start.
NOTE: As a safety feature, your coffeemaker will NOT start again
automatically the next day. If you want your coffee to brew at the same
timethefollowingday,simplyaddanewlter,coffeeandwaterandset
BREW LATER, by repeating Steps 2 and 3 above.
To cancel BREW LATER: Press the BREW LATER button until all lights turn off.
CLEANING AND MAINTAINING YOUR
COFFEEMAKER
Daily Cleaning
• Always unplug the coffeemaker and allow to cool before cleaning.
• Removeandwashthelterbasket,permanentlter(soldseparately),
carafe and carafe lid in a solution of hot water and mild liquid soap.
• Never use abrasive cleansers, steel wool pads or other abrasive materials.
CAUTION! Never immerse the coffeemaker itself in water, in any other liquid
or place in the dishwasher.
Regular Cleaning and Maintenance
Yourcoffeemakerisequippedwithacleanindicator/function.TheCleanFunction
is critical to optimize the performance of the coffeemaker. The clean function will
removeminerals(calcium/limestone)foundinwaterthatleavedepositsinyour
coffeemaker and affect its performance. Maintaining your coffeemaker will ensure
that it will continue to brew fast, hot and make great coffee.

11.
Clean Function Indicator
Your Clean Indicator will illuminate when:
• Your coffeemaker has counted 90 brew cycles OR Your coffeemaker
experiences two consecutive brew cycles lasting longer than 9.5 minutes.
NOTE: The cleaning light will NOT turn off unless you run the CLEAN
FUNCTION in its entirety (this will take 45 minutes).
Follow these steps to run the clean function:
1. Fill reservoir with 6 cups of undiluted, white household vinegar.
2. Removeoptionalwaterltrationdisk.Placeemptypaperlteror
permanentlterinbrewbasket.
3. Place the empty carafe back in the unit.
4. Press the CLEAN button to activate the Cleaning Function.
a. Whenactivated,thecleaninglightwillpulse,andtheBrewNow/Off
button will remain illuminated.
b. The entire cycle will take 45 minutes to complete.
5. During the cleaning cycle your coffeemaker will:
a. Slow brew approx. 3 cups of cleaning solution.
b. Pause for 30 minutes (the CLEAN light will pulse to alert you that the
process is active).
c. After 30 minutes, your coffeemaker will brew the remainder of the
cleaning solution.
6. When complete, the CLEAN indicator light will turn off and your
coffeemaker will turn off.
7. Discardthecleaningsolution,paperlter(orrinsethepermanentlter)
andrinsethecarafeandlterbasketthoroughlywithcleanwater.
8. Brew 2 full 10 cup cycles with clean water.
Your coffeemaker is now clean and ready to brew the next pot of delicious, hot
coffee!
Water Filtration Disk Replacement
Yourwaterltrationdiskwillneedtobereplacedonceamonth(approx.30
brew cycles). If the machine will not be in use for an extended period of time,
rinsethewaterlterwithrunningwaterandcleanthecoffeemakerbeforeuse.
Cleaning the Thermal Carafe
Hard water can leave a whitish stain on the carafe, and coffee may then turn
this stain brown. To remove carafe stains:
• Fill the carafe with a solution of equal parts water and vinegar and let the
solution stand in the carafe for approximately 20 minutes.
• Discard the solution, then wash and rinse the carafe. Do not use harsh
abrasive cleaners that may scratch the carafe.
NOTE: Thermal carafe is not dishwasher safe.
12.
TROUBLESHOOTING YOUR MR. COFFEE
®
COFFEEMAKER
Your Mr. Coffee® Coffeemaker has been carefully designed to give you many
years of trouble-free service. In the unlikely event that your new coffeemaker
does not operate satisfactorily, please review the following potential problems
and try the steps recommended BEFORE you call an Authorized Sunbeam
Service Center.
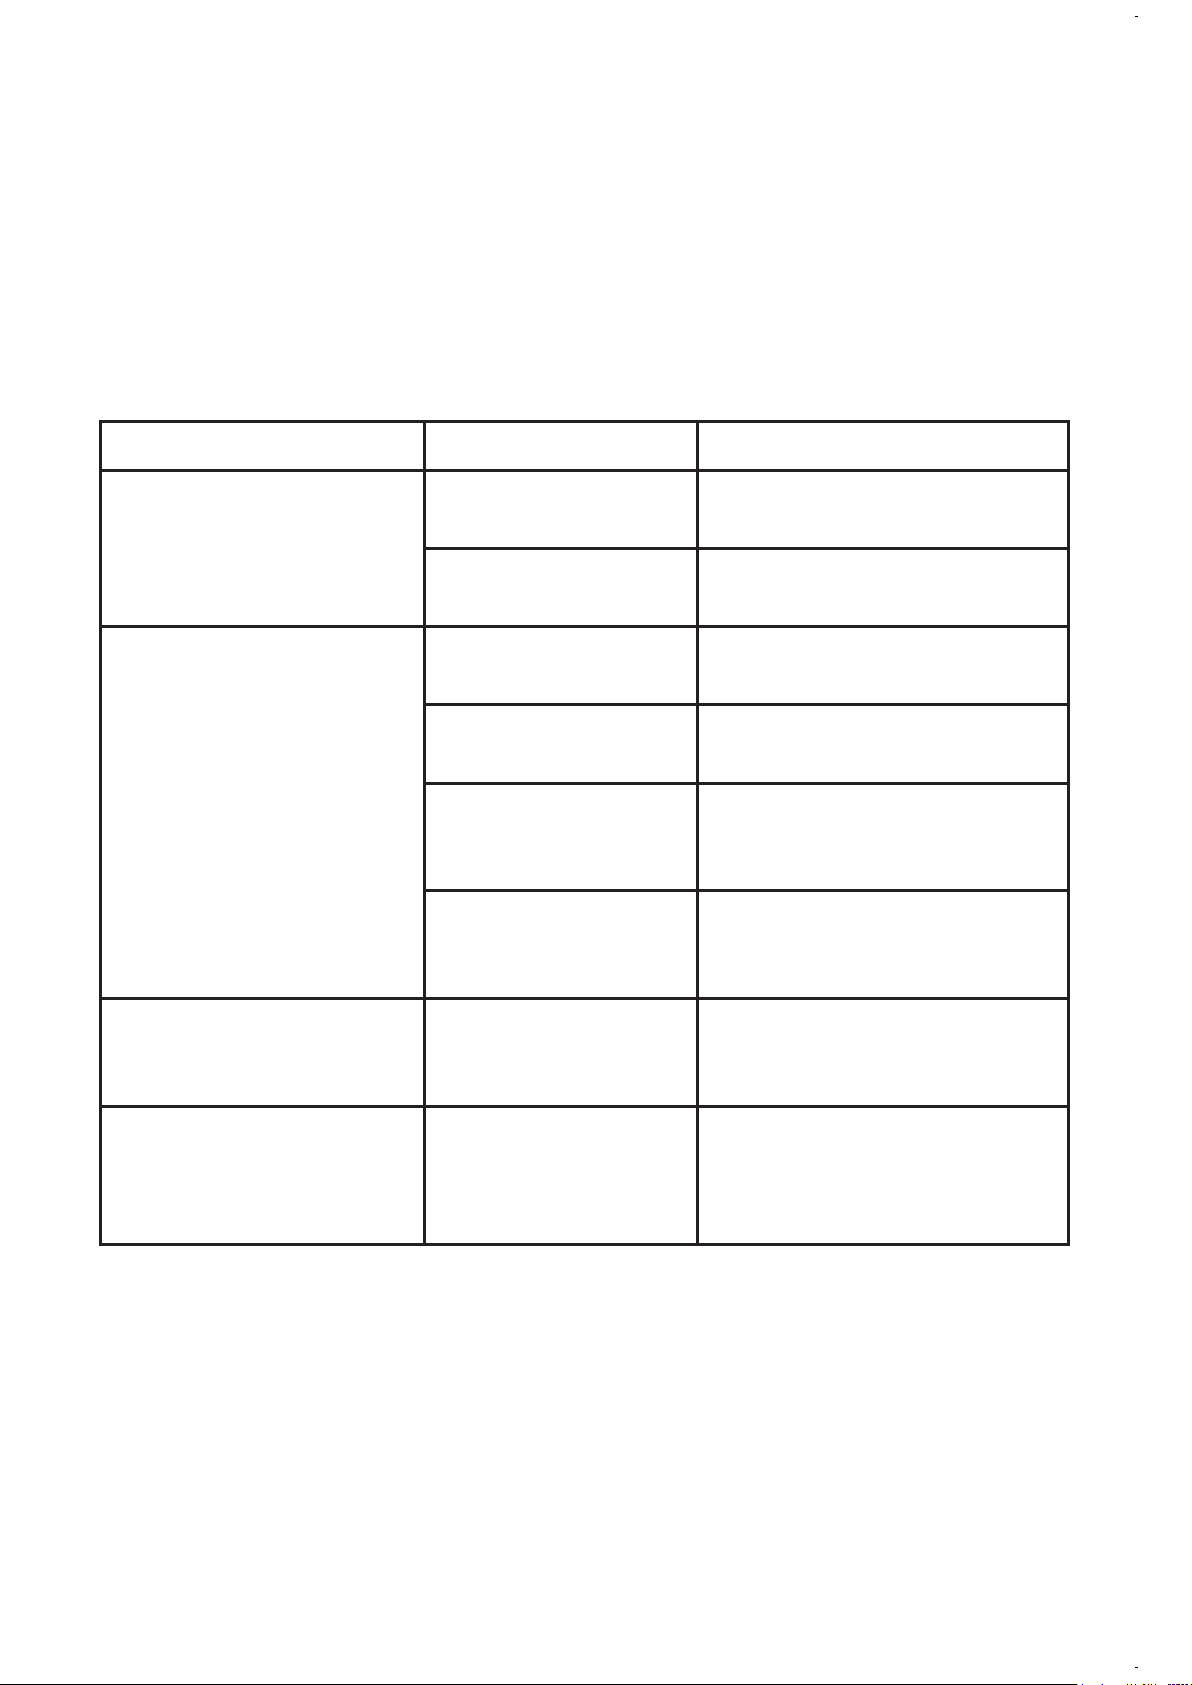
PROBLEM POSSIBLE CAUSE SOLUTION
THE“BREWNOW”/
ON LIGHT DOES NOT
LIGHT UP
The appliance is
unplugged.
PLUG UNIT IN.
There’s a power
outage.
WAIT FOR POWER TO BE
RESTORED.
THE COFFEE IS NOT
BREWING
The appliance is
unplugged.
PLUG UNIT IN.
There’s a power
outage.
WAIT FOR POWER TO BE
RESTORED.
Not enough water
in water reservoir.
FILL WATER RESERVOIR
ABOVE MINIMUM LEVEL
MAKERING.
Thelterbasket
is not properly
inserted.
INSERT FILTER BASKET
CORRECTLY.
THE COFFEEMAKER
ONLY BREWS WATER
There are no coffee
groundsinthelter
basket.
ADD THE DESIRED
AMOUNT OF COFFEE TO
THE FILTER.
THE COFFEEMAKER
BREWS SLOWLY
The coffeemaker
needs cleaning.
CLEAN COFFEEMAKER AS
DESCRIBED IN “CLEANING
AND MAINTAINING”
SECTION.
13.
THE FILTER BASKET
OVERFLOWS
Thelterbasket
is not properly
inserted.
INSERT FILTER BASKET
CORRECTLY.
The carafe is not
placed all the way
on the platform.
PLACE CARAFE
CORRECTLY ON Platform.
Too many coffee
grounds were
placedinthelter.
REMOVE FILTER DISCARD
GROUNDS. IF PAPER FILTER,
REPLACE. IF PERMANENT
FILTER, RINSE. BEGIN
BREWING PROCESS AGAIN.
The carafe was
removed from the
platform for more
than 30 seconds.
TURN OFF AND UNPLUG
THE UNIT. ALLOW TO
COOL. WIPE UP THE SPILL.
THE COFFEE IS NOT HOT There’s a power
outage.
WAIT FOR POWER TO BE
RESTORED.
THE COFFEE TASTES
BAD
Coffee grounds
other than for an
automatic drip
coffeemaker were
used.
USE COFFEE GROUNDS
RECOMMENDED FOR
AUTOMATIC DRIP
COFFEEMAKERS.
The ground coffee-
to-water ratio was
unbalanced.
USE CORRECT GROUND
COFFEE-TO-WATER RATIO.
The coffeemaker
needs cleaning.
CLEAN COFFEEMAKER
AS DESCRIBED IN
“MAINTAINING YOUR
COFFEEMAKER” SECTION.
THE GROUNDS ARE IN
THE COFFEE
Thelterisnot
properly seated in
the basket.
SEAT FILTER PROPERLY
WITHIN THE FILTER
BASKET.
Theltercollapsed. REMOVE FILTER AND
REPLACE.
THE “BREW NOW” LED IS
FLASHING FAST
Not enough water
in water reservoir.
Fill the water reservoir
above minimum level
marking.
Do you still have questions? You can call us toll-free at the Consumer Service
Department, 1-800-MR COFFEE (1-800-672-6333) or you can visit us at www.
mrcoffee.com.

14.
SERVICE AND MAINTENANCE
Replacement Parts
• Coffee Filters – FFor better tasting coffee, we recommend that you use
aMr.Coffee®brand10–12cupbasket-stylepaperlteroraMr.Coffee®
brandpermanentlter.Theseltersareavailableatmostgrocerystores.
• Water Filtration–Replacementwaterltrationdiskscanbepurchased
through your local retailer, online at www.mrcoffee.com, or by calling
1-800-MR-COFFEE (1-800-672-6333) in the U.S. or 1-800-667-8623 in
Canada.
• Thermal Carafe – Please visit us online at www.mrcoffee.com, or call
1-800-MR COFFEE (1-800-672-6333) in the U.S. or 1-800-667-8623
inCanadaforinformationonwhereyoucanndastorethatcarries
replacement carafes.
User Maintenance
This appliance has no user serviceable parts. Any servicing beyond that
described in the Cleaning Section should be performed by an Authorized
Service Representative only. See warranty available online.

15.
1 YEAR LIMITED WARRANTY
Sunbeam Products, Inc, (“Sunbeam”) warrants that for a period of one year
from the date of purchase, this product will be free from defects in material
and workmanship. Sunbeam, at its option, will repair or replace this product
or any component of the product found to be defective during the warranty
period.
Replacement will be made with a new or remanufactured product or
component. If the product is no longer available, replacement may be made
with a similar product of equal or greater value. This is your exclusive warranty
from Sunbeam.
This warranty is valid for the original retail purchaser from the date of initial
retail purchase and is not transferable. Keep the original sales receipt. Proof
of purchase is required to obtain warranty performance. Sunbeam dealers,
service centers, or retail stores selling Sunbeam products do not have the right
to alter, modify or any way change the terms and conditions of this warranty.
This warranty does not cover normal wear of parts or damage resulting from
any of the following: negligent use or misuse of the product, use on improper
voltage or current, use contrary to the operating instructions, disassembly,
repair or alteration by anyone other than Sunbeam or an authorized Sunbeam
servicecenter.Further,thewarrantydoesnotcover:ActsofGod,suchasre,
�ood,hurricanesandtornadoes.
What are the Limits on Sunbeam’s Liability?
Sunbeam shall not be liable for any incidental or consequential damages
caused by the breach of any express, implied or statutory warranty or
condition.
Except to the extent prohibited by applicable law, any implied warranty or
conditionofmerchantabilityortnessforaparticularpurposeislimitedin
duration to the duration of the above warranty.
Sunbeam disclaims all other warranties, or conditions or representations,
express, implied, statutory or otherwise.
Sunbeam shall not be liable for any damages of any kind resulting from the
purchase, use or misuse of, or inability to use the product including incidental,
special,consequentialorsimilardamagesorlossofprots,orfordamages
arising from any tort, including negligence or gross negligence, or fault
committed by Sunbeam, its agents or employees or for any breach of contract,
fundamental or otherwise, or for any claim brought against purchaser by any
other party.

16.
Some states or jurisdictions do not allow the exclusion or limitation of
incidental or consequential damages or limitations on how long an implied
warranty lasts, so the above limitations or exclusions may not apply to you.
Thiswarrantygivesyouspeciclegalrights,andyoumayalsohaveother
rights that vary from state to state or jurisdiction to jurisdiction.
How to Obtain Warranty Service
In the U.S.A.
If you have any question regarding this warranty or would like to obtain
warranty service, please call 1-800-672-6333 and a convenient service center
address will be provided to you.
PLEASE DO NOT RETURN THIS PRODUCT TO ANY OF THESE ADDRESSES
OR TO THE PLACE OF PURCHASE.

© 2021 Sunbeam Products, Inc. Todos los derechos reservados. Distribuido
por Sunbeam Products, Inc. Boca Ratón, Florida, 33431. Fabricado en China.
BVMC-DT100_20ESM1 (US)
GCDS-MRC1383825-LD
ART0000882509
www.mrcoffee.com
MANUAL DEL USUARIO
CA F E TE RA P R O G R A M A BLE PA R A 1 0 TA Z A S
selector de preparación fuerte
para una taza de café más intenso
selector de preparación fuerte
para una taza de café más intenso
depósito de agua extraíble
para llenar fácilmente
reloj contador del tiempo de frescura
y ciclo de limpieza automática
incluyefiltracióndeagua
para café con mejor sabor
PREPARACIÓN
ÓPTIMA
PREPARACIÓN
ÓPTIMA
PREPARACIÓN
ÓPTIMA
T
azas
Tazas

1.
INTRODUCCIÓN
Bienvenido y felicitaciones por la compra de su nueva Cafetera Térmica
Programable Mr. Coffee®. Su nueva cafetera se despertará junto con usted en
la mañana y le brindará descanso y placer durante sus agitadas actividades
diarias.
De la forma como disfruta su cafetera Mr. Coffee® ¡depende de usted!
TABLA DE CONTENIDO
Introducción.................................................................................................................
1
Medidas de Seguridad Importantes........................................................................
2
Instrucciones para el Cable de Alimentación..........................................................
3
Diagrama de las Piezas..............................................................................................
5
CaracterísticasyBeneciosdelaCafetera.............................................................
7
Limpie su Cafetera antes de Utilizar por Primera Vez...........................................
7
Fijar la Hora del Reloj................................................................................................
8
Prepararse para Utilizar la Cafetera
• Tabla de Medidas de Café Sugeridas...................................................................
8
• Sistema de Filtración de Agua..............................................................................
8
• Adición de Agua y Granos de Café........................................................................
9
Cómo Preparar Café Ahora........................................................................................
9
Cómo Utilizar la Función de Preparación Fuerte……….......................................
10
Cómo Preparar Café para Más Tarde…....................……......................................
10
Limpieza y Mantenimiento de Su Cafetera......................……..............................
10
Resolución de Problemas de Su Cafetera Mr. Coffee®...........…..........................
12
Servicio, Mantenimiento...........................................................................................
14

2.
MEDIDAS DE SEGURIDAD IMPORTANTES
Cuando se utilizan aparatos eléctricos, siempre se deben seguir las
precauciones básicas de seguridad para disminuir el riesgo de incendio,
descarga eléctrica o lesiones personales, incluidas las siguientes:
1. Lea todas las instrucciones antes de utilizar este producto.
2. Notoquelassuperciescalientes.Utiliceasasoperillas.
3. Andeprotegersecontraunadescargaeléctrica,nocoloquenisumerja
el cable, los enchufes o el aparato en agua o ningún otro líquido.
4. Este aparato no debe ser utilizado por los niños ni por personas con
su capacidad física, sensorial o mental reducida, o falta de experiencia
o conocimiento. Todo aparato utilizado cerca de los niños, requiere la
supervisión cercana de un adulto. Los niños deben ser supervisados para
asegurar que no jueguen con el aparato. Mantenga el aparato y su cable
fuera del alcance de los niños.
5. Desenchufe el aparato del tomacorriente cuando éste o el reloj digital
(si es proporcionado) no está en uso y antes de limpiarlo. Permita que el
aparato se enfríe antes instalarle o retirarle piezas y antes de limpiarlo.
6. No opere ningún aparato con un cable o enchufe dañado o después de
presentar un fallo en su funcionamiento o si ha sido dañado de manera
alguna. Devuelva el aparato a un centro de servicio autorizado para su
examinación, reparación o ajustamiento. No intente reemplazar o cortar
un cable dañado.
7. El uso de accesorios no recomendados por el fabricante del producto
podría ocasionar incendio, descarga eléctrica o lesión personal.
8. No utilice el aparato a la intemperie.
9. No permita que el cable cuelgue del borde de la mesa o del mostrador ni
queentreencontactoconsuperciescalientes.
10. No coloque el aparato sobre o cerca de una hornilla caliente de gas o
eléctrica ni dentro de un horno caliente.
11. Siempre conecte el enchufe al aparato primero y luego enchufe el cable
al tomacorriente (para aparatos con cables separables). Para desconectar,
gire cualquier control a la posición de apagado y luego retire el enchufe
del tomacorriente.
12. Noutiliceelaparatoparaotronquenoseaparaelquehasidodiseñado.
13. Todas las tapas deben estar cerradas durante el uso.
14. Si la tapa es retirada o la puerta de la cesta de preparación se abre
durante o inmediatamente después que termine el ciclo de preparación,
esto podría ocasionar quemaduras. El contenido puede estar caliente.
Permita que se enfríe antes de abrir la tapa.
Para cafeteras con jarras de vidrio:
15. La jarra está diseñada para utilizarse con este aparato. Nunca debe ser
utilizada sobre una estufa.
16. Nocoloqueunajarracalientesobreunasuperciemojadaofría.
17. Evite los cambios de temperatura bruscos, tales como enjuagar, lavar,
llenar o sumergir una jarra caliente en líquidos fríos.
3.
CONSERVE ESTAS INSTRUCCIONES
SOLO PARA USO DOMÉSTICO
ENCHUFE POLARIZADO
Este aparato tiene un enchufe polarizado (un contacto
es más ancho que el otro). Como una característica de
seguridad para reducir el riesgo de descarga eléctrica,
este enchufe está diseñado para entrar en un tomacorriente polarizado sólo
de una manera. Si el enchufe no entra completamente en el tomacorriente,
inviertaelenchufe.Siaúnnoentra,consulteaunelectricistacalicado.No
intenteignorarestacaracterísticadeseguridadnimodicarelenchufede
manera alguna. Si el enchufe entra holgadamente en el tomacorriente de
corriente alterna o si el tomacorriente de corriente alterna se siente caliente,
no utilice ese tomacorriente.
18. Noutiliceunajarrarajadaoastillada,oquetengaelasa�ojaodebilitada.
19. No limpie la jarra con limpiadores, estropajos de lana de acero ni ningún
otro material abrasivo.
Para aparatos con paneles de servicio:
20. ADVERTENCIA: PARA REDUCIR EL RIESGO DE INCENDIO O DESCARGA
ELÉCTRICA, NO QUITE ESTA TAPA. NO TIENE PIEZAS EN EL INTERIOR
QUE DEBAN SER REPARADAS POR EL USUARIO. CUALQUIER
REPARACIÓN SOLO DEBE SER REALIZADA POR PERSONAL DE SERVICIO
AUTORIZADO.

4.
INSTRUCCIONES PARA EL CABLE DE
ALIMENTACIÓN:
Un cable de alimentación corto (o cable de alimentación separable) puede
ser provisto para reducir los riesgos de enredarse o tropezar con un cable
más largo. Existen cables de alimentación separables más largos o cables
de extensión disponibles y estos pueden ser utilizados si se toma el cuidado
debido en su uso. Si se utiliza un cable de alimentación separable o cable de
extensión:
a. Laclasicacióneléctricamarcadadelcabledealimentaciónseparable
ocabledeextensióndebeser,comomínimo,igualalaclasicación
eléctrica del aparato;
b. Si el aparato es del tipo de conexión a tierra, el cable de extensión debe
ser un cable de tres alambres de conexión a tierra; y
c. El cable más largo debe ser acomodado de manera que no cuelgue del
mostrador o de la mesa para evitar que un niño tire del mismo o que
alguien se tropiece sin darse cuenta. No tire, retuerza ni maltrate el cable
de alimentación.
No hale, tuerza ni maltrate de manera alguna el cable de alimentación.
AVISOS DEL PRODUCTO
1. Coloqueelaparatosobreunasuperciedura,planayniveladaparaevitar
interrupcionesenel�ujodeairepordebajodelacafetera.
2. Solo para jarras de vidrio: Descarte la jarra de inmediato si en alguna
ocasión hierve hasta evaporarse su contenido.
3. Solo para jarras de vidrio: Proteja la jarra de golpes secos, rasguños o
maltrato.
4. No opere el aparato con un tanque de agua vacío.
5. Mantenga el área encima del aparato despejada durante el uso, ya que
vapor caliente saldrá del aparato.
5.
CONOZCA SU CAFETERA
1. Depósito de agua extraíble
2. Gaveta para la cesta de
preparación
3. Cesta de preparación
4. Panel de control
5. Jarratérmica
6. Plataforma
7. Marcodelltrodeagua
8. Discoparaelltrodeagua
1
7
2
3
4
5
6
8
6.
ENTIENDA EL PANEL DE CONTROL
H
F
D
B
I
G
E
C
A
A. Botón/Indicadordelafunción
deprepararcaféahora/apagado
B. Botón/Indicadordelafunción
de preparar café más tarde
C. Botón/Indicadordelimpieza
D. Botón/Indicadordelafunción
de preparación fuerte
E. Botón de minuto
F. Botón de hora
G. Pantalla del reloj contador del
tiempo de frescura
H. Pantalla del reloj
I. IndicadordeAM/PM

7.
CARACTERĹSTICAS Y BENEFICIOS DE LA CAFETERA
Su nueva cafetera térmica programable de 10 tazas Mr. Coffee® cuenta con las
siguientes características:
• Capacidad de preparación – 10 tazas.
• Preparación óptima – Prepara café 20% más rápido a una temperatura más
alta de hasta 205 grados para un sabor más intenso.
• Preparación fuerte – Seleccione la función de preparación fuerte para una
taza de café más intenso.
• Preparación de café para más tarde – Programe su cafetera por adelantado
y despierte con café fresco, acabado de preparar.
• Jarra térmica de acero inoxidable de doble pared – Mantiene la
temperatura y el sabor fresco de café para que cada taza sepa como si
estuviera acabada de preparar.
• Depósito de agua extraíble – Le permite retirar el depósito de agua para
llenarlo fácilmente.
• Cestadel�ltroextraíble–Elltroseextraeparalimpiaryllenarlorápidoy
fácilmente.
• Reloj contador del tiempo de frescura – Vigila cuan fresco está el café
desde el tiempo en que se preparó.
• Ciclo de limpieza automática – Elimina fácilmente los depósitos de caciol y
minerales del depósito de agua y el calentador.
• Función de pausa automática para servirse una taza – Detiene el ciclo de
preparación para que pueda servirse una taza antes de terminar el ciclo de
preparación.
• Incluyesistemade�ltracióndeagua -Elimina hasta un 97% del cloro del
agua y mejora el sabor de su café.
• Almacenamiento del cable – Almacena de forma segura el exceso de cable
par mantener ordenado su mostrador.
LIMPIE SU CAFETERA ANTES DE UTILIZARLA
POR PRIMERA VEZ
Asegúrese de que su primera taza de café sea tan buena como sea posible,
limpiando su Cafetera Mr. Coffee® antes de utilizarla por primera vez. Solo
debe seguir estos pasos sencillos:
1. Lavelajarra,latapadelajarraylacestadelltroenunamezclade
detergente suave y agua. Enjuague bien cada pieza (favor referirse al
Diagrama de las Piezas).
2. Coloque de nuevo todas las piezas e instale el depósito de agua. Luego,
completeunciclodepreparaciónconsoloagua,sinañadircafénielltro
de café.
3. Cuando termine el ciclo de preparación, apague su cafetera, deseche el
aguaenlajarrayenjuaguelajarra,latapadelajarraylacestadelltro.
Su cafetera ya está lista para utilizarse. ¡Disfrútela!
8.
FIJE LA HORA DEL RELOJ
Para�jarlahoradelreloj:
1. Enchufe el cable de alimentación a un tomacorriente estándar. El reloj
parpadeará en el panel de controles para indicar que la hora aún no ha
sido programada.
2. Para cambiar la hora, presione los botones de hora y minuto hasta llegar a
la hora actual.
NOTA: El oprimir cualquier botón antes de ajustar el reloj, hará que el reloj
comience a marcar la hora a partir de 12:00 a.m. Usted debe ajustar el reloj si
desea usar la función de preparación de café para más tarde.
PREPARÁNDOSE PARA UTILIZAR SU CAFETERA
A. Tabla de medición de café sugerida:
Para obtener mejores resultados, utilice una cucharada rasa para medir café
molido. Asegúrese de utilizar café de molido mediano para una preparación
perfecta.
Para preparar Cantidad de café molido
1cucharadaarasa=5gr./0.17oz.
1taza=5�.oz.decafépreparado
Utilice más o menos cantidad de café
según su preferencia.
10 tazas 7.5 cucharadas
8 tazas 6.5 cucharadas
6 tazas 4.5 cucharadas
4 tazas 3 cucharadas
B. Sistema de Filtración de Agu
UstedeseldueñodeunsistemadeltracióndeaguaMr.Coffee®.Utilizar
elltrodeaguaabasedecarbonomejoraelsabordesucaféaleliminarel
97% de cloro del agua que usted utiliza para preparar su café. Para utilizar el
sistemadeltracióndeaguaensuCafeteraMr.Coffee®,favordeseguirlos
siguientes pasos:
1. Alineeelindicadorrojoenelmarcodelltrodeaguaconectadoala
cestadelltro,conlaletraquecorrespondealmesenqueestáutilizando
el disco. Esto sirve para recordarle de cambiar el disco cada mes
(aproximadamente 30 ciclos de preparación).
NOTA:Paraobtenerresultadosóptimos,utiliceelsistemadeltraciónde
aguaconunltropermanente(vendidoporseparado).
2. Enjuagueeldiscodelltrodeaguaconaguafrescaantesdeutilizarlopor
primera vez.
3. Paracolocarlosdiscosdelltrodeagua,girelatapadeldiscogrisdesu
sistemadeltracióndeagua.Inserteeldisconuevodentrodelmarcoy
gire la tapa de nuevo en su lugar.
4. Siga las instrucciones de la sección “Adición de Agua y Café Molido”.
5. Cuando termine de preparar su café, enjuague el disco con agua fresca.
No coloque su disco en el lavaplatos.

9.
C. Adición de Agua y Café Molido
1. Abralatapadelagavetaparalacestadelltro.
2. Coloqueunltrodepapelpara10-12tazasmarcaMr.Coffee®ounltro
permanentemarcaMr.Coffee®enlacestaremovibledelltro.
NOTA:Siutilizaltrosdepapel,esimportantequelosladosdelltro
quedenlisoscontralasparedesdelacestadelltro.Sielltroseaplasta,
humedézcaloantesdecolocarloenlacestadelltroyañadircafémolido
y agua.
3. Añada la cantidad de café deseada y sacúdala suavemente para nivelar el
café. Vea la “Tabla de Medidas de Café Sugeridas”.
4. Deslice la cesta de preparación de nuevo en su lugar.
5. Llene el depósito de agua extraíble con agua fresca y fría hasta la
capacidad deseada (1 taza equivale a 5 onzas). Para un llenado fácil y
preciso, las marcas de agua en el depósito de agua extraíble muestran la
cantidad de agua requerida para preparar la cantidad correspondiente de
tazas deseadas. No llene pasado de la línea que marca “10 cup MAX line”
(“Línea de 12 Tazas MAX”) o el agua se derramará de la cafetera.
NOTA: La cantidad de café preparado siempre será levemente menor
a la cantidad de agua vertida en el depósito de agua. Esto se debe a la
absorción mínima de agua por el café molido.
CÓMO PREPARAR CAFÉ AHORA
1. Luego de completar los pasos en la sección “Adición de Agua y Café
Molido”yconlajarraylacestadelltrocolocadasdeformaseguraensu
lugar correspondiente, encienda la cafetera presionando una vez el botón
BREW NOW (preparar ahora). La luz del botón BREW NOW se iluminará
para indicar que la cafetera está encendida y preparando el café.
2. Escuchará una señal audible cuando termine el ciclo de preparación.
3. Después que los granos de café molido se hayan enfriado, retire con
cuidadolacestadelltroydeséchelos.
NOTA: La gaveta para el la cesta de preparación está caliente después de
la preparación. Siempre deje que la cafetera se enfríe antes de limpiarla.
4. Antes de preparar una segunda jarra de café, apague la cafetera. Esto
reajustará la función del reloj contador del tiempo de frescura. Para apagar
lacafetera,presioneelbotónBREWNOW/OFF(prepararahora/apagado).
5. Asegúrese de que la jarra esté vacía antes de iniciar el ciclo de
preparación de café.
6. Cerciórese de apagar su cafetera cuando no la vaya a utilizar.
Función de Reloj Contador del Tiempo de Frescura
La función de reloj contador del tiempo de frescura le deja saber por
cuánto tiempo su café ha estado esperando por usted. Al comienzo del
ciclo de preparación, el reloj contador del tiempo de frescura se activará
automáticamente. El reloj contador aparecerá en la pantalla debajo del reloj.
Esta pantalla será visible cuando esté preparando café.

10.
CÓMO UTILIZAR LA FUNCIÓN DE
PREPARACIÓN FUERTE
Para disfrutar de una taza de café de intensidad más fuerte, siga estos pasos:
1. Comience completando los pasos en la sección “Adición de agua y café”.
2. Luego presione el botón STRONG (fuerte) una vez. La luz indicadora se
encenderá.
3. Presione BREW NOW (preparar ahora) La luz indicadora de BREW NOW
también se encenderá y su cafetera iniciará el ciclo de preparación.
4. Cuando termine el ciclo de preparación, el aparato emitirá una señal audible.
5. ¡Disfrute su café!
CÓMO PREPARAR CAFÉ PARA MÁS TARDE
1. Primerodebejarlahoraenquedesearíaquelacafeteracomiencea
colar su café.
2. SimplementepresioneelbotónBREWLATER(prepararmástarde)yje
la hora de preparación presionando los botones HOUR (hora) y MINUTE
(minuto). Tenga en cuenta el indicador de AM o PM.
3. Dentro de unos segundos, la pantalla cambiará a la hora actual.
4. La hora de la función BREW LATER (preparar más tarde) ya está programada.
5. Prepare su cafetera como se describe en la sección “Adición de Agua y
Café Molido”.
6. A la hora preprogramada, la luz indicadora de BREW NOW (preparar
ahora)) se encenderá y la luz indicadora de BREW LATER (preparar más
tarde) se apagará, indicando que el ciclo de preparación ha comenzado
en la intensidad de preparación seleccionada. La función de reloj contador
del tiempo de frescura comenzará.
NOTA: Como una medida de seguridad, su cafetera no comenzará
automáticamente la preparación del café al día siguiente. Si desea que su
café se prepare a la misma hora al día siguiente, simplemente añada un
ltronuevo,caféyagua,yprogramelafuncióndeBREWLATER(preparar
más tarde) repitiendo los pasos 2 y 3 descritos arriba.
Para cancelar la función de BREW LATER: Presione el botón BREW LATER
(preparar más tarde) hasta que todas las luces se apaguen.
LIMPIEZA Y MANTENIMIENTO DE SU
CAFETERA
Limpieza Diaria
• Siempre desenchufe la cafetera y permita que se enfríe antes de limpiarla.
• Retireylavelacestadelltro,elltropermanente(vendidoporseparado),
la jarra y la tapa de la jarra en una solución de agua caliente y liquido de
fregar suave.

11.
• Nuncautilicelimpiadoresabrasivos,estropajosdebrasmetálicasniotros
materiales abrasivos.
¡PRECAUCIÓN! Nunca sumerja la cafetera en agua ni en ningún otro liquido,
ni la coloque en el lavaplatos.
Limpieza Regular y Mantenimiento
Sucafeteraestáequipadaconunafunción/indicadordelimpieza.Lafunción
de limpieza es crítica para optimizar el rendimiento de la cafetera. La función
delimpiezaeliminarálosminerales(calcio/piedracaliza)enelaguaquedejan
depósitos en su cafetera y afectan su rendimiento. El mantenimiento de su
cafetera asegurará que continúe preparando café rápido, caliente y delicioso.
Función Indicadora de Limpieza
Su indicador de limpieza se iluminará cuando:
• Su cafetera ha contado 90 ciclos de preparación O su cafetera
experimenta dos ciclos de preparación consecutivos con una duración de
más de 9.5 minutes.
NOTA: La luz indicadora de limpieza no se apagará a no ser que haga
funcionar la función de limpieza el tiempo de duración completo (esto tomará
45 minutos).
Siga estos pasa para hacer funcionar la función de limpieza:
1. Llene el depósito de agua con 6 tazas de vinagre doméstico blanco, no
diluido.
2. Retireeldiscodeltraciónopcional.Coloqueunltrodepapelvacíoo
ltropermanenteenlacestadepreparación.
3. Coloque la jarra vacía de nuevo en la unidad.
4. Presione el botón CLEAN (limpieza) para activar la función de limpieza.
a. Cuando se active, la luz de la función de limpieza parpadeará y el botón
BREWNOW/OFF(prepararahora/apagado)semantendráiluminada.
b. El ciclo completo tomará 45 minutos para terminar.
5. Durante el ciclo de limpieza su cafetera:
a. Preparará lentamente aproximadamente 3 tazas de solución de limpieza.
b. Pausará por 30 minutos (la luz indicadora de limpieza parpadeará para
avisarle que el proceso está activo).
c. Después de 30 minutos, su cafetera preparará el resto de la solución de
limpieza.
6. Cuando termine el proceso, la luz indicadora CLEAN (limpieza) se apagará
y su cafetera se apagará.
7. Desechelasolucióndelimpieza,elltrodepapel(oenjuagueelltro
permanente)yenjuaguebienlajarraylacestadelltroconagualimpia.
8. Prepare 2 ciclos completos de 10 tazas con agua limpia.
Su cafetera ya está limpia y lista para preparar la próxima jarra de ¡café
caliente y delicioso!
Reemplazo del Disco de Filtración del Agua
Sudiscodeltracióndeaguanecesitareemplazarsecadames
(aproximadamente cada 30 ciclos de preparación). Si la máquina no se
utilizaráduranteunperíododetiempoextendido,enjuagueelltrodeagua
con agua limpia y limpie la cafetera antes de utilizarla.

12.
Limpieza de la Jarra Térmica
El agua dura puede dejar una mancha blancuzca en la jarra, y el café puede
hacer que esta mancha se torne marrón. Para eliminar las manchas en la jarra:
• Llene la jarra con una solución compuesta de partes iguales de agua y
vinagre y déjela reposar en la jarra por aproximadamente 20 minutos.
• Deseche la solución y luego lave y enjuague la jarra. No utilice limpiadores
fuertes abrasivos que puedan rasguñar la jarra.
NOTA: La jarra térmica no es apta para el lavaplatos.
RESOLUCIÓN DE PROBLEMAS DE SU
CAFETERA MR. COFFEE
®
Su Cafetera MR. COFFEE® ha sido diseñada cuidadosamente para brindarle
muchos años de servicio sin contratiempos. En el caso improbable de que su
nueva cafetera no funcione adecuadamente, favor de examinar los siguientes
problemas potenciales y tratar los pasos recomendados ANTES de llamar a un
Centro de Servicio Autorizado de Sunbeam.
PROBLEMA CAUSA POSIBLE SOLUCIÓN
LA LUZ DE “PREPARAR
AHORA”/ENCENDIDO
NO SE ENCIENDE
El aparato está
desenchufado.
ENCHUFE LA UNIDAD.
Hay una
interrupción
eléctrica.
ESPERE A QUE
SE RESTAURE LA
ELECTRICIDAD.
EL CAFÉ NO SE ESTÁ
COLANDO
El aparato está
desenchufado.
ENCHUFE LA UNIDAD.
Hay una
interrupción
eléctrica.
ESPERE A QUE
SE RESTAURE LA
ELECTRICIDAD.
Nohaysuciente
agua en el depósito
de agua.
LLENE EL DEPÓSITO
HASTA PASAR EL NIVEL
MARCADOMĺNIMO.
Lacestadelltro
no está colocada
correctamente.
INSERTE LA CESTA DEL
FILTRO CORRECTAMENTE.
LA CAFETERA SOLO
PRODUCE AGUA
No hay café molido
enlacestadelltro.
AÑADA LA CANTIDAD DE
CAFÉ DESEADA AL FILTRO.
LA CAFETERA CUELA
LENTAMENTE
La cafetera necesita
limpieza.
LIMPIE LA CAFETERA
COMO SE DESCRIBE EN
LA SECCIÓN “LIMPIEZA Y
MANTENIMIENTO”.
13.
LA CESTA DEL FILTRO
SE DESBORDA
Lacestadelltrono
está correctamente
colocada.
INSERTE LA CESTA DEL
FILTRO CORRECTAMENTE.
La jarra no está
correctamente
colocada sobre la
plataforma.
COLOQUE
CORRECTAMENTE
LAJARRASOBRELA
PLATAFORMA.
Elltrocontiene
demasiado café
molido.
RETIRE EL FILTRO Y
DESECHE EL CAFÉ
MOLIDO. SI EL
FILTRO ES DE PAPEL,
REEMPLÁCELO. SI ES UN
FILTRO PERMANENTE,
ENJUÁGUELO.COMIENCE
NUEVAMENTE EL PROCESO
DE PREPARACIÓN.
La jarra fue retirada
de la plataforma
por más de 30
segundos.
APAGUE Y DESENCHUFE
LAUNIDAD.DEJEQUE
SEENFRĺE.LIMPIEEL
DERRAME.
EL CAFÉ NO ESTÁ
CALIENTE
Hay una
interrupción
eléctrica.
ESPERE A QUE
SE RESTAURE LA
ELECTRICIDAD.
EL CAFÉ TIENE MAL
SABOR
Se utilizó café
molido con un
grano no adecuado
para cafetera de
goteo.
UTILICE CAFÉ MOLIDO
RECOMENDADO PARA
CAFETERAS DE GOTEO
AUTOMÁTICAS.
Las cantidades de
café y de agua no
son las adecuadas.
UTILICE LAS CANTIDADES
ADECUADAS DE CAFÉ Y
DE AGUA.
La cafetera necesita
limpieza.
LIMPIE LA CAFETERA
COMO SE DESCRIBE
EN LA SECCIÓN
“MANTENIMIENTO DE SU
CAFETERA”.
HAY CAFÉ MOLIDO
DENTRO DEL CAFÉ
PREPARADO
Elltronoestá
correctamente
colocado en la cesta
delltro.
COLOQUE EL FILTRO
CORRECTAMENTE
DENTRO DE LA CESTA DEL
FILTRO.
Elltroseaplastó. RETIRE EL FILTRO Y
REEMPLÁCELO.

14.
LA LUZ LED DE “BREW
NOW” (preparar ahora)
ESTÁ PARPADEANDO
RÁPIDAMENTE.
Nohaysuciente
agua en el depósito
de agua.
LLENE EL DEPÓSITO
HASTA PASAR EL NIVEL
MARCADOMĺNIMO.
¿Aún tiene preguntas? Nos puede llamar gratis al Departamento de Servi-
cio al Consumidor, 1-800-MR COFFEE (1-800-672-6333) o visítenos en
www.mrcoee.com.
SERVICIO Y MANTENIMIENTO
Piezas de Repuesto
• Filtros de café – Para preparar un café más sabroso, recomendamos el uso
deltrosdepapel,estilocestamarcaMR.COFFEE®para10a12tazas,o
ltrospermanentesmarcaMR.COFFEE®.Estosltrospuedencomprarse
en la mayoría de las tiendas de alimentos.
• Filtración de agua–Losdiscosdeltracióndeaguaderepuestopueden
comprarse a través de su tienda local, en línea en mrcoffee.com o
llamando al 1-800-MR-COFFEE (1-800-672-6333) en los Estados Unidos o
al 1-800-667-8623 en Canadá.
• Jarra Térmica – Favor de visitarnos en línea en mrcoffee.com o llame
al 1-800-MR-COFFEE (1-800-672-6333) en los Estados Unidos o al
1-800-667-8623 en Canadá para obtener información acerca de donde
encontrar una tienda que ofrezca jarras de reemplazo.
Mantenimiento Del Usuario
Este aparato no contiene partes que el usuario pueda reparar. Cualquier
servicio de mantenimiento que no esté descrito en la sección Limpieza deberá
ser realizado únicamente por un representante autorizado del servicio de
mantenimiento. Consulte la garantía disponible en línea.

15.
GARANTÍA LIMITADA POR 1 AÑO
Sunbeam Products, Inc. (“Sunbeam”) garantiza que por un período de uno
año a partir de la fecha de compra, este producto estará libre de defectos de
materiales y mano de obra. Sunbeam, a su elección, reparará o reemplazará
este producto o cualquier componente del mismo que presente defectos
durante el período de garantía.
El reemplazo se realizará por un producto o componente nuevo o reparado.
Si el producto ya no estuviera disponible, se lo reemplazará por un producto
similar de valor igual o superior. Ésta es su garantía exclusiva. No intente
reparar o ajustar ninguna función eléctrica o mecánica de este producto. Al
hacerlo elimínará ésta garantía.
La garantía es válida para el comprador minorista original a partir de la fecha
de compra inicial y la misma no es transferible. Conserve el recibo de compra
original. Para solicitar servicio en garantía satisfactoria se requiere presentar
un recibo de compra. Los agentes y centros de servicio de Sunbeam o las
tiendas minoristas que venden productos de Sunbeam no tienen derecho
a alterar, modii car ni cambiar de ningún otro modo los términos y las
condiciones de esta garantía.
Esta garantía no cubre los daños que se produzcan como resultado de uso
negligente o mal uso del producto, uso de voltaje incorrecto o corriente
inapropiada, uso contrario a las instrucciones
operativas, y desarme, reparación o alteración por parte de un tercero ajeno
a Sunbeam o a un Centro de Servicio Autorizado por Sunbeam. Asimismo,
la garantía no cubre actos fortuitos tales como incendios, inundaciones,
huracanes y tornados.
¿Cuál es el límite de responsabilidad de Sunbeam?
Sunbeam no será responsable de daños incidentales o emergentes causados
por el incumplimiento de alguna garantía o condición expresa, implícita o
legal. Excepto en la medida en que lo prohíba la ley aplicable, cualquier
garantíaocondiciónimplícitadecomerciabilidadoaptitudparaunn
determinado se limita, en cuanto a su duración, al plazo de la garantía antes
mencionada. Sunbeam queda exenta de toda otra garantía, condición
o manifestación, expresa, implícita, legal o de cualquier otra naturaleza.
Sunbeam no será responsable de ningún tipo de daño emergente de la
compra, uso o mal uso del producto, ad de usar el producto, incluidos los
daños incidentales, especiales, emergentes o similares, o la pérdida de
ganancias, ni de ningún incumplimiento contractual, sea de una obligación
esencial o de otra naturaleza, ni de ningún reclamo iniciado contra el

16.
comprador por un tercero. Algunas provincias, estados o jurisdicciones no
permiten la exclusión o limitación de los daños incidentales o emergentes
ni las limitaciones a la duración de las garantías implícitas, de modo que
es posible que la exclusión o las limitaciones antes mencionadas no se
apliquenensucaso.Estagarantíaleotorgaderechoslegalesespecícosyes
posible que usted tenga otros derechos que varían de un estado, provincia o
jurisdicción a otro.
Cómo solicitar el servicio en garantía
En los Estados Unidos
Si tiene alguna pregunta sobre esta garantía o desea obtener el servicio de
garantía, llame al 1-800-672-6333 y podrá obtener la dirección del centro de
servicio que le resulte más conveniente.
POR FAVOR NO DEVUELVA ESTE PRODUCTO A NINGUNA DE ESTAS
DIRECCIONES O AL LUGAR DE COMPRA.