W11317127A
Designed to use only HE High Efciency
detergents.
專為使用HE高效能洗劑而設計。
Top-Loading
High Efficiency
Low-Water Washer
Use and Care Guide
Table of Contents
WASHER SAFETY .............................................................2
WHAT’S NEW UNDER THE LID? .....................................3
CONTROL PANEL AND FEATURES ................................4
CYCLE GUIDE ...................................................................6
USING YOUR WASHER ....................................................7
WASHER MAINTENANCE ...................................................10
TROUBLESHOOTING ...........................................................12
ASSISTANCE OR SERVICE ........................ BACK COVER
Para una versión de estas instrucciones en español, visite www.whirlpool.com.
上開式極速低水量
洗衣機使用保養手冊
目錄
洗衣機安全說明 .................................................................17
洗衣機注意事項 .................................................................18
控制面板和功能 .................................................................19
行程指南 ............................................................................21
使用洗衣機 .........................................................................22
洗衣機維護 .........................................................................25
故障排除 ............................................................................27
協助或服務 .....................................................................封底
MODEL NUMBERS: 8TWTW4955JW* and 8TWTW6000JW*
2
WASHER SAFETY
You can be killed or seriously injured if you don't
immediately follow instructions.
You can be killed or seriously injured if you don't
follow instructions.
All safety messages will tell you what the potential hazard is, tell you how to reduce the chance of injury, and tell you
what can
happen if the instructions are not followed.
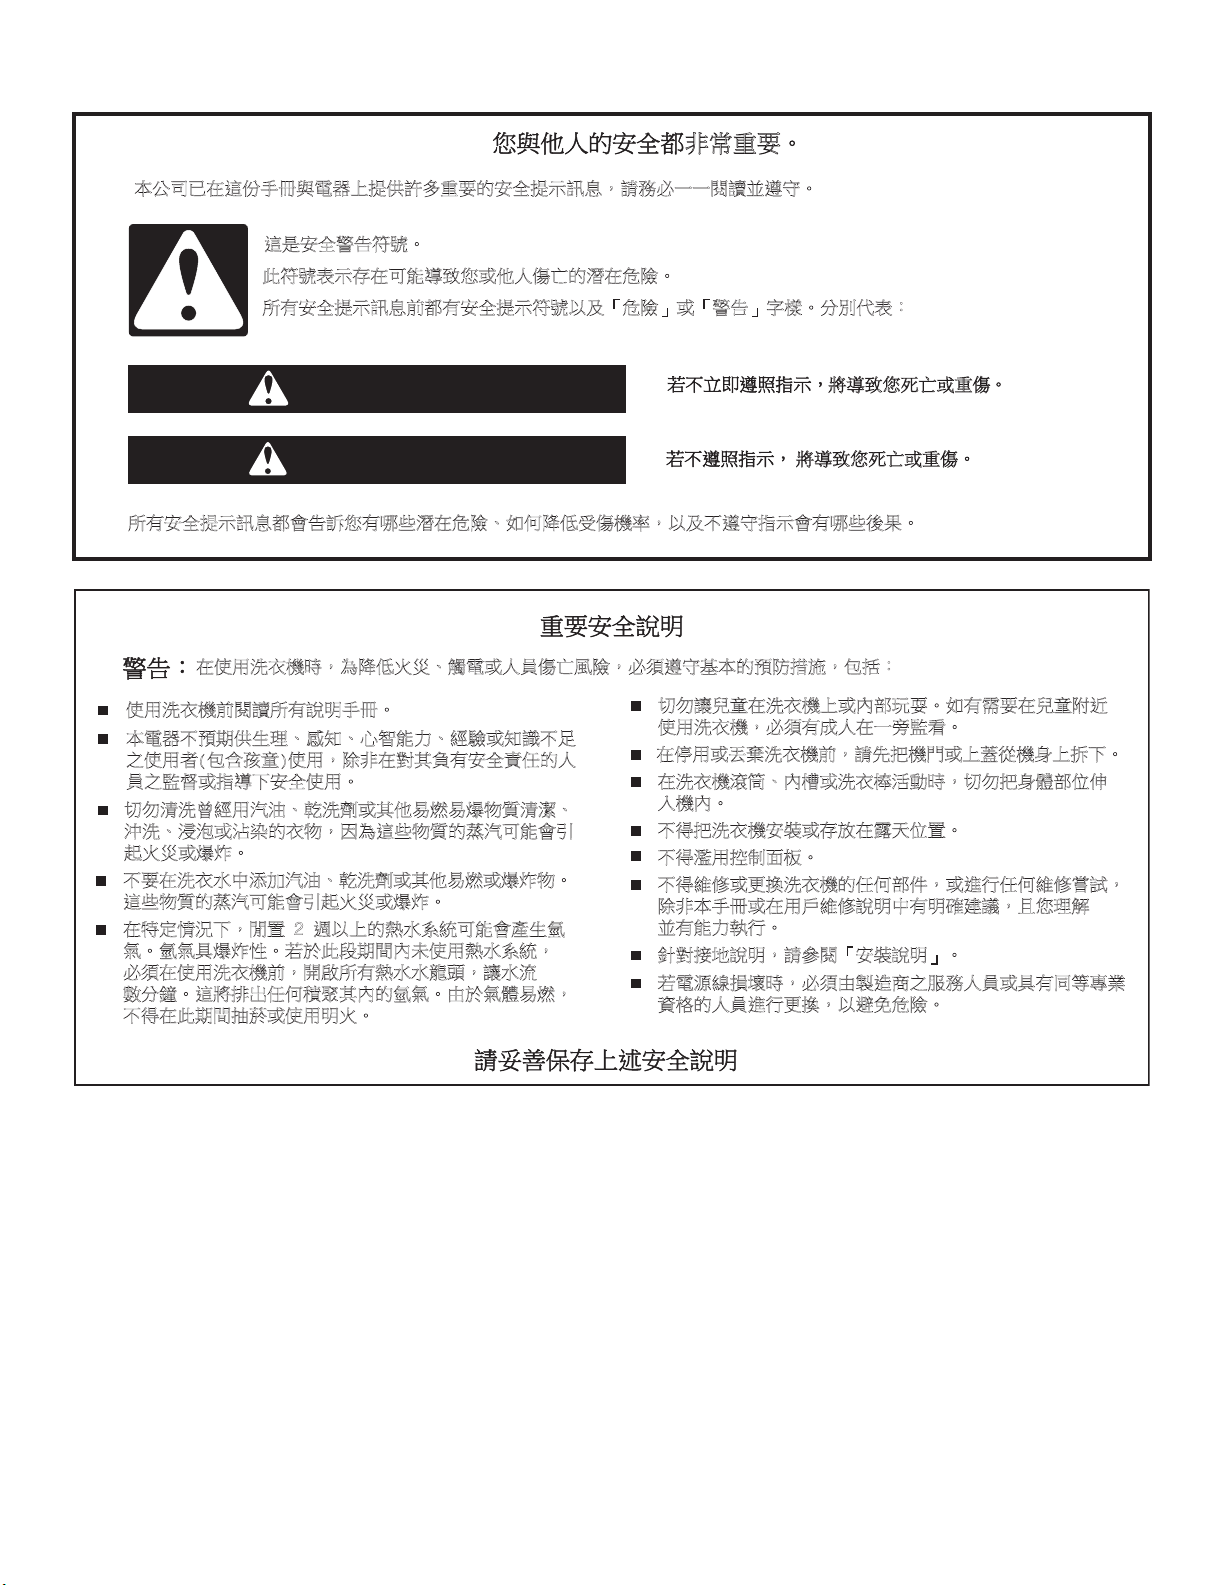
Your safety and the safety of others are very important.
We have provided many important safety messages in this manual and on your appliance. Always read and obey all
safety messages.
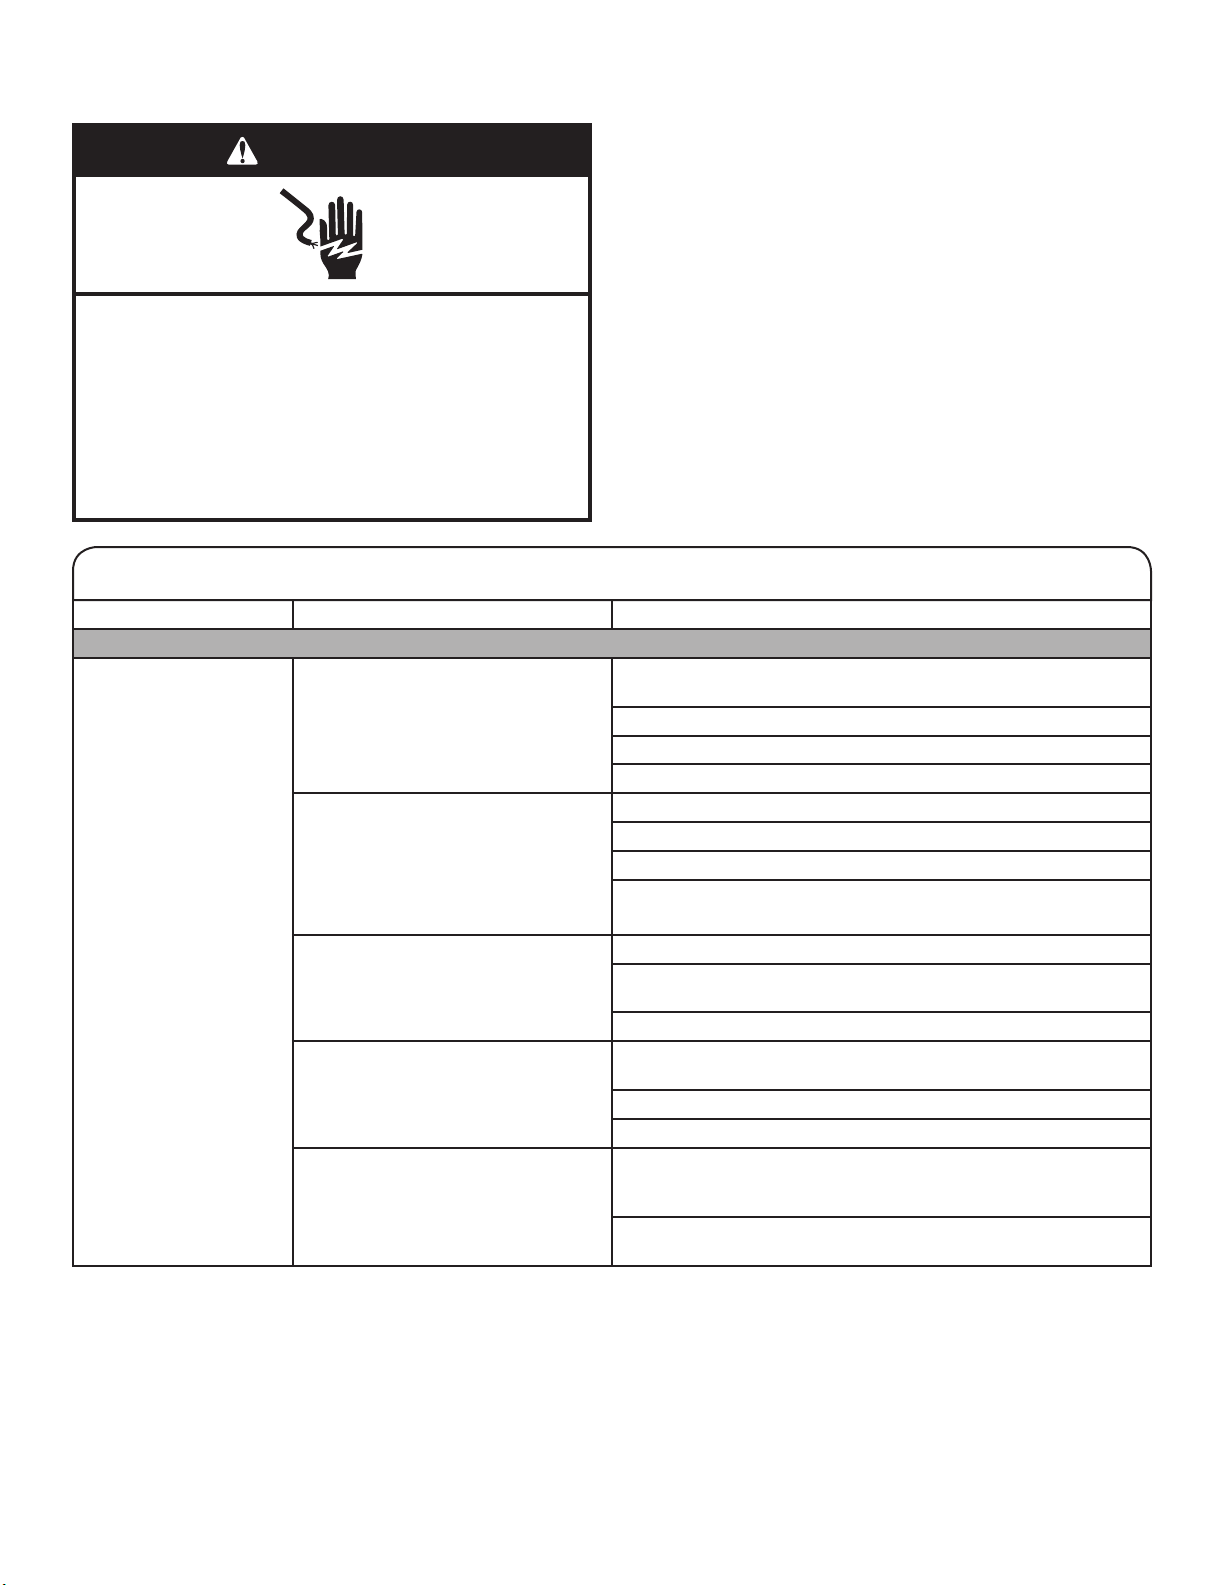
This is the safety alert symbol.
This symbol alerts you to potential hazards that can kill or hurt you and others.
All safety messages will follow the safety alert symbol and either the word “DANGER” or
“WARNING.” These words mean:
This appliance is not intended for use by persons
(including children) with reduced physical, sensory
or mental capabilities, or lack of experience and
knowledge, unless they have been given
supervision or instruction concerning use of the
appliance by a person responsible for their safety.
If the power supply cord damaged, it must be replaced by
manufacturer or its service agent or similarly qualied
person in order to avoid a hazard.
3
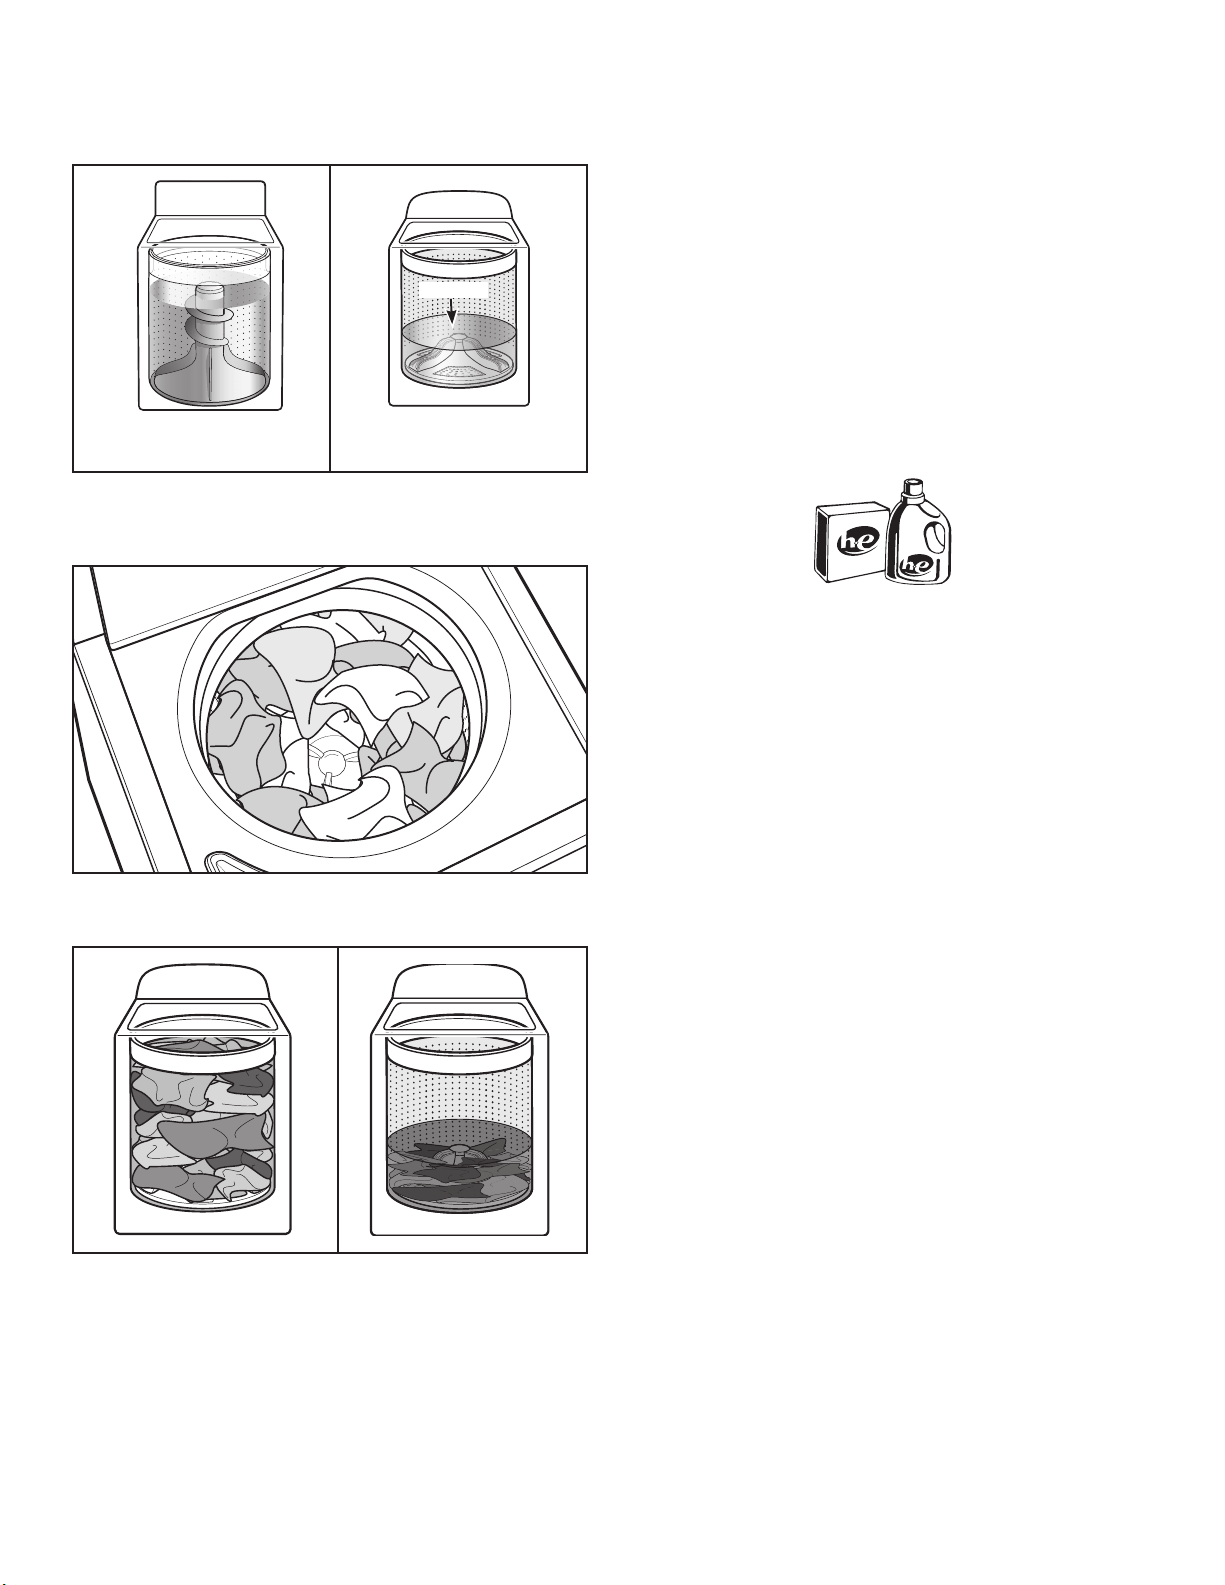
For best performance, evenly load items in loose heaps around
the washplate.
What’s New Under the Lid?
Choosing the Right Detergent
Use only High Efciency detergents. The package will be
marked “HE” or “High Efciency.” Low-water washing creates
excessive sudsing with a regular non-HE detergent. Using
regular detergent will likely result in longer cycle times and
reduced rinsing performance. It may also result in component
failures and noticeable mold or mildew. HE detergents are made
to produce the right amount of suds for the best performance.
Follow the manufacturer’s instructions to determine the amount
of detergent to use and do not go over the Max line.
Normal Sounds You Can Expect
At different stages of the wash cycle, you may hear sounds
and pauses different from those of your previous washer. For
example, you may hear a clicking and hum at the beginning of
the cycle as the lid lock goes through a self-test. There will be
different kinds of humming and whirring sounds as the agitator
tests for load balance or moves the load. Sometimes, you may
hear nothing as the washer determines the correct water level
for the load and allows the load to soak.
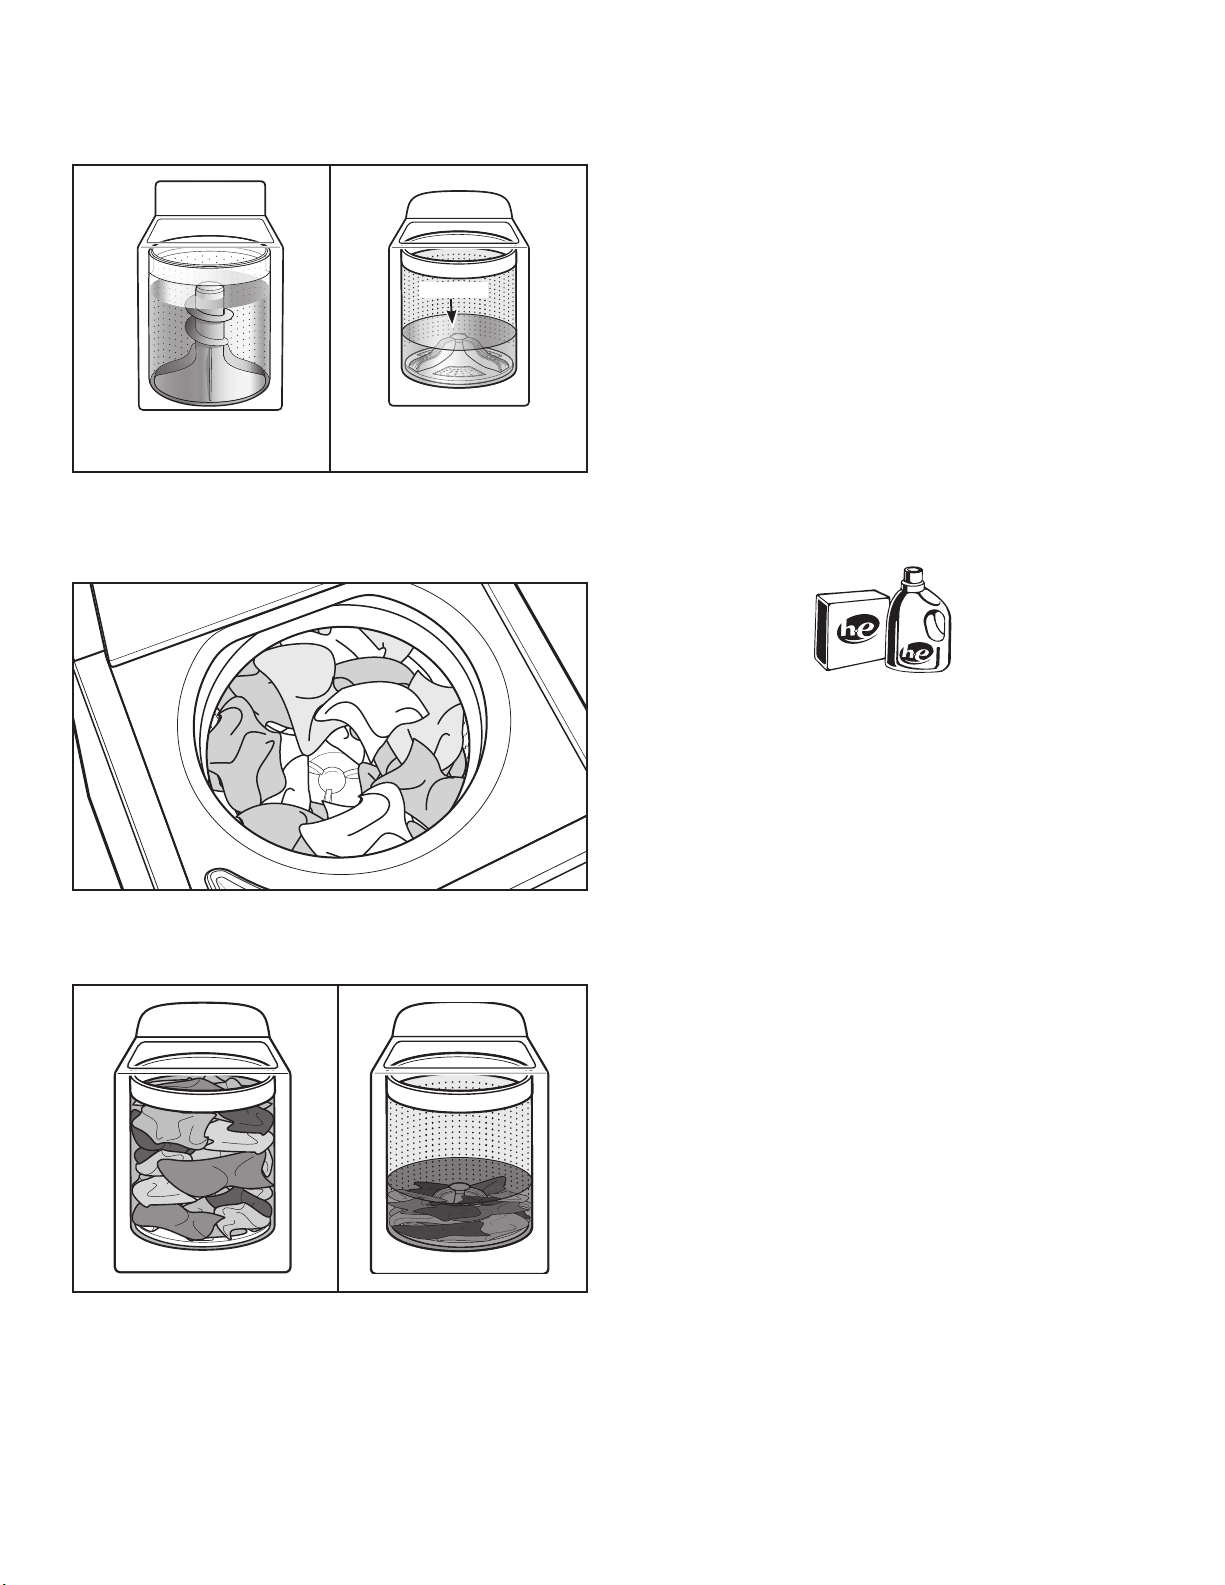
Use only High Efciency (HE) detergent.
Concentrated Cleaning
Low-water cleaning means concentrated cleaning. Rather
than diluting detergent as done in an agitator-style washer,
this washer delivers the detergent directly to the soils. This low
water wash also allows the clothing to move in a more effective
way to remove soils.
Cleaning with Less Water
The most striking difference in your new washer is the low-water
washplate wash system. The washer automatically adjusts the
water level to the load size. No water-level selector is needed.
Traditional agitator-style
washer
Washer with low-water
washplate wash system
Washplate
Automatic Load Size Sensing
Once you start the cycle, the washer will ll to the water level.
When the washer is done lling, it will start to agitate after it
determines the correct level for the load. The washer will then ll
to the appropriate water level based on the load size.
This low-water wash method uses less water and energy
compared to a traditional agitator-style washer.
As the washer dampens and moves the load, the level of the
items will settle in the basket. This is normal, and does not
indicate that more items should be added.
IMPORTANT: You will not see a washer basket full of water
as with your past agitator-style washer. It is normal for some
of the load to be above the water line.

4
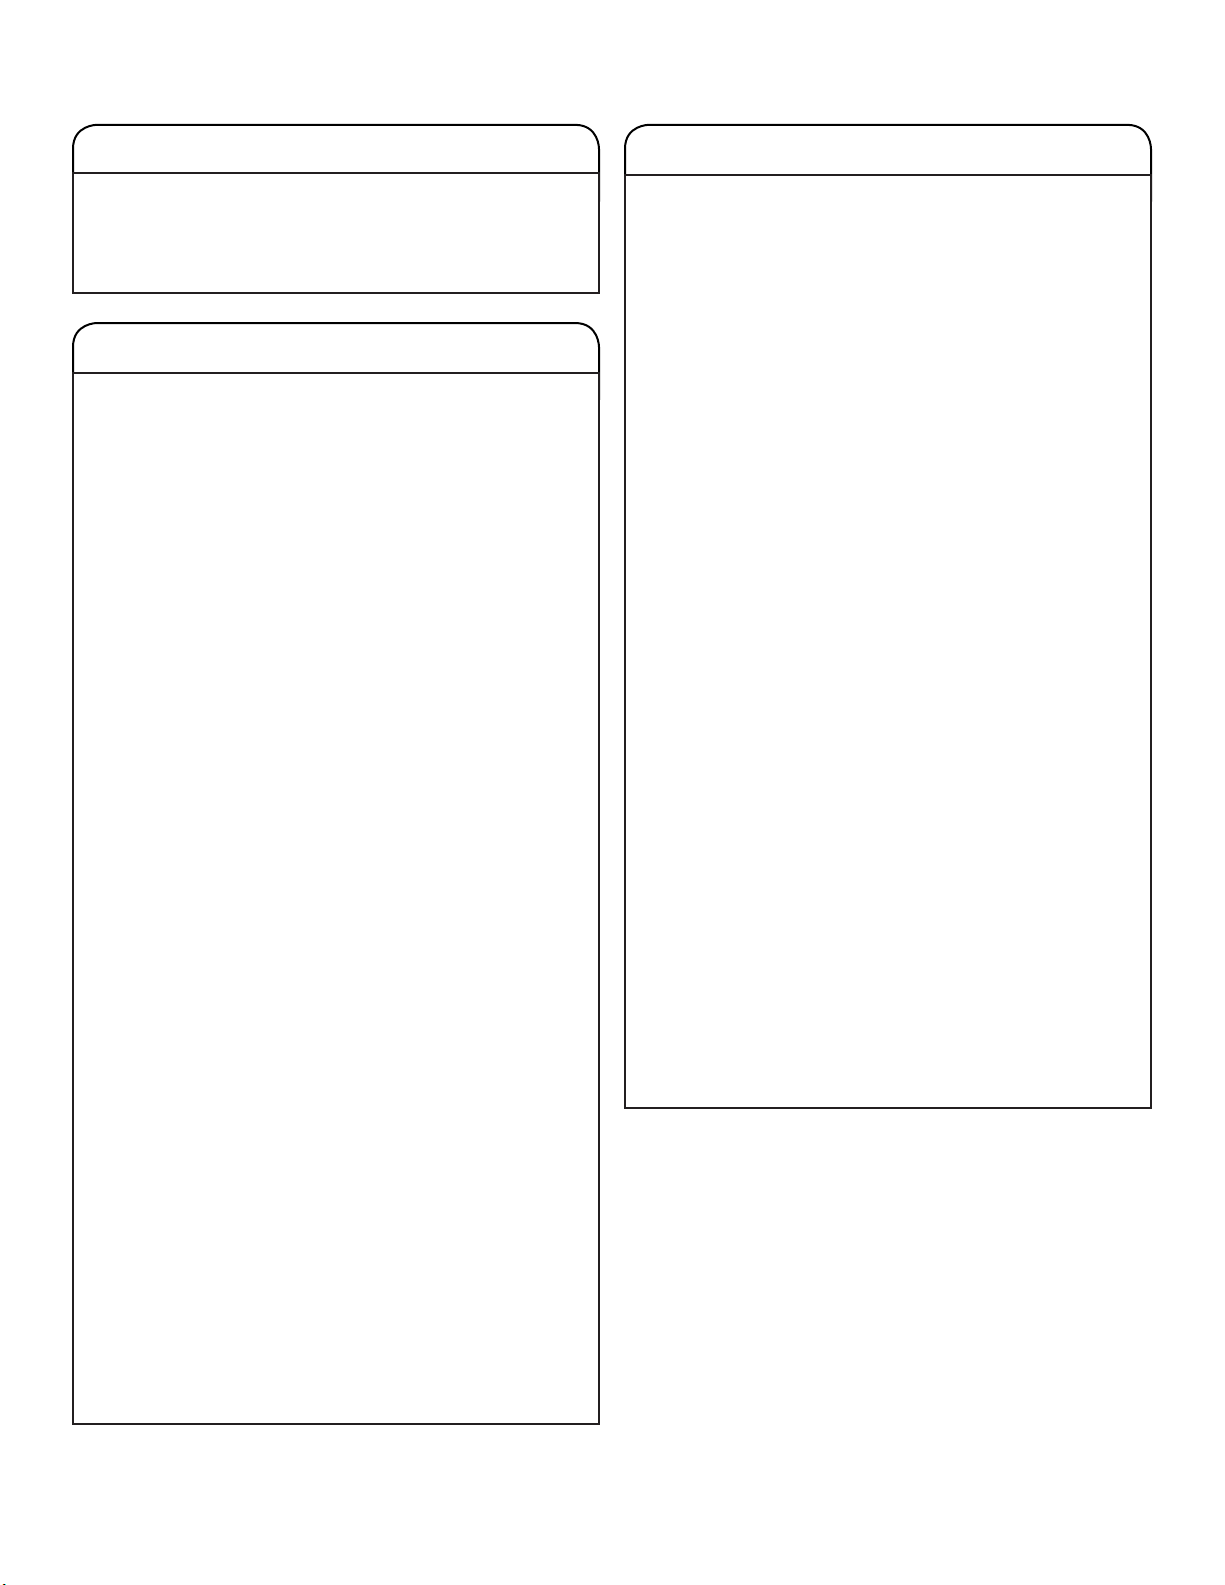
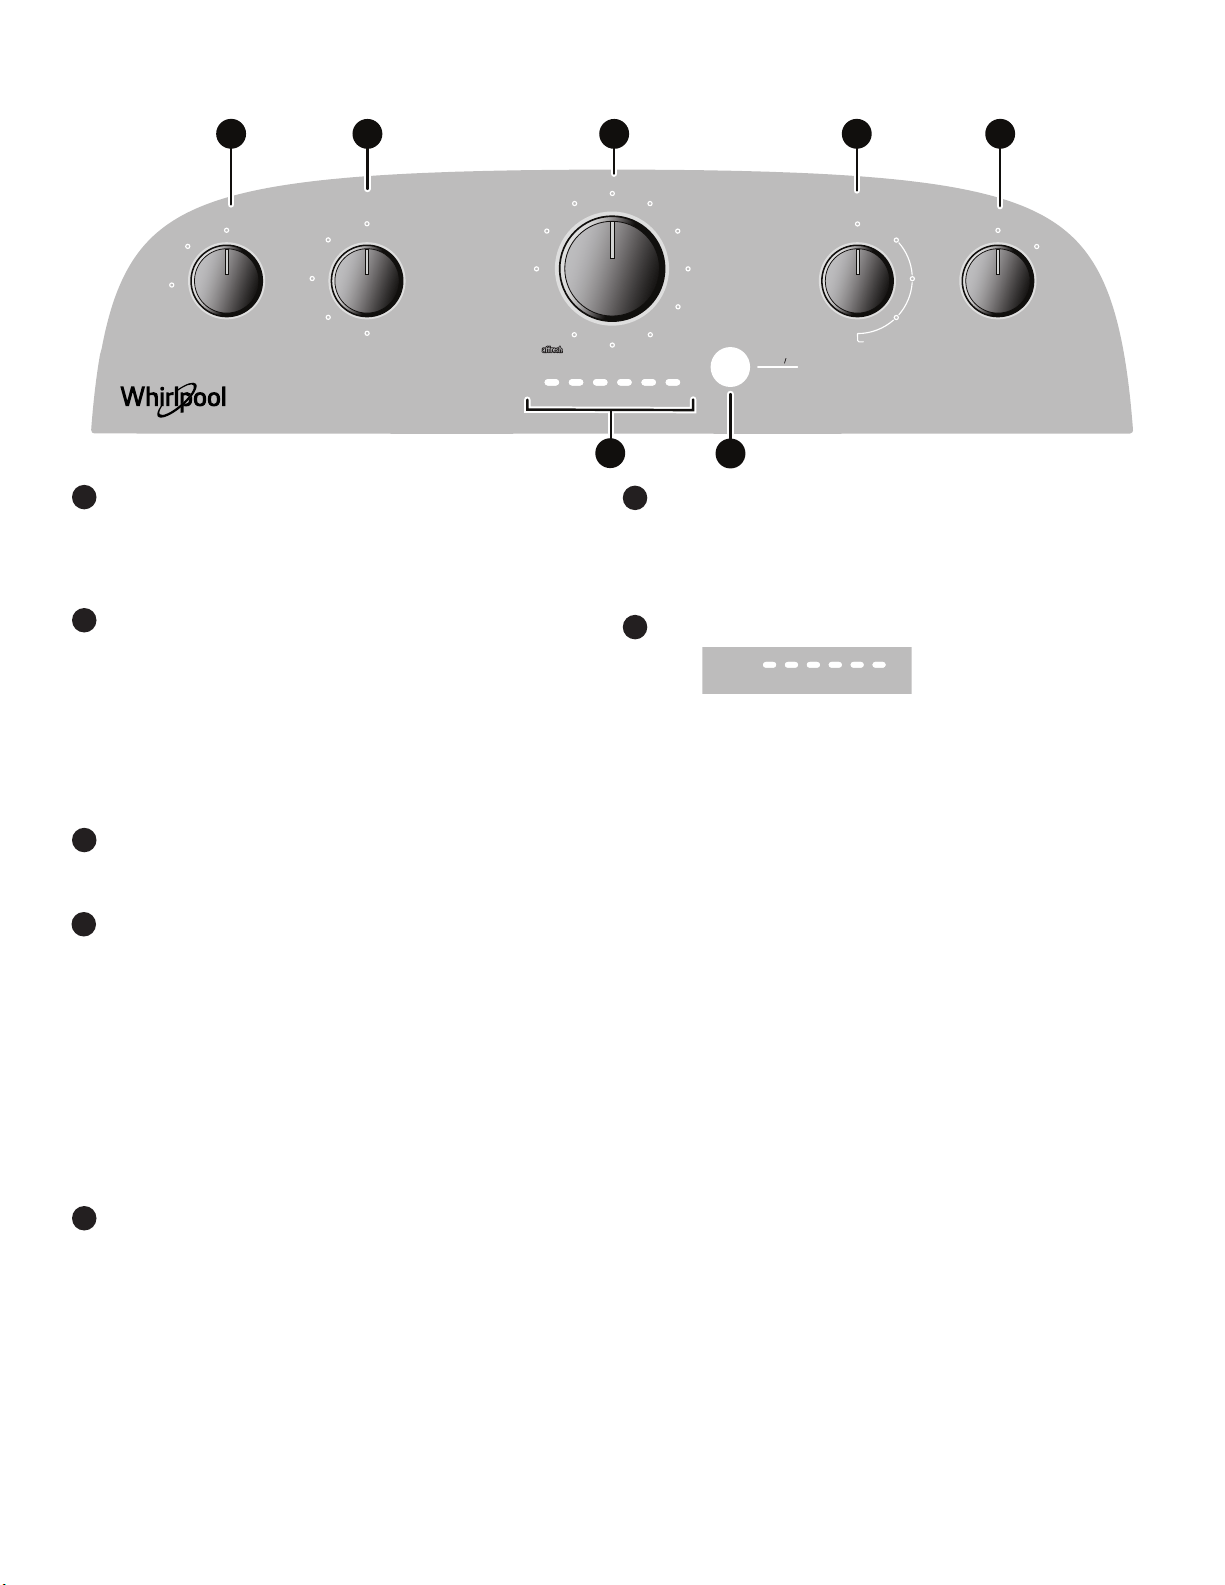
Control Panel and Features
SOIL LEVEL
Select the setting most suitable for your load. For heavily
soiled and sturdy fabrics, select Heavy Soil Level for more
wash time. For lightly soiled and delicate fabrics, select Light
Soil Level for less wash time. A lighter soil-level setting will
help reduce tangling and wrinkling.
WASH TEMP
Wash Temp senses and maintains uniform water
temperatures by regulating incoming hot and cold water.
Select a wash temperature based on the type of fabric
and soils being washed. For best results and following the
garment label instructions, use the warmest wash water safe
for your fabric.
■ On some models and cycles, warm and hot water may
be cooler than your previous washer.
■ Even in a cold and cool water wash, some warm water
may be added to the washer to maintain a minimum
temperature.
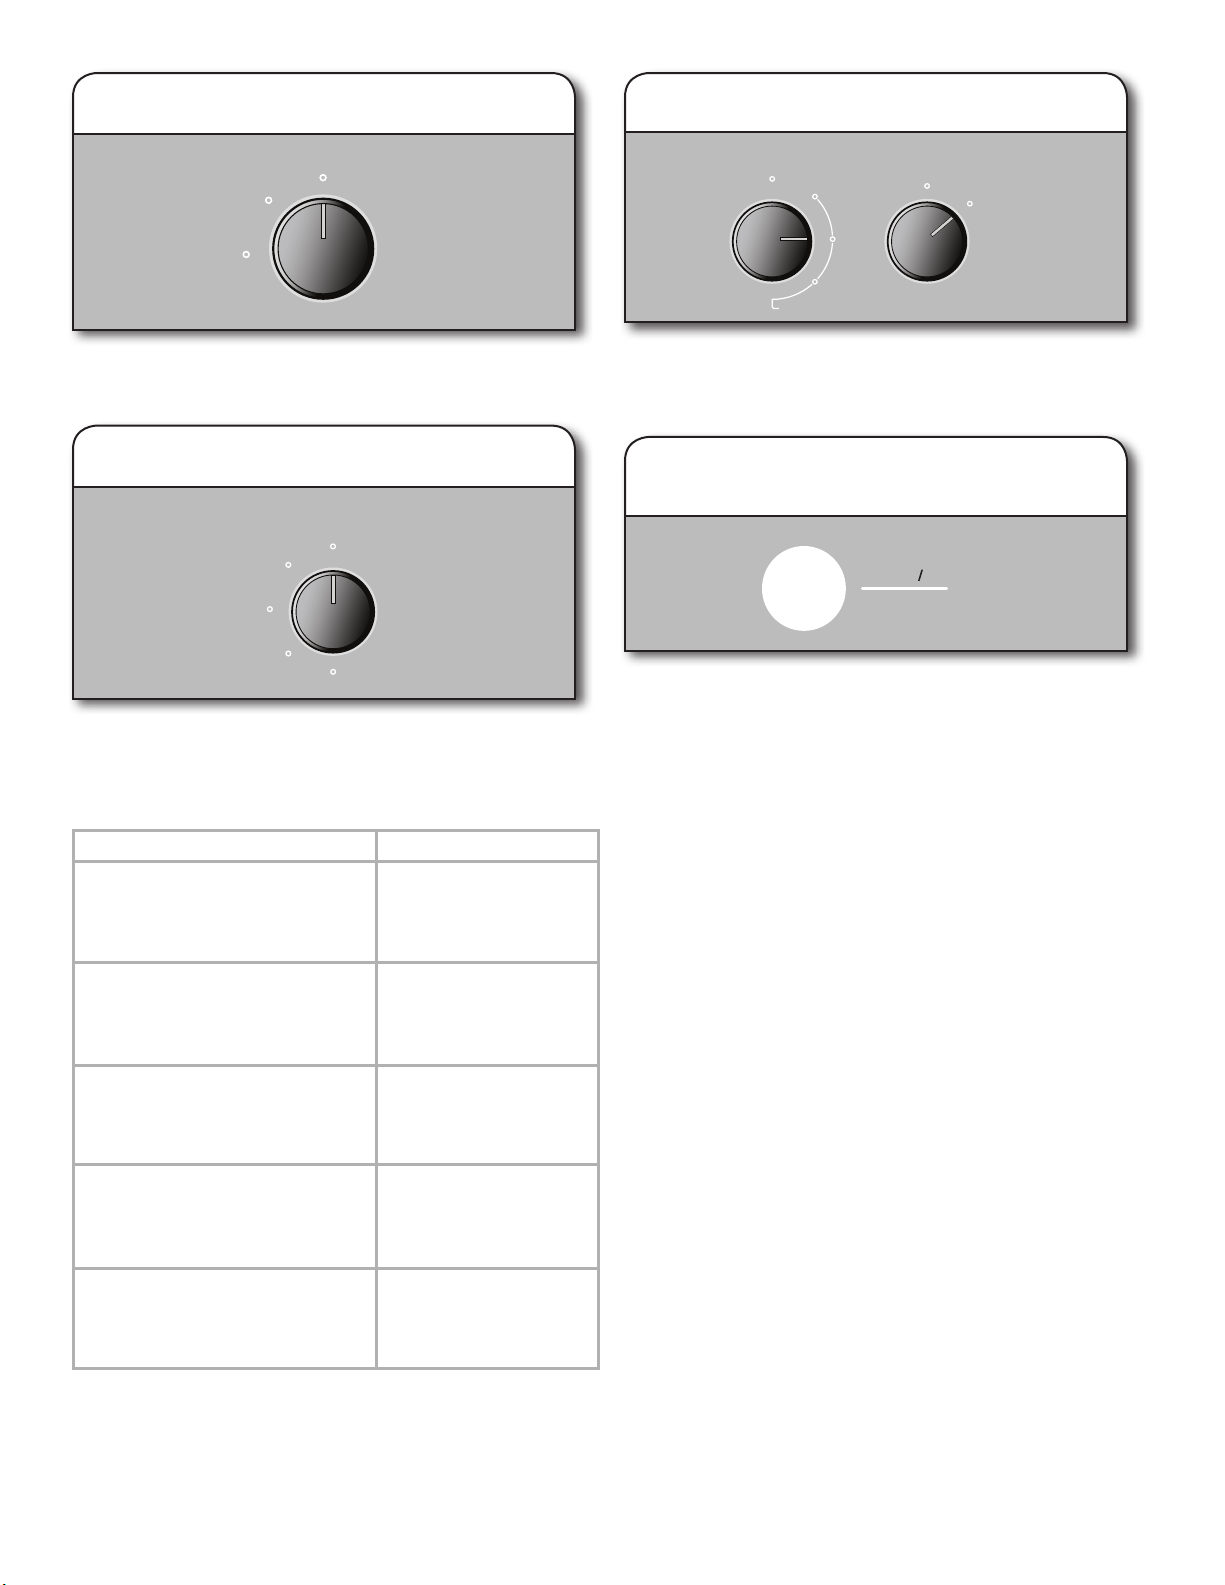
WASH CYCLE KNOB
Use the Wash Cycle knob to select cycles on your washer.
See “Cycle Guide” for detailed descriptions of cycles.
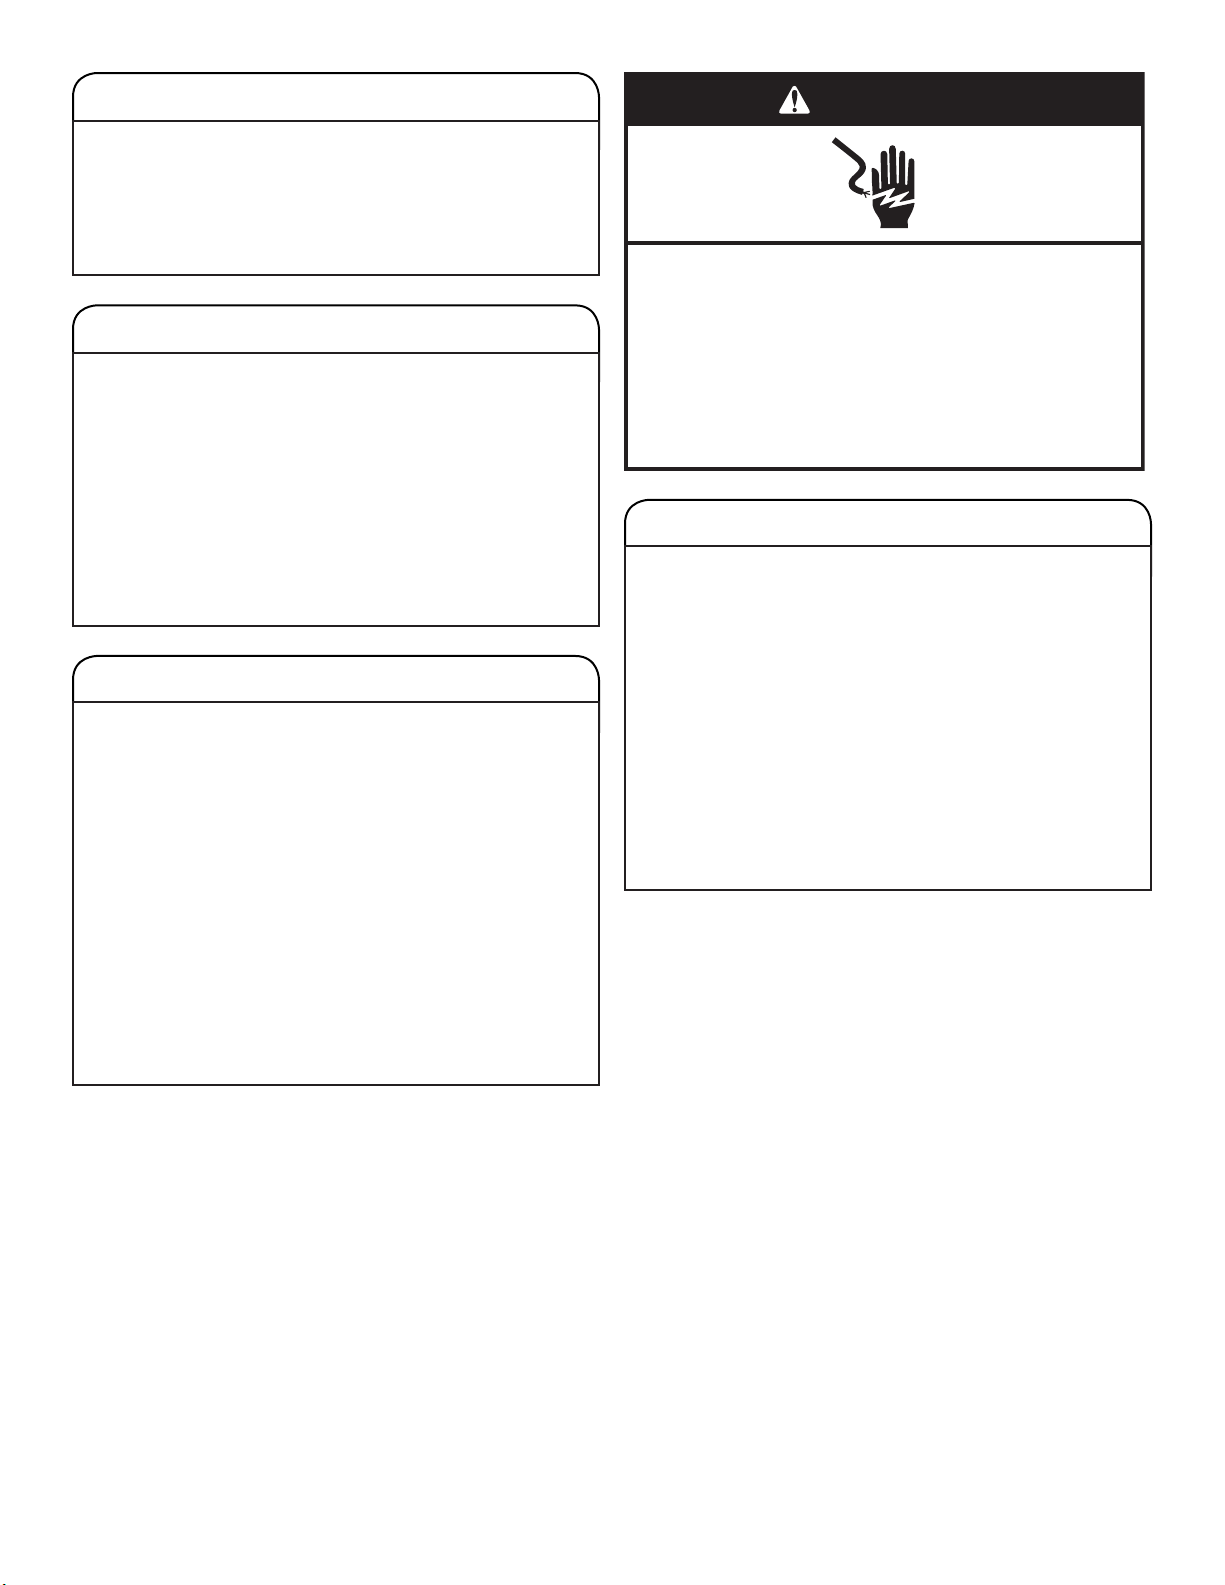
RINSE OPTIONS
The following options may be added to most cycles.
See “Cycle Guide” for additional details.
1 RINSE
This option is used to limit a cycle to one rinse.
2 RINSES
This option can be used to automatically add a
second rinse to most cycles.
1 RINSE with SOFTENER
This option must be selected if using fabric softener
during a cycle. It ensures that the water levels are correct
for optimal fabric softener distribution.
2 RINSES with SOFTENER
This option turns on both the fabric softener and
the 2 Rinses option.
PRESOAK
Use this option to add an extra soak period to any cycle
to help loosen tough stains. The washer will ll and then
alternate between a soak and a gentle agitation before
beginning the selected cycle.
1
2
3
4
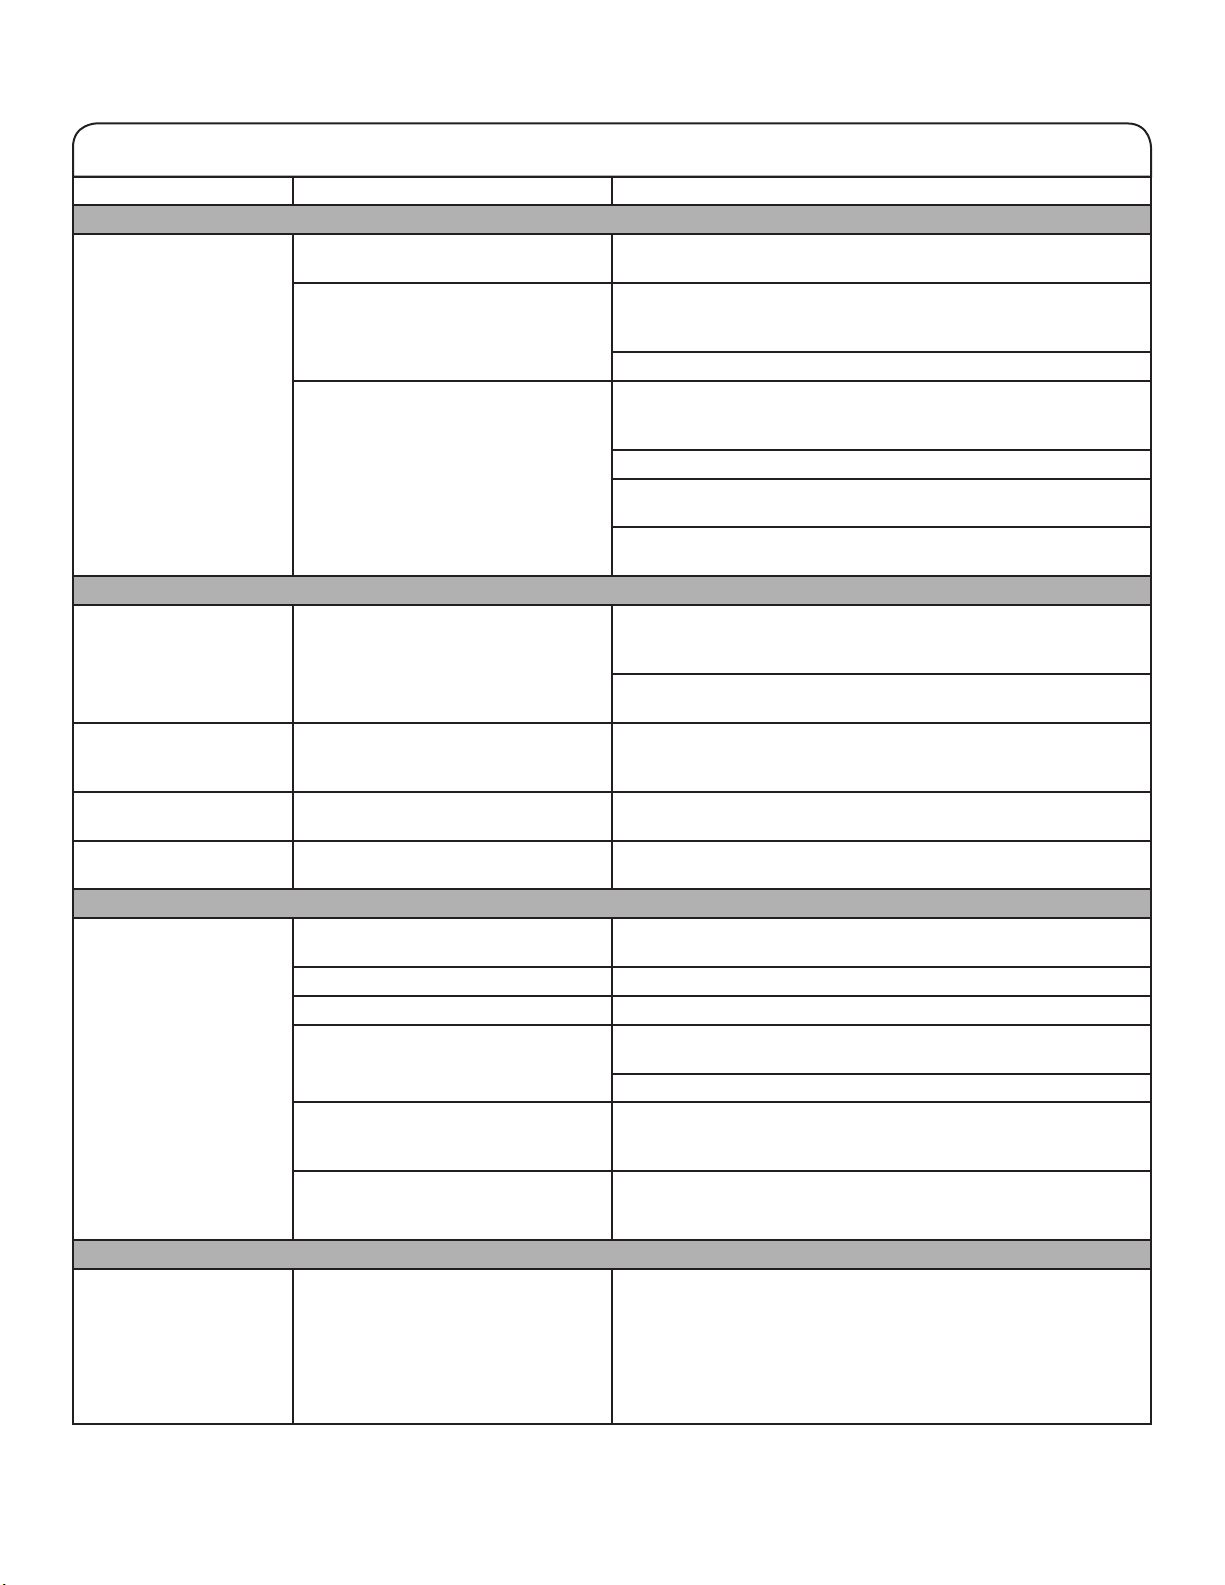
START/PAUSE BUTTON
Press to start the selected cycle; press again to pause the
cycle and unlock the lid.
NOTE: If the washer is spinning, it may take several
minutes to unlock the lid.
PROGRESS INDICATOR LIGHTS
單獨脫水
進水
行程進度
洗衣 洗清 脫水 完成 門上鎖
The Progress Lights show the progress of a cycle. At each
stage of the process, you may notice sounds or pauses that
are different from traditional washers.
SENSING
When the Start/Pause button is pressed, the washer will
ll to an initial water level and begin sensing to determine
the load size. The washer will then continue lling to the
appropriate water level based on load size and proceed to
Wash.
If the lid is opened or the Start/Pause button is pressed,
the cycle will pause. Closing the lid and/or pressing the
Start/Pause button will resume the cycle. If the cycle
remains paused with the lid open for 10 minutes, the
washer will pump out the water.
WASH
During the rst stage of the sensing/wash cycle, water will
partially ll the washer and begin to move the load. It is
normal to have the sensing light on during this stage. You
will hear the agitator rotate followed by a several second
pause. This process will repeat for several minutes,
allowing the entire load to become saturated. The lower
water level combined with HE detergent at this stage
allows for concentrated cleaning. It is normal for the
load to be above the water line during this stage. At the
beginning of the second stage, the washer will add water
to the correct level based on the load size. You will hear
the agitator increase speed during this stage of the wash
cycle. The motor sounds may change at different stages
in the wash cycle.
6
5
7
暫停啟動
8TWTW4955JW/
8TWTW6000JW
標準
白色
溫水
涼水
冷水
自來水
厚重衣物
免燙衣料
柔洗
冷水洗衣
單獨浸泡
洗清&脫水
單獨脫水
衣量多/大物件
衣物髒度
洗清選擇
水位選擇
自動偵測
洗衣水溫
(
需接熱水管
)
熱水
高水位
重
輕
進水
行程進度
洗衣 洗清 脫水 完成 門上鎖
一次洗清
自動偵測水位
(
按壓3秒取消行程
)
一次洗清
二次洗清
高水位 /
添加柔軟精*
自動偵測水位*
二次洗清
添加柔軟精*
高水位 /
* 使用柔軟精
標準
槽洗淨
搭配 錠
7
6
1
2 3
4 5

5
RINSE
You will hear sounds similar to the wash cycle as the
washer rinses and moves the load. You may hear the
motor turning on briey (short hum) to move the basket
while lling.
SPIN
The washer spins the load at increasing speeds for proper
water removal, based on the selected cycle and spin
speed.
DONE
Once the cycle is complete, this light will come on. For
best results, promptly remove the load.
LOCKED
The Lock feature allows for higher spin
speeds. When lit, the lid is locked and
cannot be opened without pausing the
cycle. When the light is off, the lid can be
opened.
To open the lid after it has been locked,
press START/PAUSE. The lid will unlock
once the washer movement has stopped.
This may take several minutes if the load
was spinning at high speed. Press
START/PAUSE while the lid is closed to
resume the cycle.
暫停啟動
單獨浸泡
洗清&脫水
洗衣 洗清 脫水 完成 門上鎖
(
按壓3秒取消行程
)
* 使用柔軟精
洗衣 洗清 脫水 完成
門上鎖
6
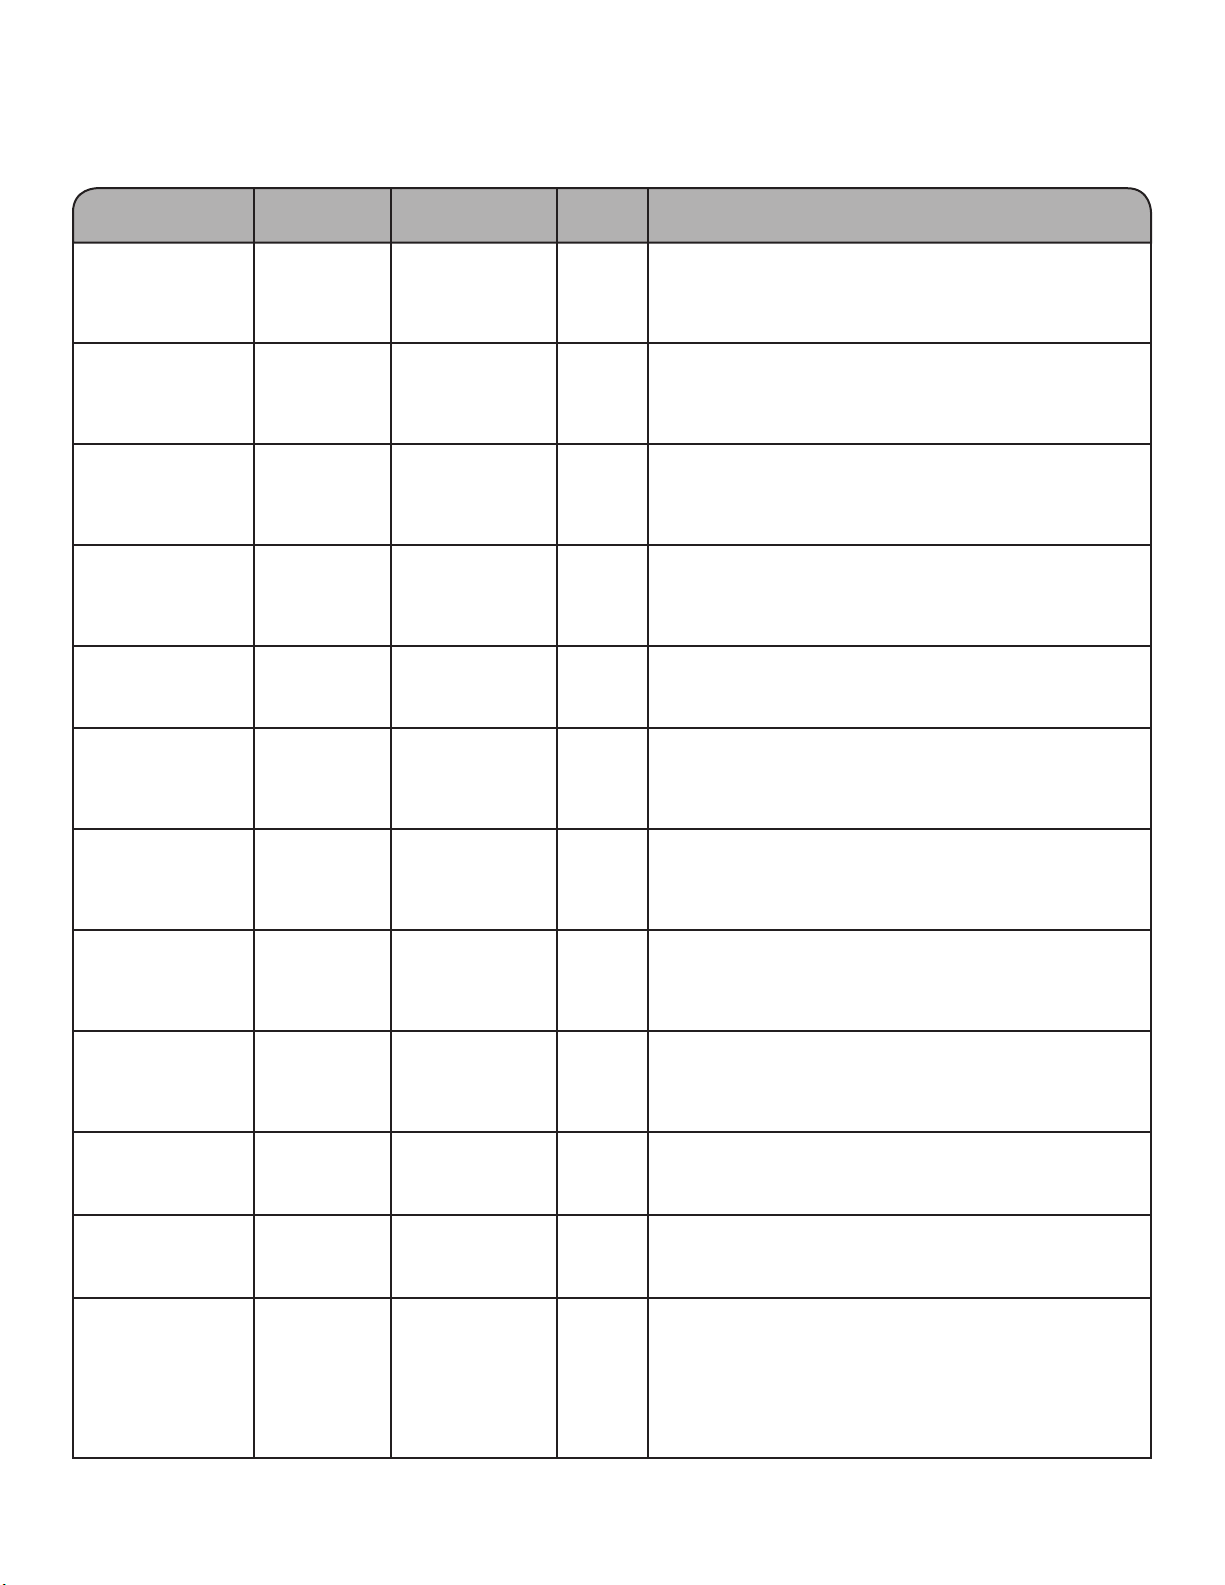
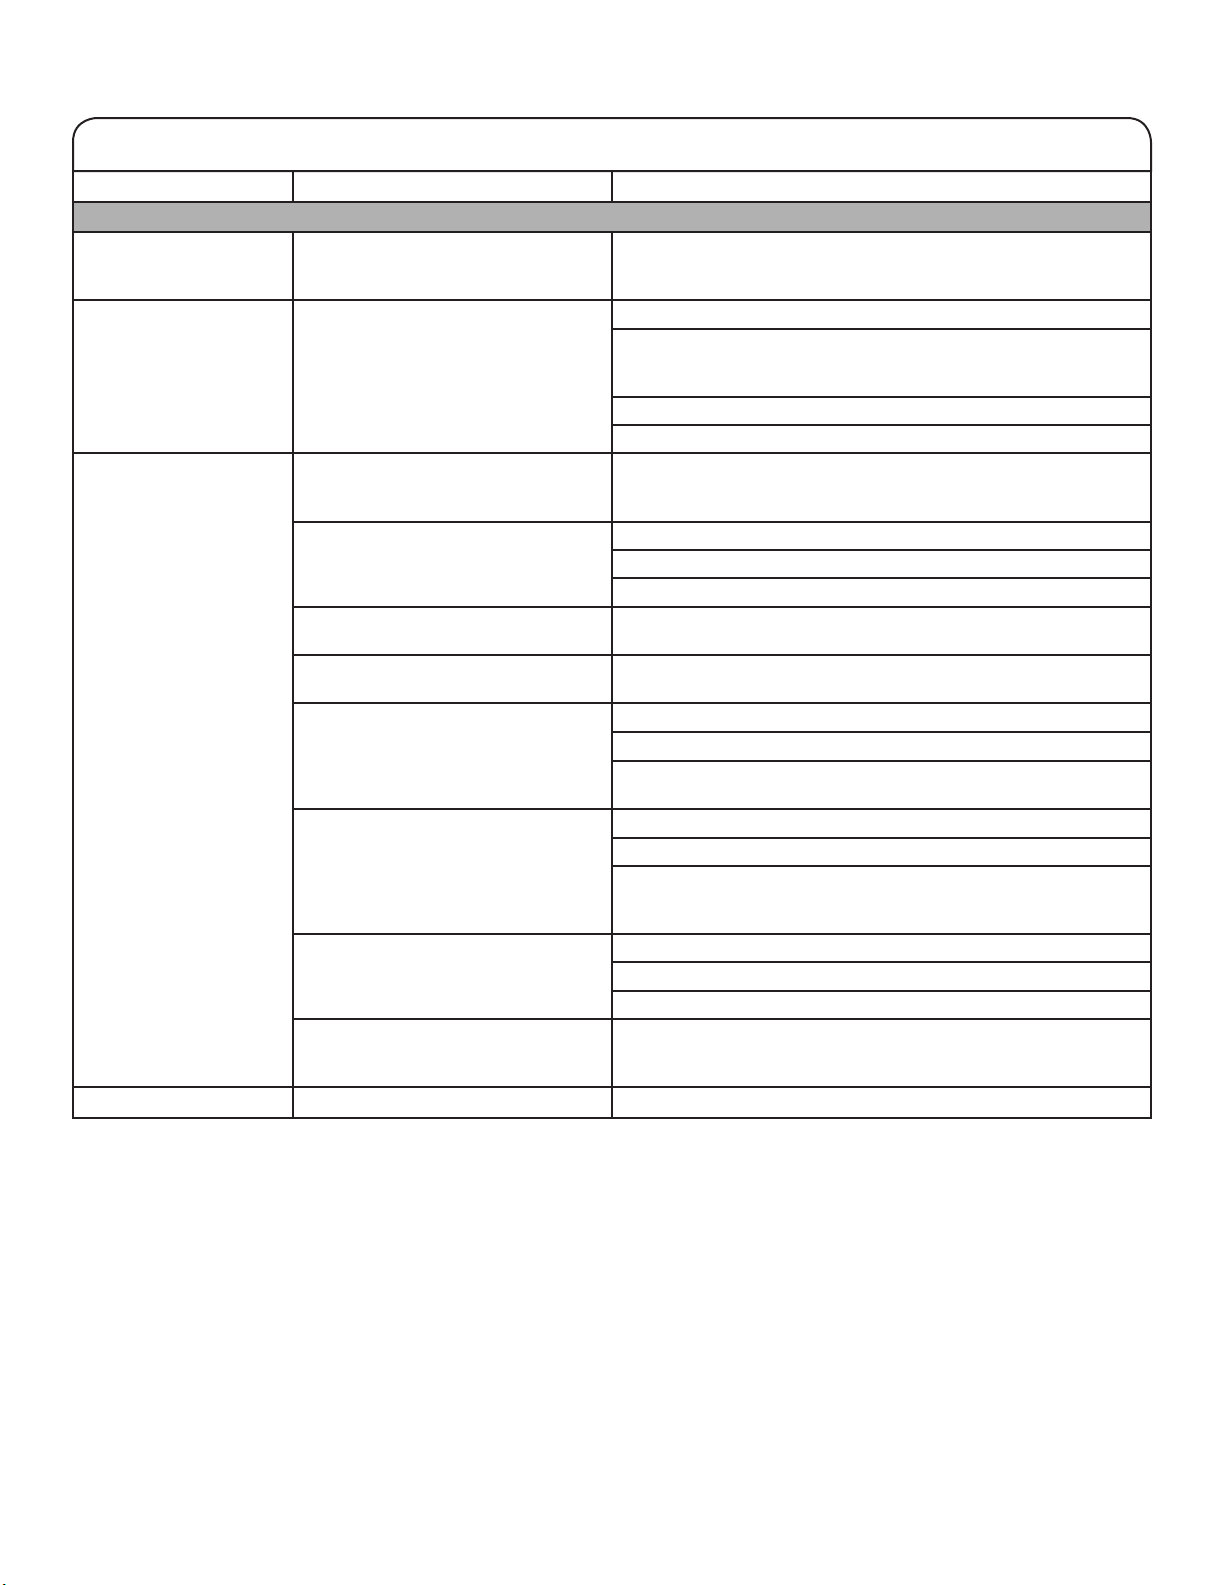
Cycle Guide
For best fabric care, choose the cycle that best ts the load being washed.
Recommended settings for best performance are shown in Bold.
Not all cycles and options are available on each cycle. Not all settings and options are available on each cycle.
*All rinses are cold.
**Spin speed is integrated into the cycle and can not be selected.
Large items such
as sheets, sleeping
bags, small
comforters, jackets,
small washable rugs
Bulky Items/
Sheets
Hot
Warm
Cool
Cold
Tap Cold
Low Use this cycle to wash large items such as jackets and small
comforters. The washer will ll with enough water to wet
down the load before the wash portion of the cycle begins,
and uses a higher water level than other cycles.
Sturdy fabrics,
colorfast items,
towels, jeans
Heavy Duty Hot
Warm
Cool
Cold
Tap Cold
High Provides maximum wash time and action for tough stains
and soils. Use this cycle for heavily soiled or sturdy items.
Water-level sensing process may take longer for some items
than for others because they will absorb more water than
other fabric types.
Casual and mixed
loads, jeans, towels,
sturdy fabrics
Deep Water
Wash
Hot
Warm
Cool
Cold
Tap Cold
High Provides additional water and alternating wash action for
heavily soiled mixed loads. Water-level sensing process may
take longer for some items than for others because they will
absorb more water than other fabric types.
Cottons, linens, and
mixed-item loads
Normal Hot
Warm
Cool
Cold
Tap Cold
High Use this cycle for normally soiled cottons and mixed-fabric
loads.
Bright or darkly
colored cottons,
linens, casual and
mixed loads
Cold Wash Cold High Cold water with an additional wash action gently lifts stains
while caring for fabrics. Settings may be adjusted as desired
but must use only cold water settings.
No-iron fabrics,
cottons, perm.
press, synthetics
Casual Hot
Warm
Cool
Cold
Tap Cold
Low Use this cycle to wash loads of no-iron fabrics such as sport
shirts, blouses, casual business clothes, permanent press,
and blends.
Machine-wash silks,
hand-wash fabrics
Delicate Hot
Warm
Cool
Cold
Tap Cold
Low Use this cycle to wash lightly soiled items indicating
“Machine Washable Silks” or “Gentle” cycle on the care
label. Place small items in mesh garment bags before
washing. This cycle uses a higher, preset water level.
Small loads,
cottons, polyester,
perm. press
Quick Wash Hot
Warm
Cool
Cold
Tap Cold
High Use this cycle to wash small, lightly soiled loads of 2-3 items
that are needed in a hurry.
Heavily soiled
fabrics
Soak Hot
Warm
Cool
Cold
Tap Cold
No Spin Use this cycle to soak small spots of set in stains on fabrics.
The washer will use intermittent agitation and soaking. After
time has expired, water will drain, but the washer will not
spin. Cycle is complete.
Hand-washed items
or dripping-wet
items
Drain &
Spin
N/A High This cycle uses a spin to shorten drying times for heavy
fabrics or special-care items washed by hand. Use this
cycle to drain washer after canceling a cycle or completing a
cycle after a power failure.
Swimsuits and
items requiring
rinsing without
detergent
Rinse &
Spin
Cold rinse only High Combines a rinse and high-speed spin for loads requiring
an additional rinse cycle. Use this cycle to complete a load
after power interruption or for loads that require rinsing only.
No clothes in
washer
Clean Washer
with
affresh
Hot
Warm
Cool
Cold
Tap Cold
Low Use this cycle every 30 washes to keep the inside of your
washer fresh and clean. This cycle uses a higher water level.
Use with affresh Washer Cleaner tablet or liquid chlorine
bleach to thoroughly clean the inside of your washer. This
cycle should not be interrupted. See “Washer Care.”
IMPORTANT: Do not place garments or other items in the
washer during the Clean Washer with affresh cycle. Use this
cycle with an empty wash tub.
Items to wash: Cycle: Wash Temp*: Spin
Speed**:
Cycle Details:
7
Using Your Washer
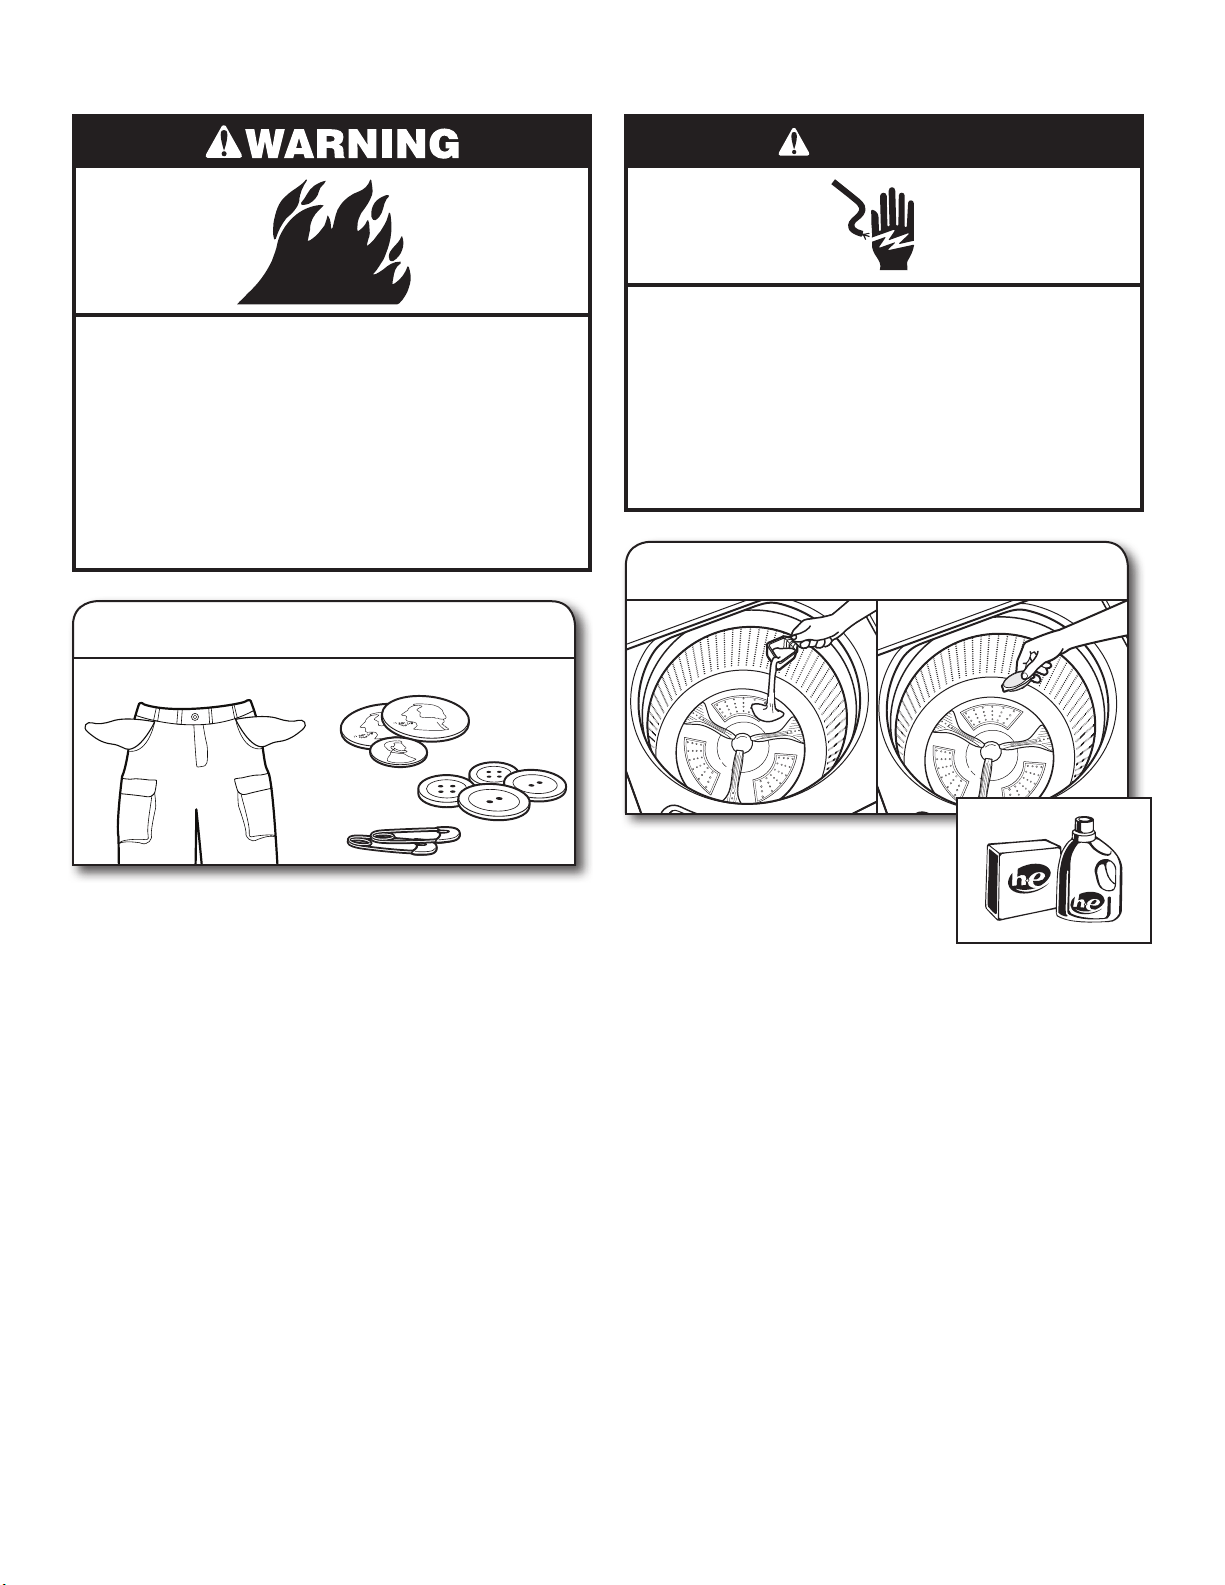
Fire Hazard
Never place items in the washer that are
dampened with gasoline or other flammable
fluids.
No washer can completely remove oil.
Do not dry anything that has ever had any type of
oil on it (including cooking oils).
Doing so can result in death, explosion, or fire.
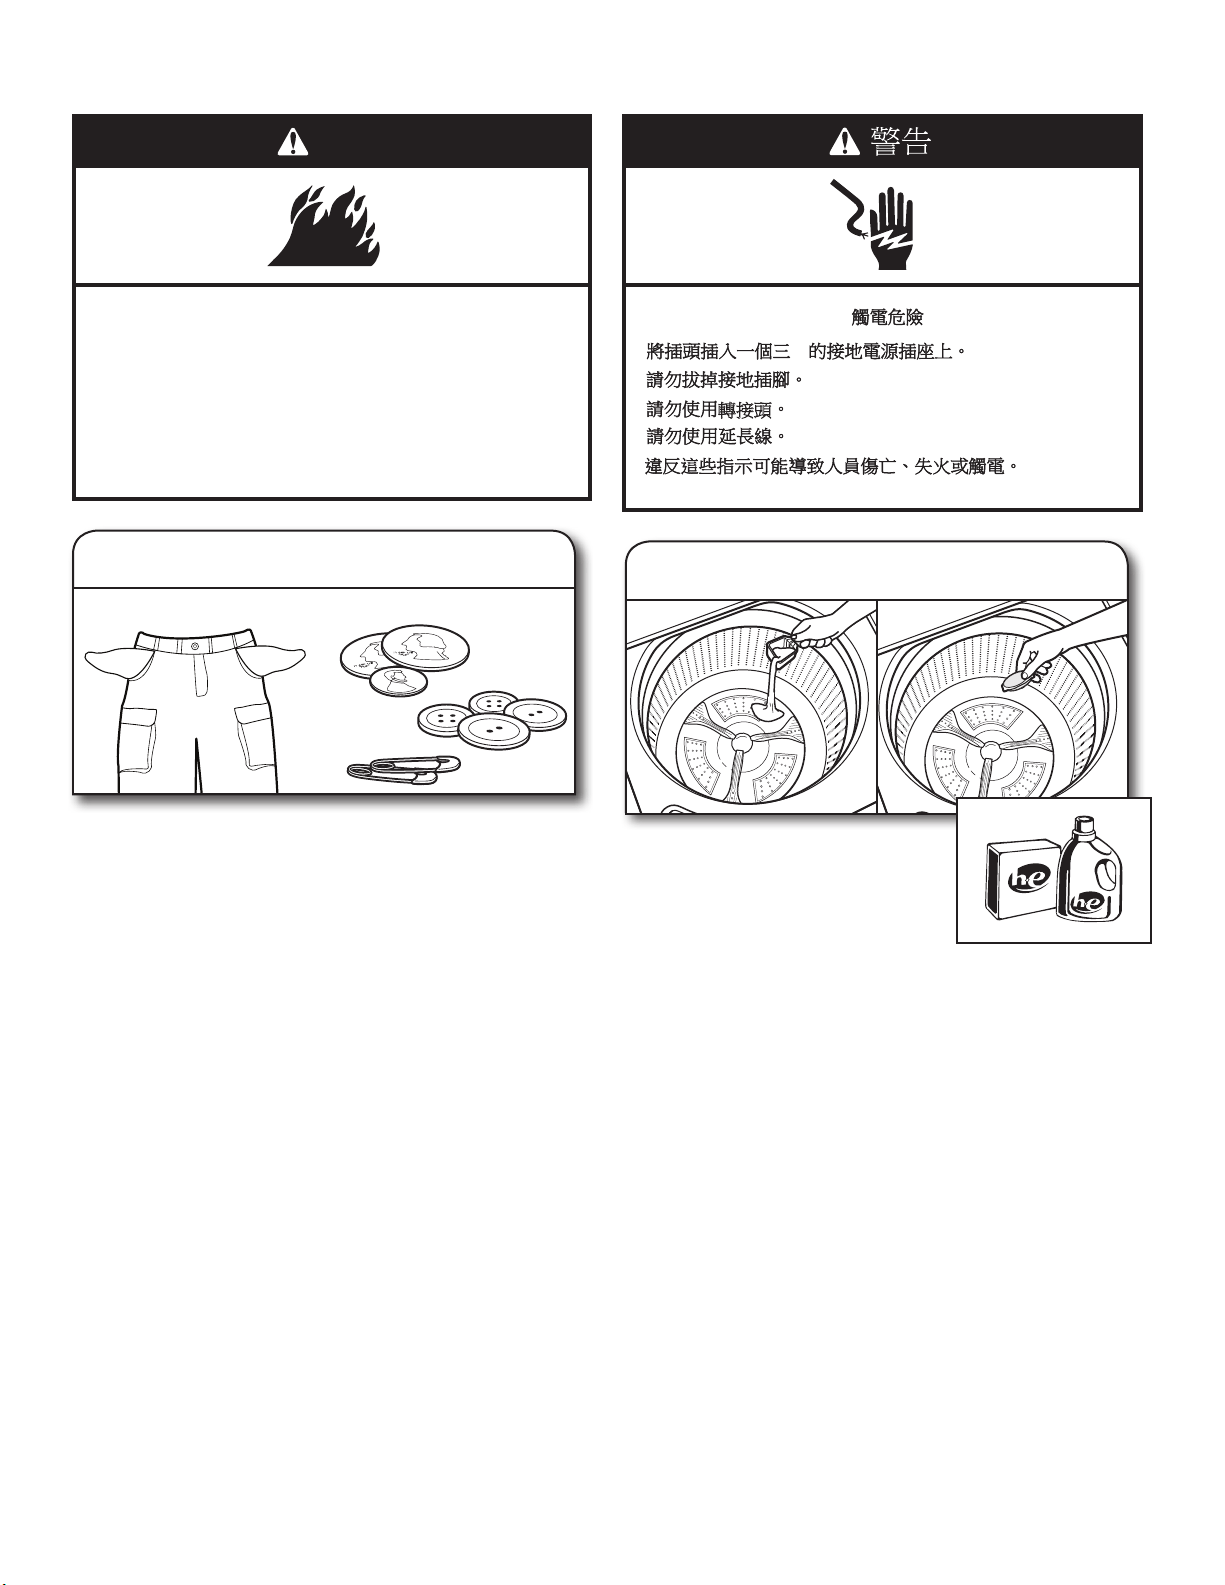
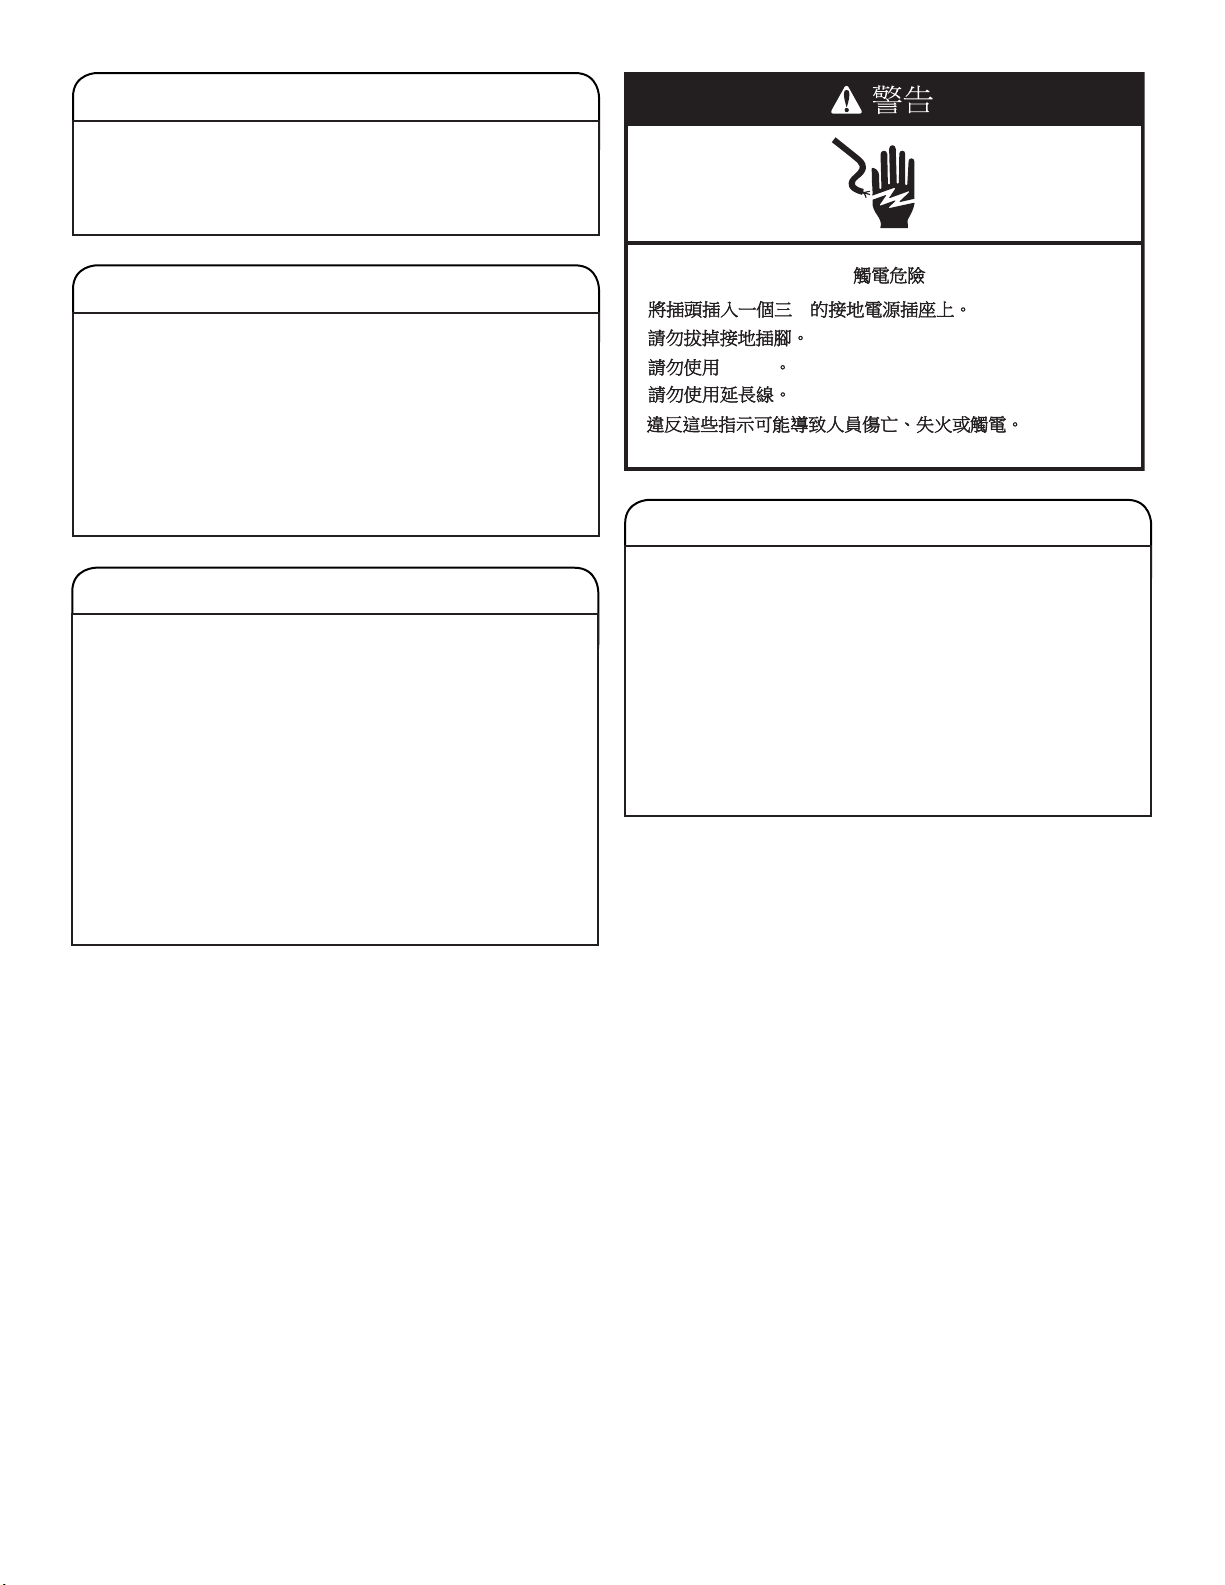
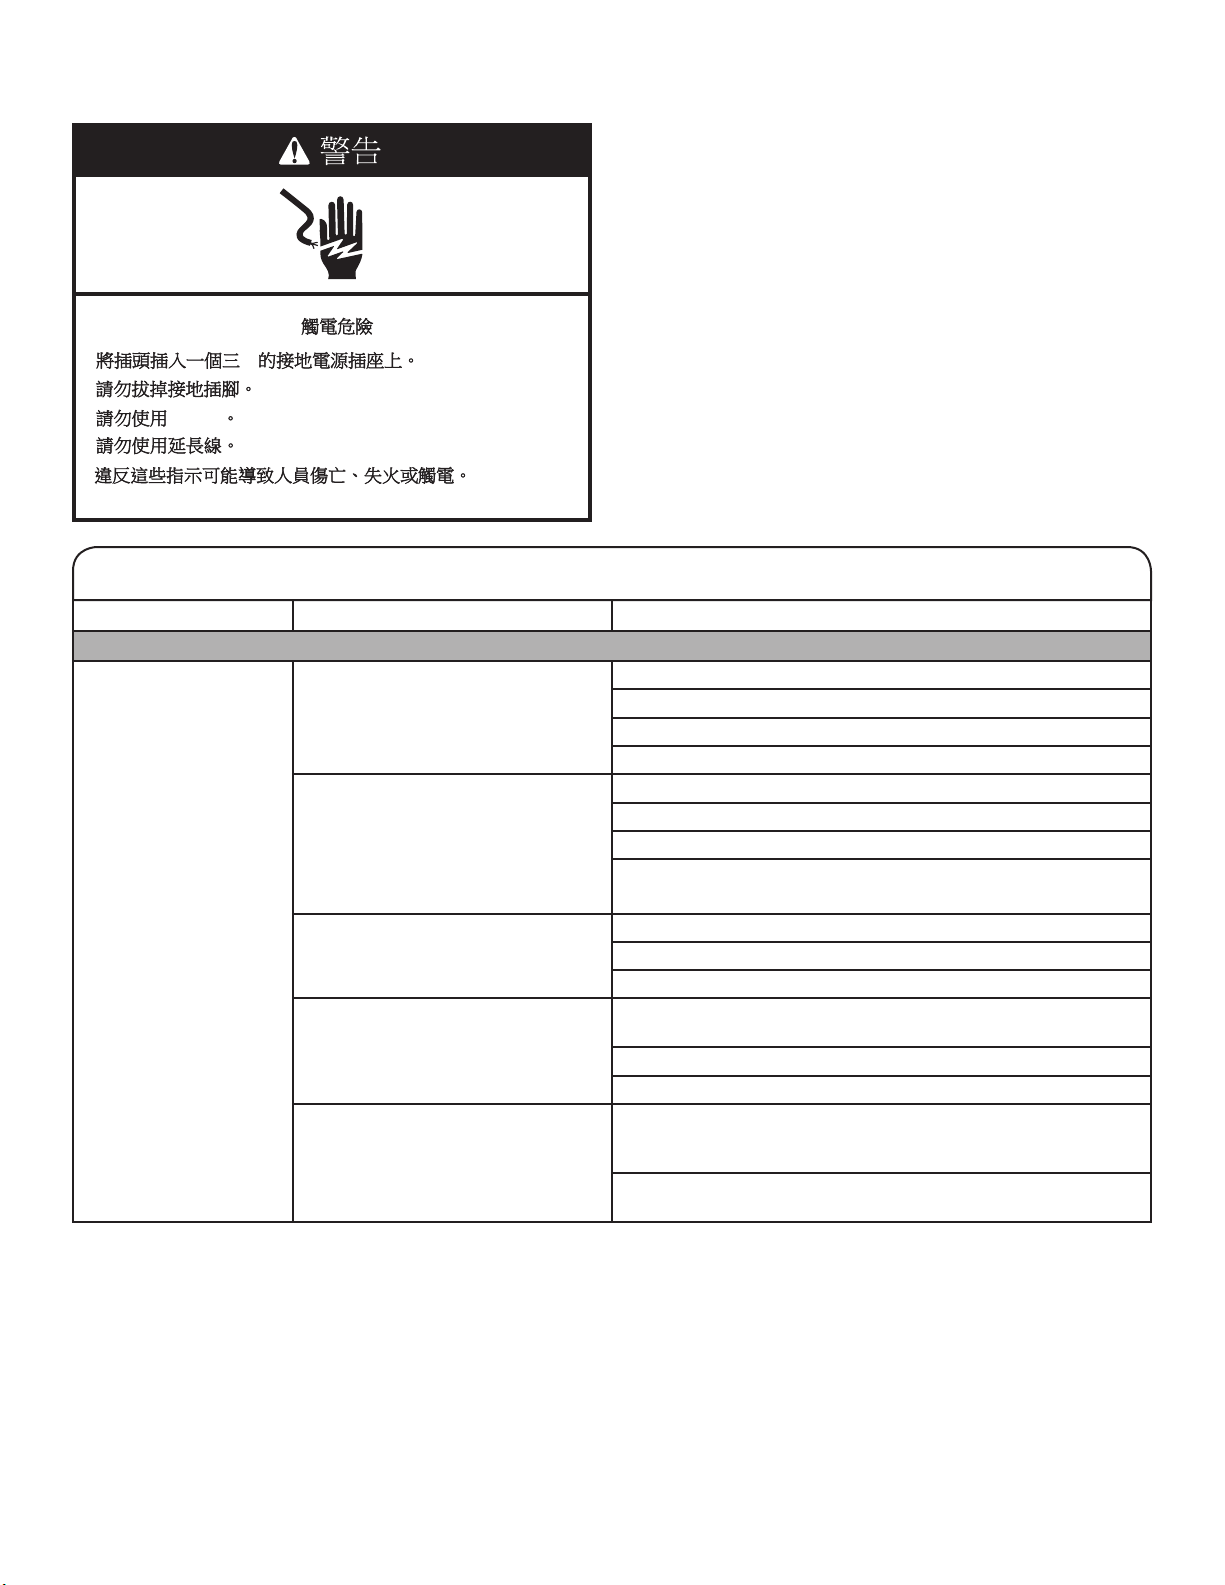
Electrical Shock Hazard
Plug into a grounded 3 prong outlet.
Do not remove ground prong.
Do not use an adapter.
Do not use an extension cord.
Failure to follow these instructions can result in death,
fire, or electrical shock.
WARNING
■ Empty pockets. Loose change, buttons, or any small
object can pass under the washplate and become trapped,
causing unexpected sounds.
■ Sort items by recommended cycle, water temperature, and
colorfastness.
■ Separate heavily soiled items from lightly soiled.
■ Separate delicate items from sturdy fabrics.
■ Do not dry items if stains remain after washing, because
heat can set stains into fabric.
■ Treat stains promptly.
■ Close zippers, fasten hooks, tie strings and sashes, and
remove non-washable trim and ornaments.
■ Mend rips and tears to avoid further damage to items
during washing.
Helpful Tips:
■ When washing water-proof or water-resistant items, load
evenly. See “Cycle Guide” for tips and more information on
using the Bulky Items cycle.
■ Use mesh item bags to help avoid tangling when washing
delicate or small items.
■ Turn knits inside out to avoid pilling. Separate lint-takers
from lint-givers. Synthetics, knits, and corduroy fabrics will
pick up lint from towels, rugs, and chenille fabrics.
Always read and follow fabric care label instructions to avoid
damage to your items.
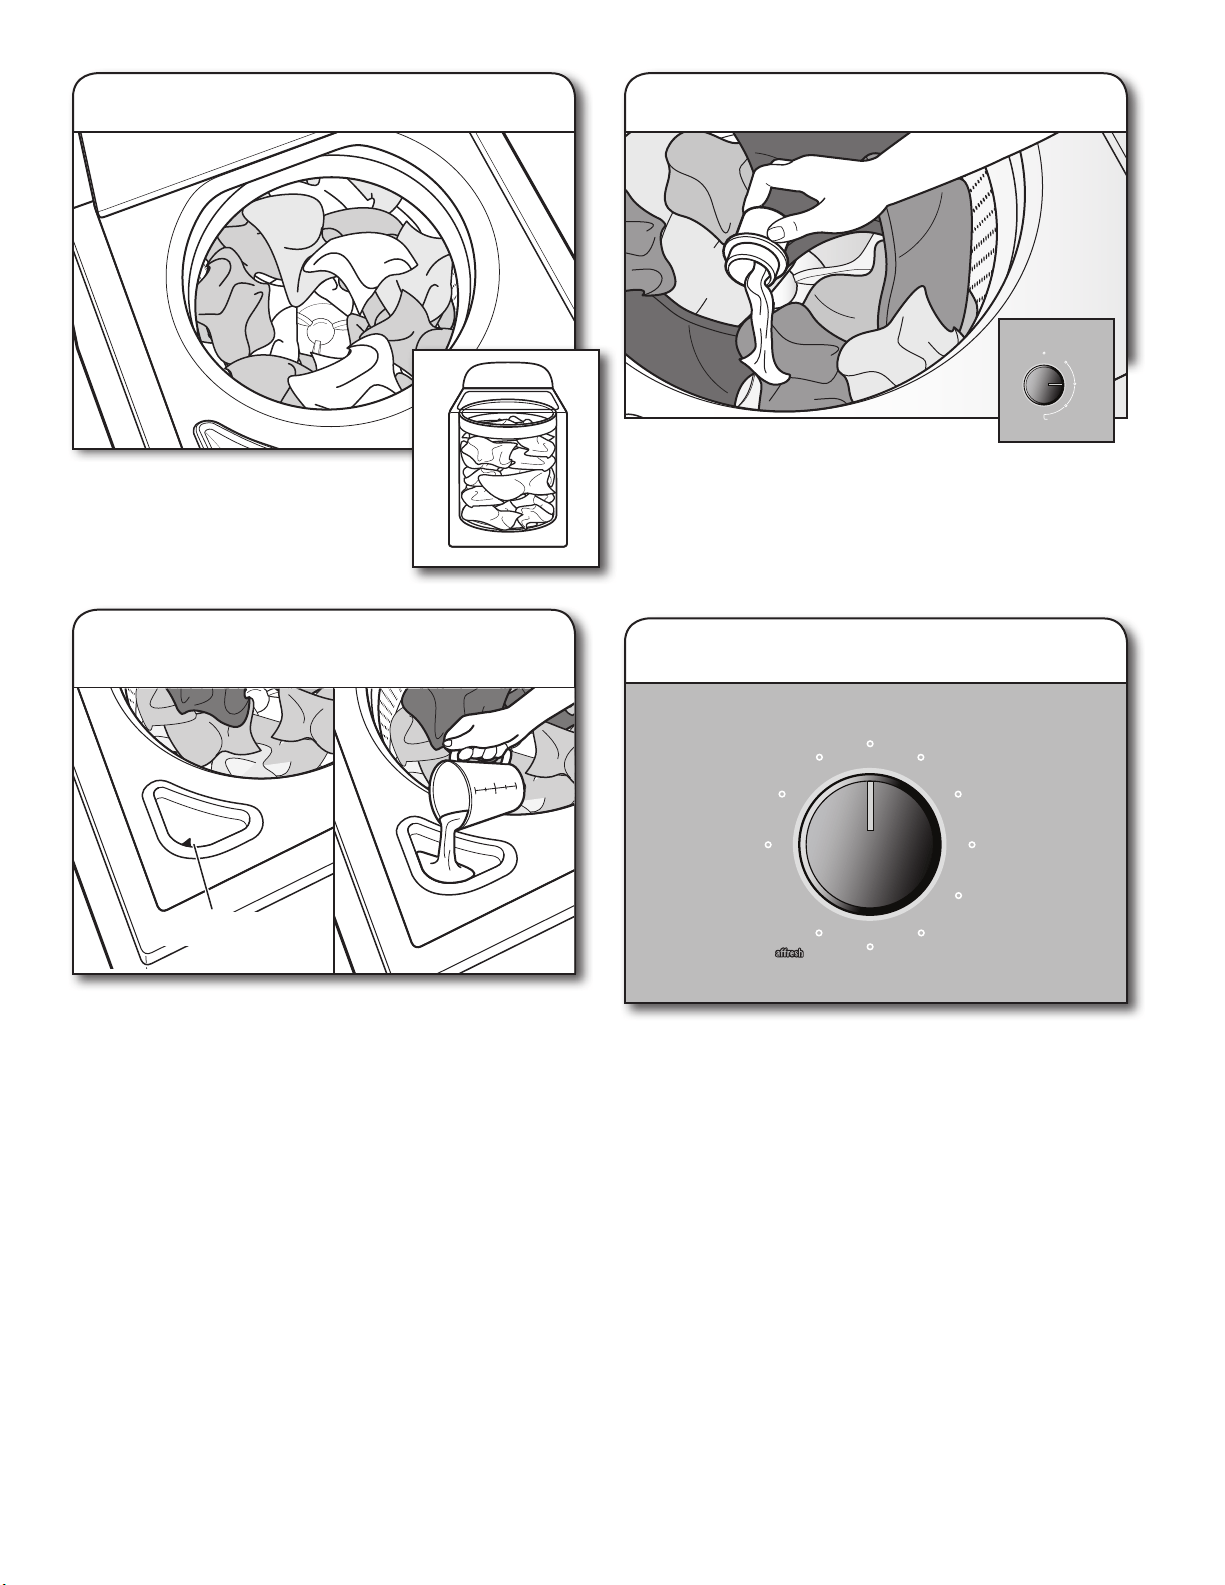
1. Sort and prepare your laundry
Add a measured amount of HE
detergent or single-dose laundry
packet into the basket.
If using Oxi-type boosters, color-safe
bleach, or fabric softener crystals, add
to the bottom of the washer basket
before adding clothes.
IMPORTANT: Use only High Efciency detergents. The
package will be marked “HE” or “High Efciency.” Low-water
washing creates excessive sudsing with a regular non-HE
detergent. Using regular detergent will likely result in longer
cycle times and reduced rinsing performance. It may also
result in component failures and noticeable mold or mildew.
HE detergents are made to produce the right amount of suds
for the best performance.
NOTE: Follow the manufacturer’s instructions to determine
the amount of laundry products to use.
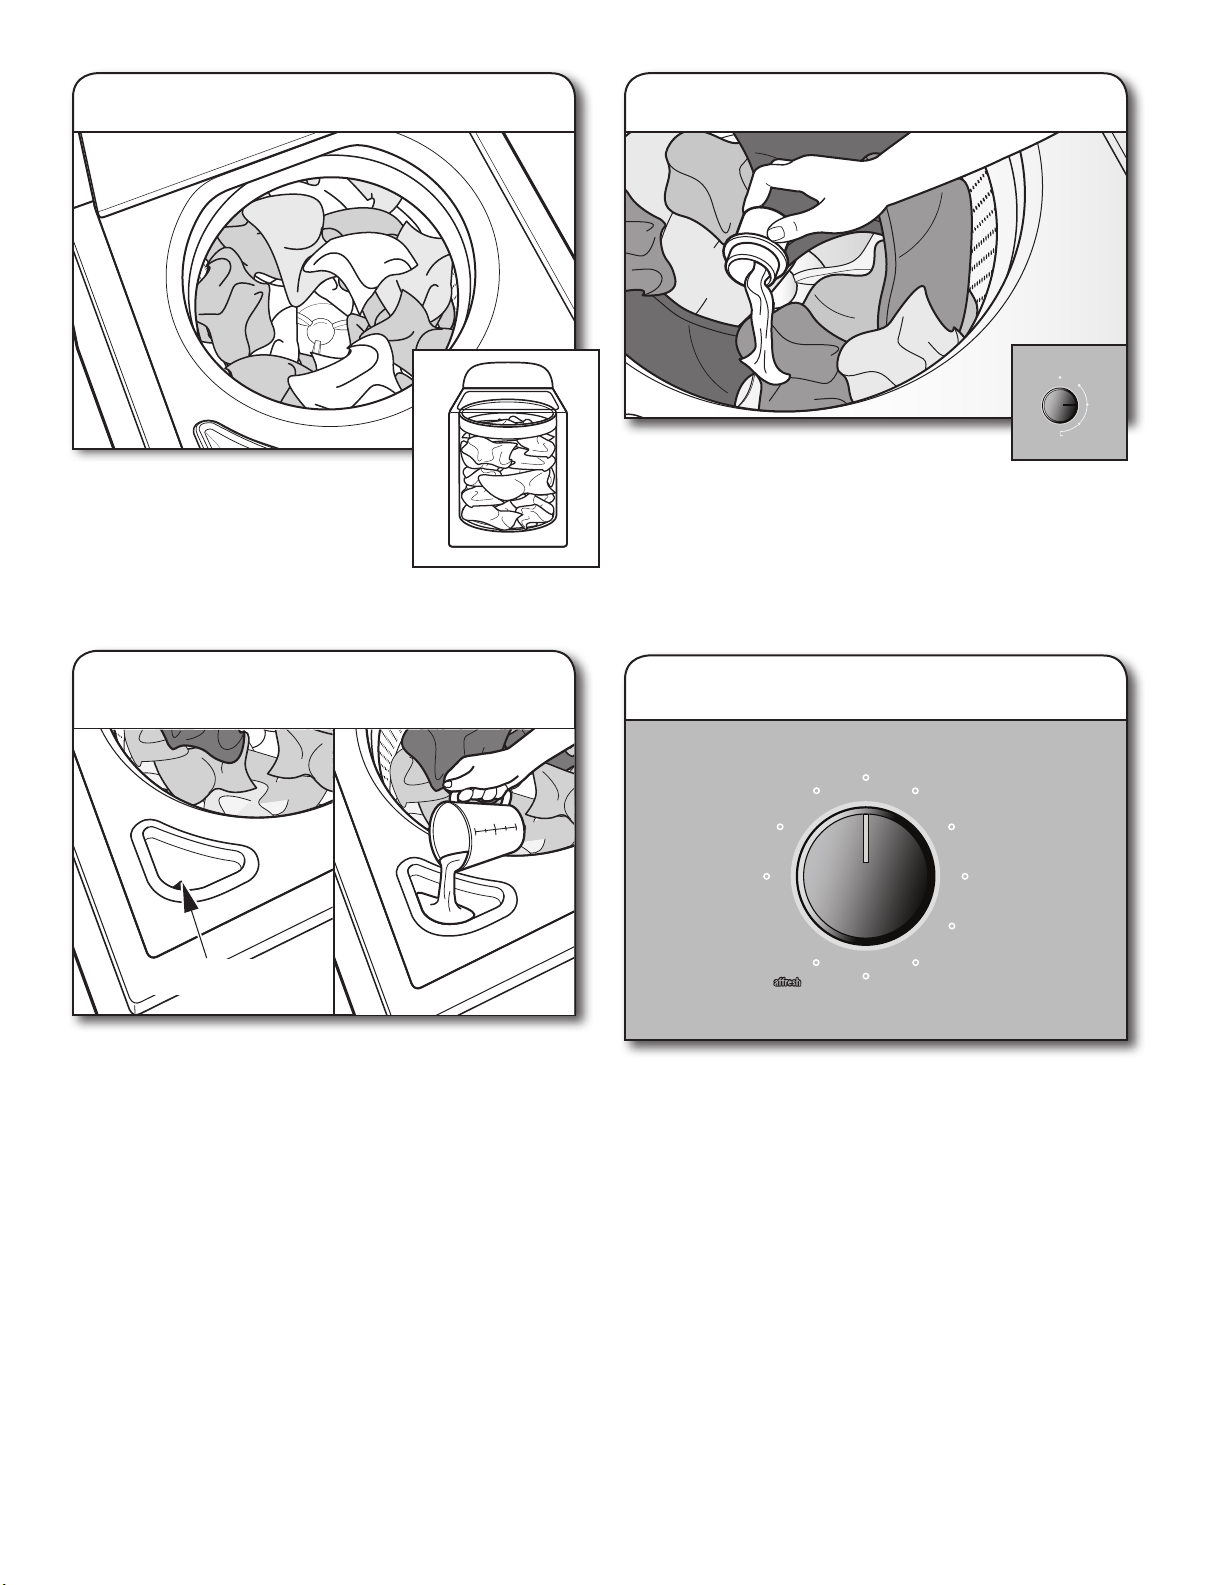
2. Add laundry products
8
5. Add fabric softener, if desired
During the nal rinse, wait until the washer
has completed lling and press the START/
PAUSE button to pause the washer. Lift the lid and add the
measured, recommended amount of liquid fabric softener. Do
not use more than the recommended amount. Close the lid
and press the START/PAUSE button again to start the washer.
IMPORTANT: Rinse option must be selected to 1 Rinse
with Softener or 2 Rinses with Softener to ensure proper
distribution at correct time in cycle. Do not overll or dilute.
4. Add liquid chlorine bleach
to dispenser, if desired
Liquid
Chlorine Bleach
Do not overll, dilute, or use more than 1 cup (250 mL). Do
not use color-safe bleach or Oxi products in the same cycle
with liquid chlorine bleach.
Turn cycle knob to choose your wash cycle.
暫停啟動
8TWTW4955JW/
8TWTW6000JW
標準
白色
溫水
涼水
冷水
自來水
厚重衣物
免燙衣料
柔洗
冷水洗衣
單獨浸泡
洗清&脫水
單獨脫水
衣量多/大物件
衣物髒度
洗清選擇
水位選擇
自動偵測
洗衣水溫
(
需接熱水管
)
熱水
重
進水
行程進度
洗衣 洗清 脫水 完成 門上鎖
一次洗清
自動偵測水位
(
按壓3秒取消行程
)
一次洗清
二次洗清
高水位 /
添加柔軟精*
自動偵測水位*
二次洗清
添加柔軟精*
高水位 /
* 使用柔軟精
標準
槽洗淨
搭配 錠
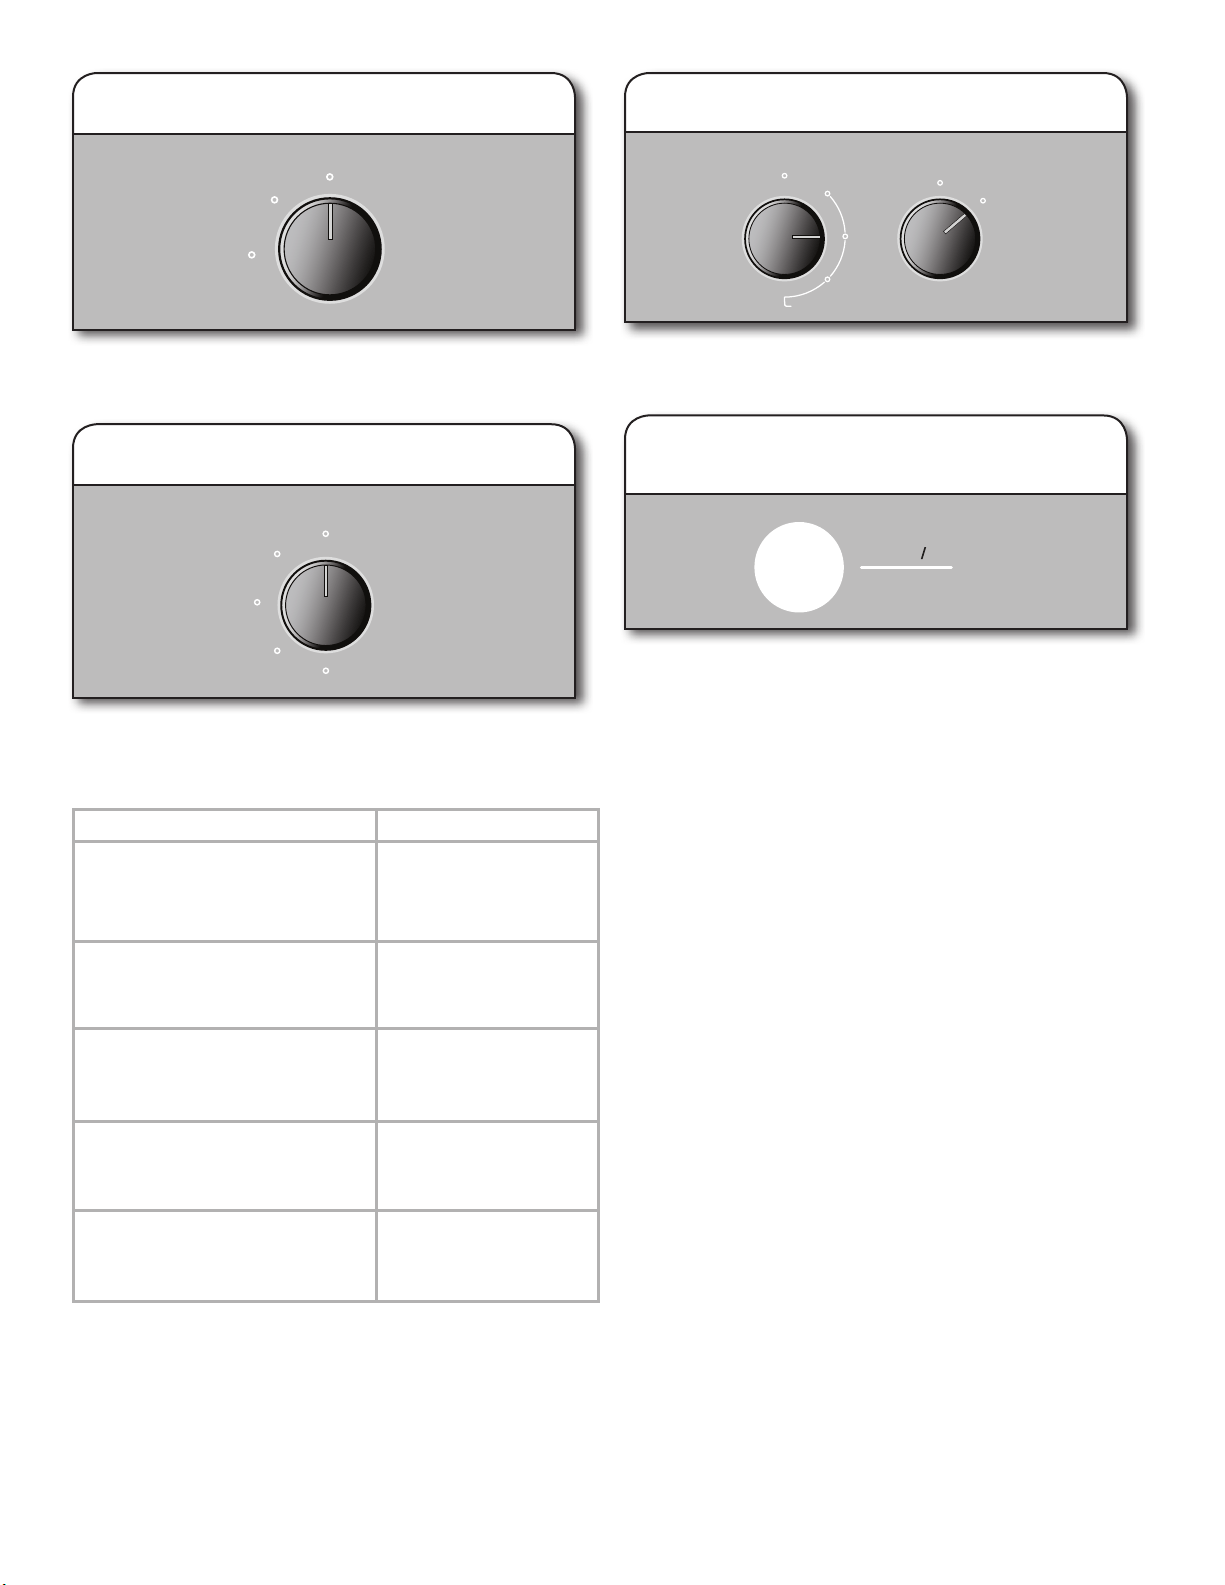
6. Select cycle
For best performance, load items
in loose heaps evenly around the
washplate. Try mixing different sized
items to reduce tangling.
IMPORTANT: Items need to move
freely for best cleaning and to reduce
wrinkling and tangling.
3. Load laundry into washer
洗清選擇
一次洗清
自動偵測水位
一次洗清
二次洗清
高水位
/
添加柔軟精*
自動偵測水位*
二次洗清
添加柔軟精*
高水位
/
* 使用柔軟精
9
白色
溫水
涼水
冷水
自來水
厚重衣物
衣量多/大物件
衣物髒度
洗衣水溫
(
需接熱水管
)
熱水
重
輕
進水
行程進度
洗衣 洗清 脫水 完成 門上鎖
標準
槽洗淨
搭配 錠
1
8. Select WASH TEMP
暫停啟動
8TWTW4955JW/
8TWTW6000JW
標準
白色
自來水
厚重衣物
免燙衣料
柔洗
冷水洗衣
單獨浸泡
洗清&脫水
單獨脫水
衣量多/大物件
洗清選擇
水位選擇
自動偵測
洗衣水溫
(
需接熱水管
)
熱水
高水位
進水
行程進度
洗衣 洗清 脫水 完成 門上鎖
一次洗清
自動偵測水位
(
按壓3秒取消行程
)
一次洗清
二次洗清
高水位
/
添加柔軟精*
自動偵測水位*
二次洗清
添加柔軟精*
高水位
/
* 使用柔軟精
槽洗淨
搭配 錠
7
6
3
9. Select cycle options, if desired
If you would like to add an extra rinse, fabric softener, or
extra soak period to any cycle, turn the knob to desired
setting.
暫停啟動
單獨浸泡
洗清&脫水
洗衣 洗清 脫水 完成 門上鎖
(
按壓3秒取消行程
)
* 使用柔軟精
10. Press START/PAUSE
to begin wash cycle
Press the START/PAUSE button to start the wash cycle. When
the cycle has nished, the Done indicator will light. Promptly
remove garments after cycle has completed to avoid odor,
reduce wrinkling, and prevent rusting of metal hooks, zippers,
and snaps.
Unlocking the lid to add items
If you need to open the lid to add 1 or 2 missed garments:
Press START/PAUSE. The lid will unlock once the washer
movement has stopped. This may take several minutes if the
load was spinning at high speed. Add garments, close lid, and
press START/PAUSE again to restart the cycle.
If lid is left open for more than 10 minutes the water will
pump out automatically.
Wash Temp Suggested Fabrics
Once you select a cycle, select the wash temperature by
turning the Wash Temp knob to the desired setting.
Always read and follow fabric care label instructions to avoid
damage to your items.
Cool
Warm water is added to assist in
soil removal and to help dissolve
detergents.
Dark colors that
bleed or fade
Light soils
Hot
Some cold water is added to save
energy. This will be cooler than
your hot water heater setting.
Warm
Some cold water will be added, so
this will be cooler than what your
previous washer provided.
Cold
Warm water may be added to
assist in soil removal and to help
dissolve detergents.
Whites and pastels
Durable items
Heavy soils
Bright colors
Moderate to light soils
Colors that bleed
or fade
Light soils
Dark colors that
bleed or fade
Light soils
Tap Cold
This is the temperature from your
faucet.
溫水
涼水
冷水
自來水
衣物髒度
洗衣水溫
(
需接熱水管
)
熱水
重
輕
標準
2
7. Select SOIL LEVEL
Once you select a cycle, select the soil level by turning the
Soil Level knob to the desired setting.
10
Washer Maintenance
Replace inlet hoses after 5 years of use to reduce the risk
of hose failure. Periodically inspect and replace inlet hoses
if bulges, kinks, cuts, wear, or leaks are found.
When replacing your inlet hoses, mark the date of
replacement on the label with a permanent marker.
WATER INLET HOSES
WASHER CARE
Recommendations to Help Keep Your Washer Clean
and Performing at its Best
1. Always use High Efciency (HE) detergents and follow the
HE detergent manufacturer’s instructions regarding the
amount of HE detergent to use. Never use more than the
recommended amount because that may increase the
rate at which detergent and soil residue accumulate inside
your washer, which in turn may result in undesirable odor.
2. Use warm and hot wash water settings sometimes (not
exclusively cold water washes), because they do a better
job of controlling the rate at which soils and detergent
accumulate.
3. Always leave the washer lid open between uses to help
dry out the washer and prevent the buildup of
odor-causing residue.
Cleaning Your Top Loading Washer
Read these instructions completely before beginning the
routine cleaning processes recommended below. This
Washer Maintenance Procedure should be performed,
at a minimum, once per month or every 30 wash cycles,
whichever occurs sooner, to control the rate at which soils
and detergent may otherwise accumulate in your washer.
Cleaning the Inside of the Washer
To keep your washer odor-free, follow the usage instructions
provided above, and use this recommended monthly
cleaning procedure:
Clean Washer Cycle
This washer has a special cycle that uses higher water
volumes in combination with affresh Washer Cleaner
or liquid chlorine bleach to clean the inside of the washer.
Begin procedure
1. Affresh Washer Cleaner Cycle Procedure
(Recommended for Best Performance):
a. Open the washer lid and remove any clothing or items.
b. Place an affresh Washer Cleaner tablet in the bottom of
the washer basket.
c. Do not place an affresh Washer Cleaner tablet
in the detergent dispenser.
d. Do not add any detergent or other chemical to the
washer when following this procedure.
e. Close the washer lid.
f. Select the Clean Washer cycle.
g. Press the START/PAUSE button to begin the cycle. The
Clean Washer Cycle Operation is described below.
NOTE: For best results, do not interrupt cycle. If cycle
must be interrupted, press POWER/CANCEL. After the
Clean Washer cycle has stopped, run a Rinse & Spin cycle
to rinse cleaner from washer.
WASHER CARE (cont.)
2. Chlorine Bleach Procedure (Alternative):
a. Open the washer lid and remove any clothing
or items.
b. Add 1 cup (236 mL) of liquid chlorine bleach
to the bleach compartment.
NOTE: Use of more liquid chlorine bleach than is
recommended above could cause washer damage
over time.
c. Close the washer lid.
d. Do not add any detergent or other chemical
to the washer when following this procedure.
e. Select the Clean Washer cycle.
f. Press the START/PAUSE button to begin the cycle. The
Clean Washer Cycle Operation is described below.
NOTE: For best results, do not interrupt cycle. If cycle
must be interrupted, press POWER/CANCEL. After the
Clean Washer cycle has stopped, run a Rinse & Spin cycle
to rinse cleaner from washer.
Description of Clean Washer Cycle Operation:
1. This cycle will ll to a water level higher than in normal
wash cycles to provide rinsing at a level above the water
line for normal wash cycle.
2. During this cycle, there will be some agitation and
spinning to increase the removal of soils.
After this cycle is complete, leave the lid open to allow
for better ventilation and drying of the washer interior.
Cleaning the Dispensers
After a period of using your washer, you may nd some
residue buildup in the washer’s dispensers. To remove
residue from the dispensers, wipe them with a damp cloth
and towel dry. Do not attempt to remove the dispensers or
trim for cleaning. The dispensers and trim are not removable.
If your model has a dispenser drawer, however, remove the
drawer and clean it before or after you run the Clean Washer
cycle. Use an all-purpose surface cleaner, if needed.
Cleaning the Outside of the Washer
Use a soft, damp cloth or sponge to wipe away any spills.
Use only mild soaps or cleaners when cleaning external
washer surfaces.
IMPORTANT: To avoid damaging the washer’s nish, do not
use abrasive products.
11
Operate your washer only when you are home. If moving,
or not using your washer for a period of time, follow these
steps:
1. Unplug or disconnect power to washer.
2. Turn off water supply to washer, to avoid ooding due
to water-pressure surge.
NON-USE AND VACATION CARE
Electrical Shock Hazard
Plug into a grounded 3 prong outlet.
Do not remove ground prong.
Do not use an adapter.
Do not use an extension cord.
Failure to follow these instructions can result in death,
fire, or electrical shock.
WARNING
WINTER STORAGE CARE
IMPORTANT: To avoid damage, install and store washer
where it will not freeze. Some water may stay in hoses, and
freezing can damage washer. If storing or moving during
freezing weather, winterize your washer.
To winterize washer:
1. Shut off both water faucets; disconnect and drain water
inlet hoses.
2. Put 1 qt. (1 L) of R.V.-type antifreeze in basket and run
washer on Rinse & Spin cycle for about 30 seconds
to mix antifreeze and remaining water.
3. Unplug washer or disconnect power.
TRANSPORTING YOUR WASHER
1. Shut off both water faucets. Disconnect and drain water
inlet hoses.
2. If washer will be moved during freezing weather, follow
“Winter Storage Care” directions before moving.
3. Disconnect drain hose from drain system and drain any
remaining water into a pan or bucket. Disconnect drain
hose from back of washer.
4. Unplug power cord.
5. Place inlet hoses and drain hose inside washer basket.
6. Drape power cord over edge and into washer basket.
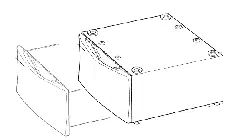
7. Place packing tray from original shipping materials
back inside washer. If you do not have packing tray,
place heavy blankets or towels into basket opening.
Close lid and place tape over lid and down front of
washer. Keep lid taped until washer is placed in new
location. Transport washer in upright position.
REINSTALLING/USING WASHER AGAIN
To reinstall washer after non-use, vacation, winter storage,
or moving:
1. Refer to Installation Instructions to locate, level, and
connect washer.
2. Before using again, run washer through the following
recommended procedure:
To use washer again:
1. Flush water pipes and hoses. Reconnect water-inlet
hoses. Turn on both water faucets.
2. Plug in washer or reconnect power.
3. Run washer through Bulky Items/Sheets cycle to clean
washer and remove antifreeze, if used. Use only HE
High Efciency detergent. Use 1/2 the manufacturer’s
recommended amount for a medium-size load.
12
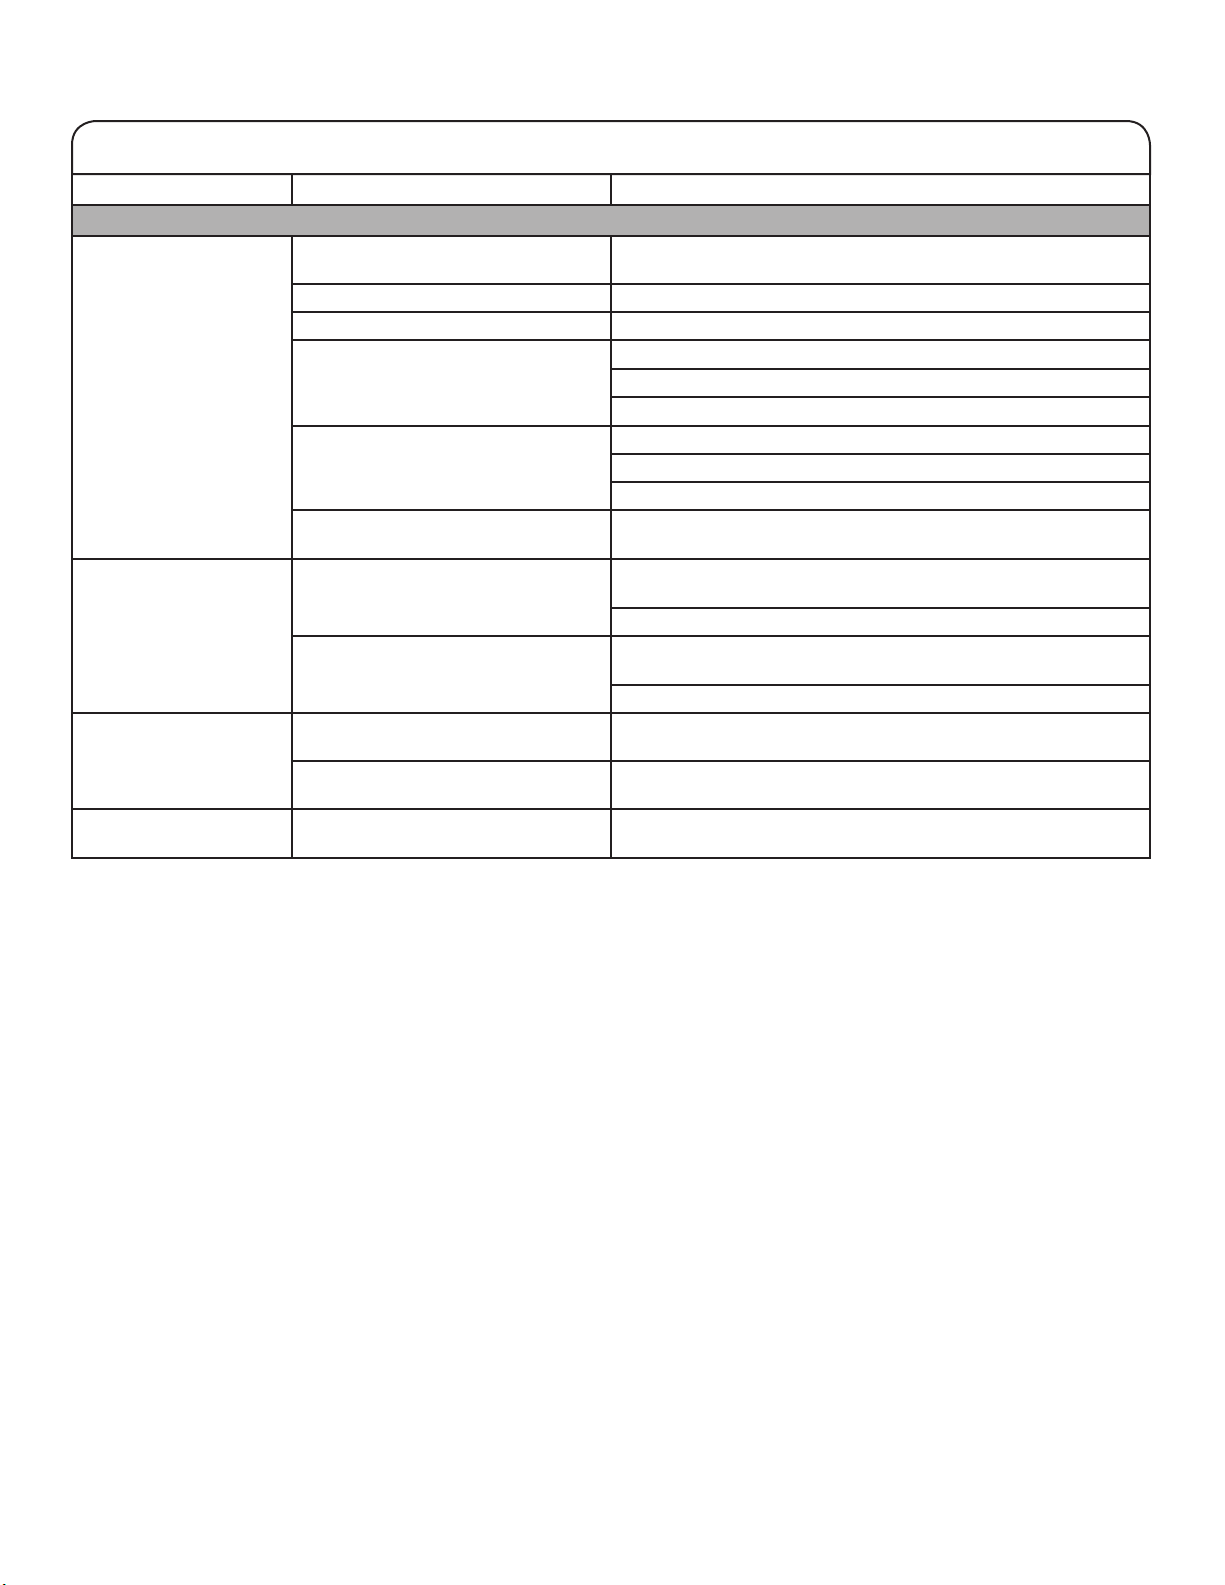
Troubleshooting
If you experience Possible Causes Solution
Vibration or Off-Balance
Check the following for
proper installation or see
“Using Your Washer”
section.
Feet may not be in contact with the
oor and locked.
Front and rear feet must be in rm contact with oor, and washer
must be level to operate properly.
Washer may not be level. Check oor for exing or sagging. If ooring is uneven, a
3/4" (19 mm) piece of plywood under your washer will reduce
sound.
See “Level the Washer” in Installation Instructions.
Load could be unbalanced. Load items in loose heaps evenly around the washplate.
Adding wet items to washer or adding more water to basket
could unbalance washer.
Do not tightly pack. Avoid washing single items.
Use Bulky Items/Sheets cycle for oversized, non-absorbent
items such as jackets and small comforters. See “Cycle Guide”.
See “Cycle Guide” and “Using Your Washer” in this
Use and Care Guide.
Noises
Clicking or metallic
noises.
Objects could get caught in washer
drain system.
Empty pockets before washing. Loose items such as coins
could fall between basket and tub or may block pump. It may
be necessary to call for service to remove items.
It is normal to hear metal items on clothing such as metal snaps,
buckles, or zippers touch against the stainless steel basket.
Gurgling or humming. Washer may be draining water. It is normal to hear the pump making a continuous humming
sound with periodic gurgling or surging as nal amounts of water
are removed during the spin/drain cycles.
Humming. Load sensing may be occurring. You may hear the hum of the sensing spins after you have
started the washer. This is normal.
Whirring. Basket deceleration may be
occurring.
You may hear the whirring sound of the basket decelerating.
This is normal.
Water Leaks
Check the following for
proper installation:
Washer not level. Water may splash off basket if washer is not level. Check that
load is not unbalanced or tightly packed.
Fill hoses not attached tightly. Tighten ll-hose connection.
Fill hose washers. Make sure all four ll hose at washers are properly seated.
Drain hose connection. Pull drain hose from washer cabinet and properly secure it to
drainpipe or laundry tub.
Do not place tape over drain opening.
Check household plumbing for leaks
or clogged sink or drain.
Water can back up out of a clogged sink or drainpipe. Check all
household plumbing for leaks (laundry tubs, drain pipe, water
pipes, and faucets.)
Washer not loaded as
recommended.
Unbalanced loading can cause basket to be out of alignment
and cause water to splash off tub. See “Using Your Washer”
for loading instructions.
Washer not performing as expected
Not enough water
in washer.
Load not completely covered
in water.
This is normal operation for an HE low-water washer. The load
will not be completely under water. The washer senses load
sizes and adds correct amount of water for optimal cleaning.
See “What’s New under the Lid.”
IMPORTANT: Do not add more water to washer. Adding water
lifts the items off the washplate, resulting in less effective
cleaning.
First try the solutions suggested here or visit our website at www.whirlpool.com.tw.
13
Electrical Shock Hazard
Plug into a grounded 3 prong outlet.
Do not remove ground prong.
Do not use an adapter.
Do not use an extension cord.
Failure to follow these instructions can result in death,
fire, or electrical shock.
WARNING
Troubleshooting
If you experience Possible Causes Solution
Washer not performing as expected (cont.)
Washer won’t run or ll,
washer stops working
or wash light remains
on (indicating that the
washer was unable to ll
appropriately).
Check for proper water supply. Both hoses must be attached and have water owing to inlet
valve.
Both hot and cold water faucets must be turned on.
Check that inlet valve screens have not become clogged.
Check inlet hoses for any kinks, which can restrict water ow.
Check proper electrical supply. Plug power cord into a grounded 3-prong outlet.
Do not use an extension cord.
Ensure there is power to outlet.
Reset a tripped circuit breaker. Replace any blown fuses.
NOTE: If problems continue, contact an electrician.
Normal washer operation. Lid must be closed for washer to run.
Washer will pause during certain phases of cycle. Do not
interrupt cycle.
Washer may be stopped to reduce suds.
Washer may be tightly packed. Remove several items, rearrange load evenly around the
washplate. Close lid and press START/PAUSE.
Add only 1 or 2 additional items after washer has started.
Do not add more water to the washer.
Not using HE detergent or using too
much HE detergent.
Only use HE detergent. Suds from regular detergents can slow or
stop the washer. Always measure detergent and follow
detergent directions based on your load requirements.
To remove suds, cancel cycle. Select Rinse & Spin. Press
START/PAUSE. Do not add more detergent.
First try the solutions suggested here or visit our website at www.whirlpool.com.tw.
14
Troubleshooting
If you experience Possible Causes Solution
Washer not performing as expected
Washer not draining/
spinning, loads are still
wet, or spin light remains
on (indicating that the
washer was unable to
pump out water within
10 minutes).
Empty pockets and use garment
bags for small items.
Small items may have been caught in pump or between basket
and tub, which can slow draining.
Using a cycle with a low spin speed. Cycles with lower spin speeds remove less water than cycles
with high spin speeds. Use the recommended cycle/spin speed
for your item. To remove extra water in the load, select
Drain & Spin. Load may need to be rearranged to allow even
distribution of the load in the basket.
The washer may be tightly packed or
unbalanced.
Tightly packed or unbalanced loads may not allow the washer to
spin correctly, leaving the load wetter than normal. Evenly
arrange the wet load for balanced spinning. Select the Drain &
Spin cycle to remove excess water. See “Using Your Washer” for
loading recommendations.
Check plumbing for correct
drain hose installation. Drain hose
extends into standpipe farther than
4.5" (114 mm).
Check drain hose for proper installation. Use drain hose form
and securely attach to drainpipe or tub. Do not tape over drain
opening. Lower drain hose if the end is higher than 96" (2.4 m)
above the oor. Remove any clogs from drain hose.
Too much detergent causing suds to
slow or stop draining and spinning.
Use only HE detergent. Always measure and follow detergent
directions for your load. To remove extra suds, select
Rinse & Spin. Do not add detergent.
Dry spots on load
after cycle.
High speed spins extract more
moisture than traditional top-load
washers.
The high spin speeds combined with air ow during the nal spin
can cause items near the top of the load to develop dry spots
during the nal spin. This is normal.
Incorrect or wrong wash
or rinse
temperatures.
Check for proper water supply. Make sure hot and cold inlet hoses are not reversed.
Both hoses must be attached to both washer and faucet,
and have both hot and cold water owing to inlet valve.
Check that inlet valve screens are not clogged.
Remove any kinks in hoses.
Load not rinsed. Check for proper water supply. Make sure hot and cold inlet hoses are not reversed.
Both hoses must be attached and have water owing to
the inlet valve.
Both hot and cold water faucets must be on.
Inlet valve screens on washer may be clogged.
Remove any kinks in the inlet hose.
Not using HE detergent or using too
much HE detergent.
The suds from regular detergent can keep washer from
operating correctly.
Use only HE detergent. Be sure to measure correctly.
Always measure detergent and follow detergent directions based
on load size and soil level.
Washer may be tightly packed. The washer is less efcient at rinsing when tightly packed.
Load items in loose heaps evenly around the washplate.
Use cycle designed for the fabrics being washed.
Add only 1 or 2 additional items after washer has started.
First try the solutions suggested here or visit our website at www.whirlpool.com.tw.
15
Troubleshooting
If you experience Possible Causes Solution
Washer not performing as expected (cont.)
Sand, pet hair, lint, etc.
on load after washing.
Heavy sand, pet hair, lint, and
detergent or bleach residues
may require additional rinsing.
Add 2 Rinses to the selected cycle.
Load is tangling. Washer not loaded as recommended. See “Using Your Washer” section.
Select a cycle with a slower wash action and spin speed;
however, items will be wetter than those using a higher speed
spin. See the “Cycle Guide” to match your load with the best
cycle.
Load items in loose heaps evenly around the washplate.
Reduce tangling by mixing types of load items. Use the
recommended cycle for the type of items being washed.
Not cleaning or
removing stains.
Added more water to washer. Washer senses load size and adds correct amount of water.
This is normal and necessary for clothes to move. It is normal
for the wash load to be not completely covered in water. Added
water lifts the laundry off the washplate, resulting in less effective
cleaning.
Washer not loaded as recommended. Washer is less efcient at cleaning when tightly packed.
Load items in loose heaps evenly around the washplate.
Add only 1 or 2 additional items after washer has started.
Adding detergent on top of load. Add detergent, Oxi products and color-safe bleach to the bottom
of the basket before adding the items.
Not washing like colors together. Wash like colors together and remove promptly after the cycle
is complete to avoid dye transfer.
Not using HE detergent or using too
much HE detergent.
The suds from regular detergent can keep washer from
operating correctly.
Use only HE detergent. Be sure to measure correctly.
Always measure detergent and follow manufacturer’s directions
based on load size and soil level.
Not using correct cycle for fabric
type.
Use a higher soil level cycle option and warmer wash
temperature to improve cleaning.
If using Quick Wash cycle, wash only a few items.
Use Heavy Duty cycle for tough cleaning. See the “Cycle Guide”
to match your load with the best cycle and fabric type.
Not using dispenser. Use dispenser for chlorine bleach and dispenser for fabric
softener to avoid staining.
Load dispenser before starting a cycle.
Do not add products directly onto load.
Not selecting 1 Rinse with Softener
or 2 Rinses with Softener.
Always select 1 Rinse with Softener or 2 Rinses with Softener
when using fabric softener. Cycles that use spray rinsing will
add additional water for proper fabric softener dispensing when
selected.
Incorrect dispenser
operation.
Clogged dispenser. Use only liquid chlorine bleach in the bleach dispenser.
First try the solutions suggested here or visit our website at www.whirlpool.com.tw.
16
Troubleshooting
If you experience Possible Causes Solution
Washer not performing as expected (cont.)
Fabric Damage. Sharp items were in pockets during
wash cycle.
Empty pockets, zip zippers, and snap or hook fasteners before
washing to avoid snags and tears.
Strings and straps could have
tangled.
Tie all strings and straps before starting wash load.
Items may have been damaged
before washing.
Mend rips and broken threads in seams before washing.
Fabric damage can occur if washer
is tightly packed.
Load items in loose heaps evenly around the washplate.
Use cycle designed for the fabrics being washed.
Add only 1 or 2 additional items after washer has started.
Liquid chlorine bleach may have
been added incorrectly.
Do not pour liquid chlorine bleach directly onto load. Wipe up
bleach spills.
Undiluted bleach will damage fabrics. Do not use more than
recommended by manufacturer.
Do not place load Items on top of bleach dispenser when
loading and unloading washer.
Garment care instructions may not
have been followed.
Always read and follow item manufacturer’s care label
instructions. See the “Cycle Guide” to match your load with the
best cycle.
Odors. Monthly maintenance not done as
recommended.
Run the Clean Washer with affresh cycle after every 30 washes.
See “Washer Care” section.
Unload washer as soon as cycle is complete.
Using wrong or too much detergent. Use only HE detergent. Be sure to measure correctly. Always
follow the manufacturer’s directions.
See “Washer Care” section.
Lid Locked light is
ashing.
The lid is not closed. Close the lid. The washer will not start or ll with the lid open.
A cycle was stopped or paused using
the Start/Pause button.
The washer may still be spinning. The lid will not unlock until the
basket has stopped spinning. This may take several minutes if
washing large loads or heavy fabrics.
Single-dose laundry
packet not dissolving.
Adding laundry packet incorrectly. Be sure laundry packet is added to washer basket before
adding clothes. Do not add packet to dispensers. Follow the
manufacturer’s instructions to avoid damage to your items.
“如需查詢RoHS資訊,請瀏覽官方網站:www.whirlpool.com.tw”.
First try the solutions suggested here or visit our website at www.whirlpool.com.tw.
17
洗衣機安全說明
⛐ἧ䓐㲿堋㨇㗪炻䁢旵Ỷ䀓䀥ˣ妠暣ㆾṢ⒉ ṉ桐晒炻⽭枰思⬰➢㛔䘬枸旚㍒㕥炻⊭㊔烉
ἧ䓐㲿堋㨇⇵教嬨㚱婒㖶ㇳℲˤ
㛔暣☐ᶵ枸㛇ὃ䓇䎮ˣデ䞍ˣ⽫㘢傥≃ˣ䴻槿ㆾ䞍嬀ᶵ嵛
ἧ䓐侭)⊭⏓⬑䪍*ἧ䓐炻昌朆⛐⮵℞屈㚱⬱ℐ屔ả䘬Ṣ
⒉䚋䜋ㆾ㊯⮶ᶳ⬱ℐἧ䓐ˤ
↯⊧㶭㲿㚦䴻䓐㰥㱡ˣḦ㲿∹ㆾ℞Ṿ㖻䅫㖻䆮䈑岒㶭㻼ˣ
㰾㲿ˣ㴠㲉ㆾ㱦㝻䘬堋䈑炻⚈䁢忁ṃ䈑岒䘬呠㰥⎗傥㚫⺽
崟䀓䀥ㆾ䆮䁠ˤ
ᶵ天⛐㲿堋㯜㶣≈㰥㱡ˣḦ㲿∹ㆾ℞Ṿ㖻䅫ㆾ䆮䁠䈑ˤ
忁ṃ䈑岒䘬呠㰥⎗傥㚫⺽崟䀓䀥ㆾ䆮䁠ˤ
⛐䈡⭂ね㱩ᶳ炻攺伖!2!忙ẍᶲ䘬䅙㯜䲣䴙⎗傥㚫䓊䓇㯓
㯋ˤ㯓㯋℟䆮䁠⿏ˤ劍㕤㬌㭝㛇攻ℏ㛒ἧ䓐䅙㯜䲣䴙炻
⽭枰⛐ἧ䓐㲿堋㨇⇵炻攳┇㚱䅙㯜㯜漵柕炻嬻㯜㳩
㔠↮揀ˤ忁⮯㌺↢ảỽ䧵倂℞ℏ䘬㯓㯋ˤ䓙㕤㯋橼㖻䅫炻
ᶵ⼿⛐㬌㛇攻㉥厠ㆾἧ䓐㖶䀓ˤ
↯⊧嬻䪍⛐㲿堋㨇ᶲㆾℏ悐䍑侵ˤ⤪㚱暨天⛐䪍旬役
ἧ䓐㲿堋㨇炻⽭枰㚱ㆸṢ⛐ᶨ㕩䚋䚳ˤ
⛐ 䓐ㆾ㡬㲿堋㨇⇵炻婳㈲㨇攨ㆾᶲ味⽆㨇幓ᶲ㉮ᶳˤ
⛐㲿堋㨇㺦䫺ˣℏ㦥ㆾ㲿堋㡺㳣≽㗪炻↯⊧㈲幓橼悐ỵỠ
ℍ㨇ℏˤ
ᶵ⼿㈲㲿堋㨇⬱墅ㆾ⬀㓦⛐曚⣑ỵ伖ˤ
ᶵ⼿㾓䓐㍏⇞朊㜧ˤ
ᶵ⼿䵕ᾖㆾ㚜㎃㲿堋㨇䘬ảỽ悐ẞ炻ㆾ忚埴ảỽ䵕ᾖ▿娎炻
昌朆㛔ㇳℲㆾ⛐䓐㇞䵕ᾖ婒㖶㚱㖶䡢⺢嬘炻ᶼぐ䎮妋
㚱傥≃➟埴ˤ
憅⮵㍍⛘婒㖶炻婳⍫教ˬ⬱墅婒㖶˭ˤ
劍暣㸸䶂㎵⢆㗪炻⽭枰䓙墥忈⓮㚵⊁Ṣ⒉ㆾ℟㚱⎴䫱⮰㤕
屯㟤䘬Ṣ⒉忚埴㚜㎃炻ẍ性⌙晒ˤ
本公司已在這份手冊與電器上提供許多重要的安全提示訊息,請務必一一閱讀並遵守。
這是安全警告符號。
此符號表示存在可能導致您或他人傷亡的潛在危險。
所有安全提示訊息前都有安全提示符號以及「危險」或「警告」字樣。分別代表:
危險
警告
所有安全提示訊息都會告訴您有哪些潛在危險、如何降低受傷機率,以及不遵守指示會有哪些後果。
非常重要
將導致您死亡或重傷
將導致您死亡或重傷
18
為求最大洗淨力,請將衣物平均散置於洗衣盤周圍。
洗衣機開始加水並攪動衣物時,洗衣槽中的衣物高度會逐漸降
低。這是正常現象,也不代表可以再加衣物。
重要事項:以往的洗衣棒式洗衣機會讓洗衣槽注滿水,但是這款
新機型不會。部份衣物高出水位線是正常現象。
洗衣機注意事項
選擇適用的洗劑
僅可使用HE高效能洗劑。包裝將標示「HE」或「高效能」。低水
量洗衣時若使用一般非 HE高效能洗劑,將產生多餘的泡沫。使用
一般洗劑也可能導致較長的行程時間、降低洗清效能。此舉也可能
導致組件故障,並產生看得見的黴菌或發霉情形。HE高效能洗劑
能產生適當的泡沫量。請按照製造商的說明決定洗劑使用量,而且
不要超過 Max 高水位線。
可能會聽到的正常聲音
這種洗衣機會在洗衣行程的不同階段發出聲音和暫停,與傳統的洗
衣機完全不同。舉例來說,您可能在行程剛開始時,聽到洗衣機上
蓋安全鎖自動測試期間發出的喀搭聲和嗡嗡聲。洗衣盤在測試衣物
是否平均或移動衣物時,會發出不同的嗡嗡聲和咻咻聲。有時您聽
不到聲音,因為洗衣機正在判斷衣物需要的正確水量和浸泡衣物。
專為使用HE高效能洗劑而設計。
集中清潔
低水量清潔技術能夠集中洗淨力。洗衣棒式洗衣機會稀釋洗劑,
這種洗衣機則完全不會,而是直接將洗劑送到污垢上。
這種低水量洗淨技術也提高了衣物攪動效率,更能去除污垢。
乾淨更省水
新型洗衣機最大的差別,在於採用低水量洗衣盤洗淨系統。
洗衣機會自動根據衣物量調整水位,不需要特別選擇。
傳統型洗衣棒式洗衣機
採用低水量洗衣盤系統洗
衣機
洗衣盤
自動偵測洗衣量功能
行程開始後,洗衣機就會開始注水到所需高度。洗衣機注水時會
判斷正確的洗衣量,然後開始攪動衣物。接著洗衣機會根據衣物
量注水到適當高度。
和傳統的洗衣棒式洗衣機相比,這種低水量洗淨法更為省水、省電。
19
控制面板和功能
暫停啟動
8TWTW4955JW/
8TWTW6000JW
標準
白色
溫水
涼水
冷水
自來水
厚重衣物
免燙衣料
柔洗
冷水洗衣
單獨浸泡
洗清&脫水
單獨脫水
衣量多/大物件
衣物髒度
洗清選擇
水位選擇
自動偵測
洗衣水溫
(
需接熱水管
)
熱水
高水位
重
輕
進水
行程進度
洗衣 洗清 脫水 完成 門上鎖
一次洗清
自動偵測水位
(
按壓3秒取消行程
)
一次洗清
二次洗清
高水位 /
添加柔軟精*
自動偵測水位*
二次洗清
添加柔軟精*
高水位 /
* 使用柔軟精
標準
槽洗淨
搭配 錠
7
6
1
2 3
4 5
衣物髒度
選擇最適合衣物的設定。如果衣物極度髒污或者是耐洗布料,
請選擇「重」延長洗衣時間。至於微髒以及細緻布料,請選擇
「輕」縮短洗衣時間。較低衣物髒度設定可減少纏繞和衣物
皺痕。
洗衣水溫
「洗衣水溫」功能可偵測水溫,並調節注入的冷熱水以維持水
溫恆定。
根據布料和污垢類型來選擇洗衣水溫。如果要有最佳的洗淨效
果,請參考衣物的洗滌標示,並在保護布料的前提下,使用最
熱的水溫清洗。
■ 部份機型和行程的溫水和熱水溫度可能比舊機型冷。
■ 就算是冷水洗衣行程,還是可能為了保持最低水溫而加溫
水到洗衣機。
洗衣行程旋鈕
請使用洗衣機上的「洗衣行程」旋鈕選擇行程。請參閱「行程
指南」中各洗衣行程之詳細說明。
洗清選擇
大部分行程都能搭配以下選項。
請參閱「行程指南」的詳細解釋。
一次洗清 (自動偵測水位)
這個選項設定整個行程只洗清一次。
二次洗清 (自動偵測水位)
這個選項可用來為大部分行程增加第二次洗清。
一次洗清 (高水位 /添加柔軟精)
如果要在行程中使用衣物柔軟精,請務必選擇這個選項,確
保水量正確,讓衣物柔軟精能均勻分佈。
二次洗清 (高水位 /添加柔軟精)
這個選項會同時開啟衣物柔軟精和二次洗清功能。
水位選擇(浸洗功能)
這個選項能讓所有行程多出一段浸泡時間,有助於化解頑垢。
洗衣機會先注水,然後輪流切換浸泡和輕柔攪動模式,最後才
啟動所選行程。
1
2
3
4
啟動/暫停
按下即可開始所選行程。再按一次則可暫停洗衣並將洗衣機上
蓋鎖打開。
注意:如果洗衣機已經在脫水,可能要等幾分鐘後才能解除洗
衣機上蓋鎖住狀態。
進度指示燈號
單獨脫水
進水
行程進度
洗衣 洗清 脫水 完成 門上鎖
進度指示燈顯示行程進度。在行程的每個階段,您可能注意到
相異於一般洗衣機的響聲和暫停。
進水
按下「啟動/暫停」按鈕時,洗衣機會先注水到起始高度,
然後偵測衣物量。接著洗衣機會根據衣物量繼續注水到適當
高度,然後進行洗衣程序。
如果這時打開洗衣機上蓋或按下「啟動/暫停」按鈕,洗衣
行程就會暫停。只要關上洗衣機上蓋或按下「啟動/暫停」
按鈕,就能繼續洗衣行程。如果因為打開洗衣機上蓋讓洗衣
行程暫停達 10 分鐘,洗衣機就會開始排水。
洗衣
洗衣機在洗衣的第一個階段會注入一部分水,並開始翻動衣
物。燈號在這個階段亮起是正常情形。您會聽到洗衣盤旋轉
的聲音,接著暫停幾秒鐘。這道程序會重複幾分鐘,讓所有
衣物全部濕透。由於水量較少,加上搭配HE高效能洗劑,
使得這個階段能集中洗淨力。這個階段的衣物高出水位線是
正常現象。洗衣機進入第二階段時,一開始會根據衣物量注
水到適當高度。您在這個洗衣行程階段會聽到洗衣盤速度加
快。洗衣行程不同階段的馬達聲可能改變。
6
5
7

20
洗清
洗衣機在洗清和攪動衣物時,會發出和洗衣行程類似的聲
音。您可能在洗衣機注水時,聽到馬達短暫啟動並旋轉洗衣
槽的聲音 (很短的嗡嗡聲)。
脫水
洗衣機根據所選行程和脫水速度,逐漸加快衣物的旋轉速
度,以達到脫水目的。
完成
行程結束後,這個燈號就會亮起。如要達到最佳洗淨效果,
請立刻取出衣物。
門上鎖
上鎖功能可提高脫水速度。這個燈號亮起時,
洗衣機上蓋會自動鎖住,必須暫停洗衣行程才
能打開。燈號熄滅後就能打開洗衣機上蓋。
如果要在鎖住後打開洗衣機上蓋,請按下
「啟動/暫停」按鈕。
一旦洗衣機停止運轉,洗衣機上蓋將解
鎖。如果衣物正在高速旋轉,開鎖的時間
可能需要幾分鐘。只要在關好洗衣機上蓋
後按下「啟動/暫停」按鈕,洗衣行程就會
繼續。
暫停啟動
單獨浸泡
洗清&脫水
洗衣 洗清 脫水 完成 門上鎖
(
按壓3秒取消行程
)
* 使用柔軟精
洗衣 洗清 脫水 完成
門上鎖
21
行程指南
為達成保護衣物的最佳效果,請選擇最適合待洗衣物的行程。
最佳洗淨效果的建議設定以粗體字顯示。
並非每種行程都適用所有行程和選項。並非每個行程都提供所有設定和選項。
*所有洗清階段都使用冷水。
**脫水速度已與行程功能整合,無法自行選擇。
大型物品,例如床
單、睡袋、小棉被、
夾克、可清洗的小
地毯
衣量多/大物件 熱水
溫水
涼水
冷水
自來水
低 用此行程清洗大物品,例如:夾克和小棉被。洗衣機將在洗衣
行程的洗衣階段開始前,注入足以讓衣物濕透的足夠水量,而
且水位比其他行程還高。
耐洗布料、不易褪色
物品、毛巾、牛仔褲
厚重衣物
熱水
溫水
涼水
冷水
自來水
高 洗衣時間最長、清洗力道最大,適合頑垢和重度髒汙衣物。重
度髒汙或耐洗衣物請使用這個行程。部份衣物的水位偵測程序
可能較久,因為這類衣物比其他類型的布料更容易吸水。
免燙衣料和混合衣
物、牛仔褲、毛巾、
耐洗布料
高水位洗衣
熱水
溫水
涼水
冷水
自來水
高 水位較高,同時採取交替洗淨動作,適合重度髒汙的混合衣
物。部份衣物的水位偵測程序可能較久,因為這類衣物比其他
類型的布料更容易吸水。
棉質、亞麻和混合
衣物
標準
熱水
溫水
涼水
冷水
自來水
高 這個行程適合髒污程度一般的棉質和混紡衣物。
亮色或深色棉質、亞
麻、休閒和混合衣物。
冷水洗衣
冷水
高 冷水加額外的洗衣動作,能在呵護衣料的同時,輕柔帶走汙
垢。設定可被調整,但必須僅使用冷水設定。
免燙布料、棉料、
永久定型布料、合
成纖維
免燙衣料 熱水
溫水
涼水
冷水
自來水
低 這個行程適合清洗免燙布料,例如運動服、女性襯衫、半正式
衣服、永久定型布料和混紡布料。
可機洗絲織品、手
洗布料
柔洗
熱水
溫水
涼水
冷水
自來水
低 這個行程適合清洗保養標籤上標示「可機洗絲織品」或「輕
柔」行程的微髒衣物。清洗前將小型衣物放入網狀洗衣袋。
此行程使用較高的預設水位。
少量衣物、棉料、
聚酯纖維、永久定
型布料
少量快洗 熱水
溫水
涼水
冷水
自來水
高
這個行程適合清洗急需使用的 2~3 件少量微髒衣物。
骯髒衣物 單獨浸泡 熱水
溫水
涼水
冷水
自來水
不脫水 使用這個行程可浸泡布料上的小團污漬。洗衣機會輪流以攪動
和浸泡的方式處理衣物,並在時間過後直接排水,但是不進行
脫水階段就結束整個行程。
手洗衣物或濕透的
衣物
單獨脫水 不適用 高 這個行程利用脫水方式,讓厚重布料或需要特別保護的手洗衣
物能更快乾燥。這個選項可在取消洗衣行程後讓洗衣機排水,
或在斷電後結束洗衣行程。
泳裝和需要洗清但不
必添加洗劑的衣物
洗清&脫水
僅用冷水洗清 高
結合洗清和高速脫水步驟,適合需要額外洗清行程的衣物。使用
這個行程可在斷電後結束洗衣行程,或用於只需洗清的衣物。
洗衣機內沒有衣物 槽洗淨 搭配
affresh 錠
熱水
溫水
涼水
冷水
自來水
低
每 30 次洗衣後用此行程一次,保護洗衣機內部清新和清潔。此
行程使用較高水位。搭配使用 affresh 槽洗錠或液態含氯漂白劑,
徹底清潔洗衣機的內部。不得中斷此行程。請參閱「洗衣機保
養」。
重要事項:「槽洗淨」行程期間,不得把衣物或其他物品放在
洗衣機內。使用此行程時請淨空洗衣槽。
待洗衣物: 行程: 洗衣水溫*:
脫水轉
速**:
行程說明:
22
使用洗衣機
火災危險
請勿將沾過汽油或其他可燃液體的物品放進洗衣機。
任何洗衣機都無法完全清潔油污。
不得烘乾曾沾有任何油品的物品(包括烹調用油)。
否則可能導致死亡、爆炸或失火。
警告
孔
轉接頭
■ 清空衣服的口袋。散落的硬幣、鈕扣或小型物體可能落到洗
衣盤底下卡住,導致發出異音。
■ 按建議行程、洗衣水溫和褪色程度分類衣物。
■ 分開髒污和微髒衣物。
■ 分開精緻衣物和堅固布料。
■ 洗衣後若仍殘留污漬,不得烘乾衣物,因為熱力可將污漬永
久留在衣料上。
■ 有污漬時必須立刻處置。
■ 拉上衣服拉鍊、扣好鉤子、繫上繩子和腰帶,然後取下無法
清洗的鑲邊和飾品。
■ 縫補裂痕,避免洗衣時進一步損壞衣物。
實用秘訣:
■ 清洗防水衣物時請平均擺放。如要知道使用「(衣量多/大物
件」行程的秘訣和詳細資訊,請參閱「行程指南」。
■ 使用網狀洗衣袋可避免精緻衣物或小型衣物打結。
■ 為避免針織品起毛球,洗衣前請翻面。分開毛巾、雪尼爾和
燈芯絨、合成纖維和耐久壓燙衣物。合成纖維、針織品和燈
芯絨會沾附來自毛巾、地毯和雪尼爾布料的棉絨。
請務必閱讀並遵守布料保養標籤說明,避免衣物受損。
1. 分類並準備好您需要清洗的衣物
將量好的 HE高效能洗劑或洗衣膠囊加入
洗衣槽。
如果要使用氧系漂白劑、護色漂白劑或
衣物柔軟晶球,請在放衣服以前直接投
放到洗衣槽底部。
重要事項:僅可使用HE高效能洗劑。包
裝將標示「HE」或「高效能」。低水量洗衣時若使用一般非
HE高效能洗劑,將產生多餘的泡沫。使用一般洗劑也可能導致
較長的行程時間、降低洗清效能。此舉也可能導致零件故障,
並產生看得見的黴菌或發霉情形。HE高效能洗劑能產生適當的
泡沫量。
注意:請遵循製造商的說明,決定洗衣用品的用量。
2. 加入洗衣用品
23
5. 如果需要,請添加衣物柔軟精
請在最後洗清階段等洗衣機注水完成,然後按下「啟動/暫停」
按鈕,暫停洗衣機運轉作業。打開洗衣機上蓋,根據建議用量倒
入量好的衣物柔軟精。不得使用超過建議用量。關上洗衣機上
蓋,然後再按一次「啟動/暫停」按鈕啟動洗衣機。
重要事項:您必須在「洗清」選項選擇「一次洗清 高水位/添加
柔軟精」或「二次洗清 高水位/添加柔軟精」,才能在洗衣行程
的正確時間點投放適當柔軟精。請勿過量添加或加以稀釋。
4. 如果需要,請將液態含氯漂白劑放進洗
劑盒內
⏓㯗㺪䘥㯜
不得過量添加、稀釋或使用超過 1 杯的用量 (250 毫升)。使用
液態含氯漂白劑的行程內,不得使用護色漂白劑或氧系漂白劑
產品。
旋轉行程旋鈕,選擇洗衣行程。
暫停啟動
8TWTW4955JW/
8TWTW6000JW
標準
白色
溫水
涼水
冷水
自來水
厚重衣物
免燙衣料
柔洗
冷水洗衣
單獨浸泡
洗清&脫水
單獨脫水
衣量多/大物件
衣物髒度
洗清選擇
水位選擇
自動偵測
洗衣水溫
(
需接熱水管
)
熱水
重
進水
行程進度
洗衣 洗清 脫水 完成 門上鎖
一次洗清
自動偵測水位
(
按壓3秒取消行程
)
一次洗清
二次洗清
高水位
/
添加柔軟精*
自動偵測水位*
二次洗清
添加柔軟精*
高水位
/
* 使用柔軟精
標準
槽洗淨
搭配 錠
6. 選擇行程
為求最大洗淨力,請將衣物平均散置於洗
衣盤周圍。為減少打結情形,請儘量混合
不同大小的衣物。
重要事項:衣物須能有移動空間,才能取
得最佳清潔效果,減少衣物皺痕和纏繞。
3. 將衣物放進洗衣機內
洗清選擇
一次洗清
自動偵測水位
一次洗清
二次洗清
高水位 /
添加柔軟精*
自動偵測水位*
二次洗清
添加柔軟精*
高水位 /
* 使用柔軟精
24
白色
溫水
涼水
冷水
自來水
厚重衣物
衣量多/大物件
衣物髒度
洗衣水溫
(
需接熱水管
)
熱水
重
輕
進水
行程進度
洗衣 洗清 脫水 完成 門上鎖
標準
槽洗淨
搭配 錠
1
8. 選擇 洗衣水溫
選擇行程後,請將「洗衣水溫」旋鈕轉到您要使用的設定,以便
選擇洗衣水溫。
請務必閱讀並遵守布料保養標籤說明,避免衣物受損。
暫停啟動
8TWTW4955JW/
8TWTW6000JW
標準
白色
自來水
厚重衣物
免燙衣料
柔洗
冷水洗衣
單獨浸泡
洗清&脫水
單獨脫水
衣量多/大物件
洗清選擇
水位選擇
自動偵測
洗衣水溫
(
需接熱水管
)
熱水
高水位
進水
行程進度
洗衣 洗清 脫水 完成 門上鎖
一次洗清
自動偵測水位
(
按壓3秒取消行程
)
一次洗清
二次洗清
高水位 /
添加柔軟精*
自動偵測水位*
二次洗清
添加柔軟精*
高水位 /
* 使用柔軟精
槽洗淨
搭配 錠
7
6
3
9. 如果需要,請選擇行程選項
如果您要多洗清一次或添加衣物柔軟精,或在任何行程中多加
一次浸泡階段,請將水位選擇旋鈕轉到您要使用的設定。
暫停啟動
單獨浸泡
洗清&脫水
洗衣 洗清 脫水 完成 門上鎖
(
按壓3秒取消行程
)
* 使用柔軟精
10. 按「啟動/暫停」按鈕開始洗衣行
程
按下「啟動/暫停」按鈕,開始洗衣行程。行程結束後,
「完成」燈號會亮起。行程完成後立即取出衣物,避免氣味殘
留、減少衣物皺痕,同時避免金屬扣子、拉鍊和按扣生鏽。
打開洗衣機上蓋,添加衣物
如果要打開洗衣機上蓋加入 1、2 件忘了洗的衣服:按
「啟動/暫停」按鈕。一旦洗衣機停止運轉,洗衣機上蓋將解
鎖。如果衣物正在高速旋轉,開鎖的時間可能需要幾分鐘。放
入衣物、關上洗衣機上蓋,然後再次按下「啟動/暫停」按鈕,
重新開始洗衣行程。
如果洗衣機上蓋打開超過 10 分鐘,洗衣機會自動排水。
洗衣水溫 建議布料
涼水
洗衣機會注入溫水加強去污力,
並協助溶解洗劑。
深色暈染或褪色
微髒
熱水
為節約能源,洗衣機會加入部份冷
水,因此水溫會比您的熱水器設定
溫度還低。
溫水
會加入部份冷水,所以水會比舊
機型冷。
冷水
洗衣機可能注入溫水加強去污力,
並協助溶解洗劑。
白色和淡色衣物
耐洗衣物
重度髒汙
鮮艷色彩
中度到輕度髒污
顏色暈染或褪色
微髒
深色暈染或褪色
微髒
自來水
這是從水龍頭出來的水溫。
溫水
涼水
冷水
自來水
衣物髒度
洗衣水溫
(
需接熱水管
)
熱水
重
輕
標準
2
7. 選擇 「衣物髒度」
選擇行程後,請將「衣物髒度」旋鈕轉到您要使用的設定,以便
選擇衣物髒度。
25
洗衣機維護
更換已使用 5 年的進水管,以降低水管故障的風險。若發現
突起物、纏繞、割痕、磨損或漏水,定期檢查和更換進水管。
更換進水管時,請在標籤上用奇異筆寫上更換日期。
進水管
洗衣機保養
維持洗衣機清潔和最佳效能的建議
1. 請務必使用HE高效能洗劑並遵循 HE高效能洗劑製造商對
HE高效能洗劑用量的說明。不得使用超過建議用量,因為
此舉可能增加洗劑和髒污殘留積聚在洗衣機的速率,進而產
生異味。
2. 偶爾要用溫水和熱水設定洗衣 (不僅是只用冷水洗衣),因為
溫水或熱水更能控制髒污和洗劑積聚的速率。
3. 洗衣機用後打開洗衣機上蓋,有助風乾洗衣機、避免能發出
異味的殘留物積聚。
清潔上開式洗衣機
展開下方建議的例行清潔流程前,閱讀完整的說明。於每個月或
每 30 次洗衣行程 (視何者先發生而定),至少須執行一次洗衣機
保養程序。此舉能控髒污和洗劑積聚在洗衣機的速率。
清潔洗衣機內部
為避免洗衣機產生味道,請遵守上述使用說明,並參考以下建
議的每月清潔程序:
槽洗淨
本洗衣機配備特殊行程,能結合「affresh 槽洗錠」或液態含氯
漂白劑,清潔洗衣機的內部。
開始程序
1. Affresh 槽洗錠行程步驟 (可達到最佳洗淨力的建議作法):
a. 打開洗衣機上蓋並取出所有衣物。
b. 將 affresh 槽洗錠放到洗衣槽底部。
c. 請勿將 affresh 槽洗錠放入洗劑盒。
d. 遵行本程序時,不得加入任何洗劑或其他化學物至洗衣
機內。
e. 關閉洗衣機上蓋。
f. 選擇「槽洗淨」行程。
g. 按下「啟動/暫停」按鈕,開始洗衣行程。
「槽洗淨」行程說明如下。
注意: 為取得最佳成果,請勿中斷行程。 如果不得已要中
斷洗衣行程,請按壓「啟動/暫停」按鈕 3 秒。「槽洗淨」
行程停止後,請執行「洗清&脫水」行程,沖掉洗衣機中的
清潔劑。
洗衣機保養 (續)
2. 含氯漂白劑程序 (其他方式):
a. 打開洗衣機上蓋並取出所有衣物。
b. 將 1 杯 (236 毫升) 液態含氯漂白劑倒入漂白水投放格。
注意:使用比建議量更多的液態含氯漂白劑長期下來將損壞
洗衣機。
c. 關閉洗衣機上蓋。
d. 遵行本程序時,不得加入任何洗劑或其他化學物至洗衣
機內。
e. 選擇「槽洗淨」行程。
f. 按下「啟動/暫停」按鈕,開始洗衣行程。 「槽洗淨」行
程說明如下。
注意: 為取得最佳成果,請勿中斷行程。 如果不得已要中
斷洗衣行程,請按壓「電源/取消」按鈕 3 秒。「槽洗淨」
行程停止後,請執行「洗清&脫水」行程,沖掉洗衣機中的
清潔劑。
「槽洗淨」行程操作說明:
1. 這個行程的注水高度超過一般洗衣行程,因此沖洗水位高於
一般洗衣行程的水位線。
2. 為了增強去污力,這個行程會加入攪動和脫水階段。
這個行程完成後請打開洗衣機上蓋,讓空氣流通,並風乾洗衣
機內部。
清潔洗劑盒
使用洗衣機一段時間後,您可能會發現洗劑盒積聚殘留物。為
了清除洗劑盒中的殘留物,請以濕布和毛巾擦乾,不要將洗劑
盒或邊框取出清潔。洗劑盒和邊框是無法取出的,不過如果您
的機型有洗劑盒抽屜,請在執行「槽洗淨」行程前後都將抽屜
取出清潔。若有需要,使用全效表面清潔劑。
清潔洗衣機外部
使用柔軟的濕布或海綿,擦掉任何外溢物品。
清潔洗衣機外殼時只能使用中性肥皂或清潔劑。
重要事項:為避免損壞洗衣機的烤漆,不得使用磨蝕性產品。
26
只可在您在家時運行洗衣機。若搬家,或將有一段時間不使
用洗衣機,遵循下列步驟:
1. 拔下洗衣機電源,或切斷電源。
2. 關閉洗衣機水源,避免因水壓升高導致淹水。
冬季儲存保養
重要事項:為避免毀損,請將洗衣機安裝並存放於不會結
凍的地方。管內可能殘存水份,水結冰後可能會損壞洗衣
機。若在寒冷天氣下存放或搬運洗衣機,請做好防寒措施。
洗衣機的防寒措施:
1. 關閉冷熱水龍頭,接著中斷和排乾進水管。
2. 放 1 qt (1 公升) 的 R.V. 防凍劑至洗衣槽內,以「洗清&脫
水」行程運轉約 30 秒,混合防凍劑和殘留水份。
3. 拔下洗衣機的插頭,或切斷電源。
不再使用和度假保養
孔
轉接頭
運送洗衣機
1. 關閉兩個水龍頭。 中斷和排乾進水管。
2. 若需在寒冷的天氣下搬運洗衣機,執行作業前遵循「冬季
儲存保養」說明。
3. 拔掉排水系統的排水軟管,將剩下的水排到鍋子或水桶
中。拔掉洗衣機背面的排水軟管。
4. 拔下電線。
5. 把進水管和排水管放在洗衣槽內。
6. 將電源線順著洗衣機邊緣懸掛到洗衣槽內。
7. 將原先裝箱材料中的包裝殼放回洗衣機內。如果沒有包裝
殼,請將厚毛毯或厚毛巾塞進洗衣槽開口。關上洗衣機上
蓋,用膠帶從洗衣機上蓋上面一直黏貼到洗衣機正面下
方。在洗衣機移到新位置以前都不要撕掉膠帶。搬運時請
讓洗衣機保持直立。
重新安裝/再使用洗衣機
在長期未用、度假、冬季儲存或搬遷後重新安裝洗衣機:
1. 參閱「安裝說明」擺放、調整水平以及連接洗衣機。
2. 於再次使用前,請按照以下建議程序運作洗衣機:
再次使用洗衣機:
1. 沖洗水管和喉管。重新連接進水管。開啟冷熱水水龍頭。
2. 插上洗衣機插頭,或重新連接電源。
3.
用「衣量多/大物件」行程運轉洗衣機,以清潔洗衣機,或
若使用防凍劑,則清除此物質。僅可使用 HE 高效能洗劑。
中量衣物按製造商的建議量減半。
27
故障排除
如果您經歷了 可能原因 解決方案
震動或不平衡
請參考以下的正確安裝
說明或「使用洗衣機」
一節。
支腳可能可能沒著地或鎖緊。
洗衣機之前後腳都必須確實著地,且必須調整水平以正常地運轉。
洗衣機也許未平放。
檢查地板是否彎曲或下沉。若地板不平,放一塊 3/4" (19 公釐) 夾
板在洗衣機底部,可減少噪音。
參閱「安裝說明」的「調整水平」。
衣物未均勻地放置。 請將衣物平均散置於洗衣盤周圍。如果在洗衣機內添加已經濕掉的
衣物或在洗衣槽中倒入更多水,可能使洗衣機失去平衡。
請勿將衣物塞得太密。避免清洗單一衣物。
清洗夾克和小被子這類不吸水的大型物品時,請使用「衣量多/大
物件」行程。請參閱「行程指南」。
請參考本「使用保養手冊」中的「行程指南」和「使用洗衣機」
說明。
噪音
喀嗒或金屬噪音。 洗衣機排水系統內可能有東西。 洗衣前清空口袋。零錢之類的零散物品可能掉落至洗衣槽和滾筒之
間,進而堵住幫浦。也許需要致電維修部清除物品。
聽到衣物金屬物品,例如:金屬扣、帶扣或拉鍊與不鏽鋼洗衣槽接
觸後發出聲音是正常現象。
淙淙聲或嗡嗡聲。 洗衣機也許正在排水。 幫浦會發出嗡嗡聲,並偶爾發出淙淙聲或在單獨脫水行程排去最後
水量時發出沖水聲,這是正常現象。
嗡嗡聲。 可能正在偵測衣物。 洗衣機啟動後,您可能聽到偵測旋轉功能發出的嗡嗡聲。這是正
常現象。
咻咻聲。 洗衣槽可能正在減速。 您可能聽到洗衣槽減速的咻咻聲。
這是正常現象。
漏水
檢查下列事項確保排水管
正確安裝:
洗衣機沒有保持水平。 如果洗衣機安裝時不夠水平,水可能濺出洗衣槽。請檢查衣物是否
重量不均或塞得太密。
進水管未鎖緊。 將進水管之連接頭鎖緊。
注水管墊圈。 檢查四個注水管墊圈是否都確實裝好。
排水管連接。 將排水軟管拉出洗衣機機體,確實固定到排水管或洗衣滾筒。
不要用膠帶黏住排水管的開口。
檢查家用管線是否有洩漏、堵塞或漏水。
水流可能會因為水槽或漏盆堵塞而回流。檢查所有家用管線是否有
洩漏 (洗衣滾筒、排水管、水管和水龍頭)。
未按建議將衣物放入洗衣機內。 衣物擺放不均可能造成洗衣槽歪斜,導致水濺出洗衣槽。請參考
「使用洗衣機」一節的衣物擺放說明。
洗衣機未妥善運作
洗衣機中的水不足。 衣物未全部浸泡於水中。
這是 HE 低水量洗衣機的正常現象。衣物不會完全泡在水裡。洗衣
機感應到衣物量,並注入正確的水量,以達成最佳清潔效果。請參
考「洗衣機注意事項」一節。
重要事項:請勿在洗衣機中放更多水。加水會使衣物漂起,離開洗
衣盤,導致洗淨力打折。
首先,請嘗試此處的建議辦法,或造訪我們的網站:www.whirlpool.com.tw.
28
孔
轉接頭
故障排除
如果您經歷了 可能原因 解決方案
洗衣機未妥善運作 (續上頁)
洗衣機無法運轉或注水、
洗衣機停止運轉或洗衣燈
號亮起 (代表洗衣機無法
正常注水)。
檢查水源供應是否正常。 兩個進水管都必須接上,且水應流進進水閥。
冷熱水水龍頭都必須開啟。
檢查進水閥網罩沒有堵塞。
檢查進水管是否打結,造成水流減少。
檢查電源供應是否正常。
將電源線插入一個 3 孔的接地電源插座上。
不得使用延長線。
確保插座有電源。
重設跳閘的斷路器。更換任何燒壞的保險絲。
注意:若問題持續,聯絡電子技工。
正常的洗衣機運作。 洗衣機上蓋必須關閉,否則洗衣機無法運轉。
洗衣機在行程特定階段將暫停。不要中斷行程。
洗衣機也許會停止,以減少泡沫。
洗衣機中的衣物可能塞得太密。 取出幾件衣物,將衣物平均放在洗衣盤周圍。關上洗衣機上蓋、按
下「啟動/暫停」按鈕。
洗衣機啟動後僅能添加 1 或 2 件衣物。
不要加水至洗衣機。
未使用 HE高效能洗劑,或使用太多
HE高效能洗劑。
僅使用 HE高效能洗劑。一般洗劑起的泡沫可能會減緩或停止洗衣機
運行。請務必量測洗劑用量,並根據衣物量要求,遵循洗劑的用量
說明。
要清除泡沫,取消行程。選擇「洗清&脫水」。
按「啟動/暫停」按鈕。請勿加入更多洗劑。
首先,請嘗試此處的建議辦法,或造訪我們的網站:www.whirlpool.com.tw.
29
故障排除
如果您經歷了 可能原因 解決方案
洗衣機未妥善運作
洗衣機無法排水/脫水、衣
物還很潮濕,或者脫水燈
號一直亮起 (代表洗衣機
無法在 10 分鐘內排水)。
請將口袋內的東西取出,清洗小型物
品時則使用洗衣袋。
幫浦或洗衣槽與滾筒之間可能有小東西卡住,造成排水速度緩慢。
使用低轉速行程。 低轉速行程比高轉速行程的去水力低。針對您的衣物選擇建議的行
程/脫水速度。如果要讓衣物脫水,請選擇「單獨脫水」。衣物可
能必須重新擺放,讓洗衣槽中的衣物重量平均。
洗衣機中的衣物可能塞得太密或重量
不均。
衣物塞得太密或重量不均可能讓洗衣機無法正常脫水,使衣物比平
常更為潮濕。請平均放置潮濕衣物,讓洗衣機脫水時能保持平衡。
如要去除水分,請選擇「單獨脫水」行程。請參考「使用洗衣機」
一節的衣物擺放建議。
檢查管線,確定已正確安裝排水管。
排水管應延伸至立管的
4.5" (114 公釐) 處。
檢查已正確安裝排水管。使用排水管固定架,並穩妥連接至漏盆或
水槽。不要用膠帶黏住排水管的開口。若排水管末端離地面有
96" (2.4 公尺),降低排水管的高度。取出管內任何堵塞物。
洗劑加得太多,導致泡沫使排水和脫
水速度變慢或停止。
僅使用HE高效能洗劑。請務必量測洗劑用量,並根據衣物量,遵
循洗劑的用量說明。如果要去除多餘泡沫,請選擇
「洗清&脫水」。請勿加入更多洗劑。
衣物在洗衣行程結束後有
部份地方是乾的。
高速脫水功能比傳統上開式洗衣機更
能去除水分。
高速脫水功能在最終的脫水階段整合氣流技術,因此衣物如果接近
最上層,在最終脫水階段時就可能有部份位置完全變乾。這是正
常現象。
洗衣或洗清溫度不正確或
錯誤。
檢查水源供應是否正常。 確保沒有錯誤連接冷熱水進水管。
兩條管子都必須連接至洗衣機和水龍頭,且都有冷熱水流進進水閥。
檢查進水閥網罩沒有堵塞。
清除管子內任何扭曲處。
衣物沒有洗清。 檢查水源供應是否正常。 確保沒有錯誤連接冷熱水進水管。
必須連接兩個管子,且水應流進進水閥。
冷熱水水龍頭都必須打開。
也許洗衣機的進水閥網罩堵塞。
清除進水管任何扭曲處。
未使用 HE高效能洗劑,或使用太多
HE高效能洗劑。
一般洗劑的泡沫可能讓洗衣機無法正常運轉。
僅使用HE高效能洗劑。確定要正確測量。
請務必量測洗劑用量,並根據衣物量和衣物髒度,遵循洗劑的用量說
明。
洗衣機中的衣物可能塞得太密。 衣物如果塞得太密,洗衣機的洗清效率就會變差。
請將衣物平均散置於洗衣盤周圍。
使用待洗衣料專用的行程。
洗衣機啟動後僅能添加 1 或 2 件衣物。
首先,請嘗試此處的建議辦法,或造訪我們的網站:www.whirlpool.com.tw.
30
故障排除
如果您經歷了 可能原因 解決方案
洗衣機未妥善運作 (續上頁)
衣服洗完後出現沙粒、寵
物毛髮、棉絮……等等。
沙粒、寵物毛髮、棉絮、洗劑或漂白
水如果殘留過多,可能需要額外洗清
程序。
選擇行程後多加「二次洗清」的選項。
衣物打結。 未按建議將衣物放入洗衣機內。 請參考「使用洗衣機」一節。
選擇洗淨動作和脫水轉速較慢的行程,不過衣物洗完後會比高速脫
水行程來得濕。如要瞭解如何針對衣物性質選擇最適合的行程,請
參閱「行程指南」。
請將衣物平均散置於洗衣盤周圍。
混合不同類型的衣物,減少纏繞。選擇適合洗衣類型的建議行程。
未清潔或去除污漬。 在洗衣機內放了太多水。 洗衣機會偵測衣物量並注入正確水量。這是正常現象,而且為了讓
衣物有移動空間,這也是必要作法。衣物沒有完全被水覆蓋是正常
情形。加水會使衣物漂起,離開洗衣盤,導致洗淨力打折。
未按建議將衣物放入洗衣機內。 衣物如果塞得太密,洗衣機的清潔效率就會變差。
請將衣物平均散置於洗衣盤周圍。
洗衣機啟動後僅能添加 1 或 2 件衣物。
將洗劑加到衣物最上方。 放入衣物前,請將洗劑、氧系漂白劑和護色漂白劑倒入洗衣槽底
部。
未合併清洗類似顏色的衣物。 合併清洗類似顏色的衣物,並在完成行程後立即取出衣物,能避免
衣物染色。
未使用HE高效能洗劑,或使用太多HE
高效能洗劑。
一般洗劑的泡沫可能讓洗衣機無法正常運轉。
僅使用HE高效能洗劑。確定要正確測量。
請務必量測洗劑用量,並根據衣物量和衣物髒度,遵循製造商的用量
說明。
沒有按衣物類型使用正確的行程。 使用較重衣物髒度行程選項和暖水洗衣,增進清潔效能。
使用「少量快洗」行程時只能洗少數幾件衣服。
如果要強力去污,請使用「厚重衣物」行程。
如要瞭解如何針對衣物性質選擇最適合的行程和布料類型,請參閱
「行程指南」。
未使用洗劑盒。 使用含氯漂白劑和衣物柔軟精的洗劑盒可避免產生污漬。
開始行程前注入洗劑至洗劑盒。
請勿將漂白水直接倒到衣物上。
未選擇「一次洗清 高水位 /添加柔軟
精」或「二次洗清 高水位 /添加柔軟
精」。
使用衣物柔軟精時,請務必選擇
「一次洗清 高水位 /添加柔軟精」
或「二次洗清 高水位 /添加柔軟精」。
選擇使用噴洗技術的行程
時,為了適當投放衣物柔軟精,洗衣機會注入更多的水。
洗劑盒操作不正確。 洗劑盒堵塞。 只能將液態含氯漂白劑注入於漂白劑洗劑盒。
首先,請嘗試此處的建議辦法,或造訪我們的網站:www.whirlpool.com.tw.
31
故障排除
如果您經歷了 可能原因 解決方案
洗衣機未妥善運作 (續上頁)
布料損壞。 洗衣行程期間口袋裡有尖銳物品。 洗衣前清空口袋、拉上拉鍊、扣上帶扣或鉤子固件,避免鉤破和撕
裂衣物。
繩子和帶子可能會纏繞。 開始清洗衣物前,繫上所有繩子和帶子。
洗衣前衣物可能就已毀損。 洗衣前修補接縫處的撕裂口和斷線。
若洗衣機塞太滿,將可能會損壞布料。 請將衣物平均散置於洗衣盤周圍。
使用待洗衣料專用的行程。
洗衣機啟動後僅能添加 1 或 2 件衣物。
也許未正確添加液態含氯漂白劑。 不得將液態含氯漂白劑直接倒進衣物裡。擦拭溢出的漂白劑。
未稀釋的漂白劑可能會損壞布料。不得使用超過製造商建議的用量。
將衣物放入和取出洗衣機時,不要把衣物放在漂白水洗劑盒上面。
可能沒有遵守衣物保養說明。 請務必閱讀並遵守衣物製造廠的保養標籤說明。如要瞭解如何針對
衣物性質選擇最適合的行程,請參閱「行程指南」。
異味。 未按建議進行每月維護。
每洗 30 次衣服後就執行「槽洗淨」行程。請參閱「洗衣機保養」
章節。
行程完成後立即取出洗衣機的衣物。
用錯洗劑或洗劑用量太多。
僅使用HE高效能洗劑。確定要正確測量。請務必遵循製造商的說
明。
請參閱「洗衣機保養」章節。
門上鎖燈號閃爍。 洗衣機上蓋沒關。 關上洗衣機上蓋。如果打開洗衣機上蓋,洗衣機就無法啟動或注
水。
因為按下「啟動/暫停」按鈕使得行程
停止或暫停。
洗衣機可能還在脫水。洗衣機上蓋必須等到洗衣槽停止旋轉後才會開
鎖。如果您清洗大量衣物或厚重布料,開鎖的時間可能需要幾分鐘。
洗衣膠囊沒有溶解。 加入膠囊的程序不正確。 請務必在加入衣物前將洗衣膠囊投入洗衣槽。不要將膠囊加至洗劑
盒。遵循製造商說明,避免損壞衣物。
首先,請嘗試此處的建議辦法,或造訪我們的網站:www.whirlpool.com.tw.
05/19
Printed in U.S.A
美國印製
W11317127A
©2019 All rights reserved.
版權所有。
Assistance or Service
Before calling for assistance or service, please check “Troubleshooting” or visit www.whirlpool.com.tw.
It may save you the cost of a service call. If you still need help, follow the instructions below.
When calling, please know the purchase date and the complete model and serial number of your appliance.
This information will help us to better respond to your request.
If you need replacement parts or to order accessories
We recommend that you use only FSP
T o locate FSP replacement parts or accessories, go to www.whirlpool.com.tw.
Questions? Call us toll free at 0800-258-558.
For more information on RoHS, please visit the ofcial website: www.whirlpool.com.tw.
u sed to build every new WHIRLPOOL appliance.
協助或
服務
在致電協助或服務熱線之前,請先查閱「故障排除」章節,或訪問網頁 www.whirlpool.com.tw。
這可能會為您節省致電服務熱線的費用。如果您依然需要幫助,請遵從以下指示。
在打電話時,請查明購買日期、完整的型號與序列號。
這一訊息將會幫助我們更好地解答您的需求。
如果您需要更換零件或訂購配件
我們建議您僅使用原廠指定零件。這些零件可適當的匹配並運作正
常,因為其生產製作依從所有惠而浦家電的同樣精密標準製造。
確定原廠指定備件或配件,請查看網站 www.whirlpool.com.tw。
如有問題,請致電 0-800-258-558 。
如需查詢RoHS資訊,請瀏覽官方網站:www.whirlpool.com.tw。