Overview
This manual provides instructions for the AOBEN Rivet Nut Tool Kit. The kit is a hand-operated tool designed for installing rivet nuts (also known as nutserts) into various materials. It is suitable for automotive, metalworking, and general repair applications.
Features and Components
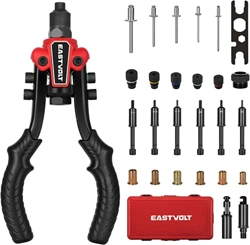
The kit includes the following components:
- 1 x Ratchet Rivet Nut Tool
- 10 x Interchangeable Mandrels
- 100 x Rivet Nuts (assorted sizes)
- 1 x Rugged Carrying Case
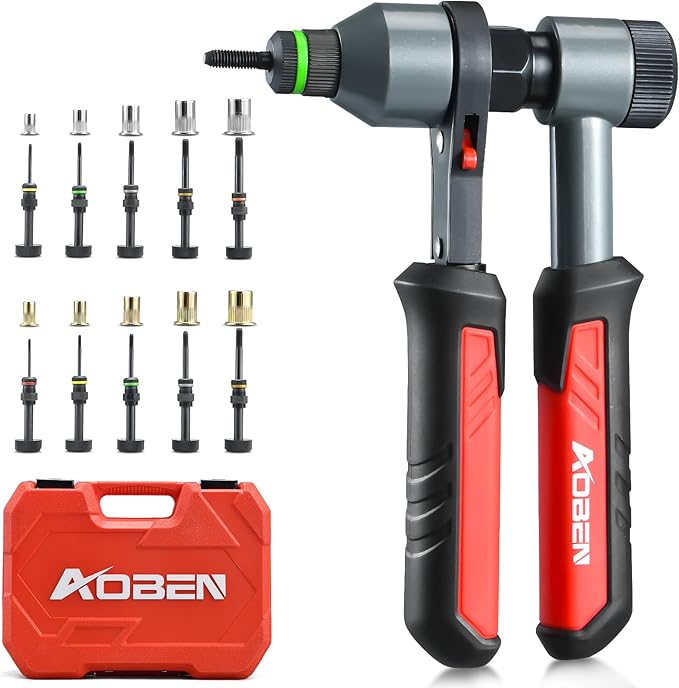
Tool Description
The main tool features a ratchet mechanism designed to reduce the effort required for installation. It has a quick-change mandrel system for swapping between different rivet nut sizes.
The tool body is constructed from thick steel with a heat-treated surface for corrosion resistance and durability.
Mandrel and Rivet Nut Specifications
The kit includes mandrels and corresponding rivet nuts in the following sizes:
- Metric: M5, M6, M8, M10, M12
- SAE (UNC): 8-32, 10-24, 1/4-20, 5/16-18, 3/8-16
Each mandrel size is supplied with 100 matching rivet nuts.
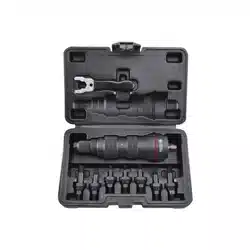
Carrying Case
The rugged case organizes all components. Each tool and mandrel has a designated slot to prevent movement and damage during transport or storage.
Use Guide
Safety Information
- Wear appropriate personal protective equipment, including safety glasses.
- Ensure the workpiece is securely clamped before operation.
- Inspect the tool and mandrel for damage before each use.
- Use only the rivet nuts supplied with the kit or identical replacements.
Selecting the Correct Mandrel and Rivet Nut
- Determine the thread size required for your application (e.g., M6, 1/4-20).
- Select the corresponding mandrel from the kit.
- Select a rivet nut of the same thread size and appropriate length for your material thickness.
Installing the Mandrel
- Pull back the spring-loaded mandrel lock collar on the tool nose.
- Insert the shank of the selected mandrel into the tool head.
- Release the lock collar. The internal pin should engage automatically to secure the mandrel.
- Give a gentle tug on the mandrel to confirm it is locked in place.
Installing a Rivet Nut
- Drill a hole in the workpiece to the recommended diameter for the selected rivet nut size.
- Deburr the hole.
- Thread the rivet nut onto the installed mandrel by hand until it is snug against the tool nose.
- Insert the rivet nut into the prepared hole in the workpiece.
- Hold the tool handle firmly and operate the ratchet mechanism. Squeeze the handles together repeatedly.
- The tool will pull the mandrel head, deforming the rivet nut and clamping it against the backside of the workpiece. Continue until the ratchet mechanism stops moving or a firm installation is achieved.
- To release, operate the tool in reverse (if equipped) or unscrew the mandrel from the now-installed rivet nut.
Removing the Mandrel
Pull back the spring-loaded lock collar and pull the mandrel straight out of the tool head.
Maintenance and Storage
- Wipe the tool clean after use.
- Apply a light coat of machine oil to the ratchet mechanism and mandrel shanks periodically to prevent rust.
- Store all components in the provided carrying case.
- Ensure the case is fully closed and latched before transport.
Troubleshooting
- Rivet nut spins in the hole: The hole may be too large. Use the correct drill size. Ensure you are applying sufficient pulling force with the tool to properly deform the rivet nut.
- Mandrel is difficult to install or remove: Check for debris in the tool head. Clean the mandrel shank and the tool's internal bore. Ensure the lock collar is fully retracted.
- Tool ratchet slips or does not hold: The mechanism may be worn or require lubrication. Inspect for damage.
- Rivet nut threads are damaged: Do not cross-thread the rivet nut onto the mandrel. Start it by hand carefully.
Technical Specifications
- Manufacturer: AOBEN
- Model Number: AB7003
- Item Weight: 8.75 pounds (approx. 3.97 kg)
- Package Dimensions: 13.66 x 10.24 x 3.66 inches
What's in the Box
- Rivet Nut Tool
- 10 Metric and SAE Mandrels
- 100 Pcs Rivet Nuts
- Carrying Case