Overview
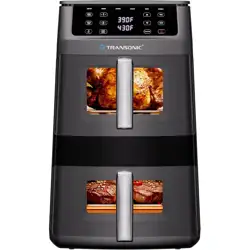
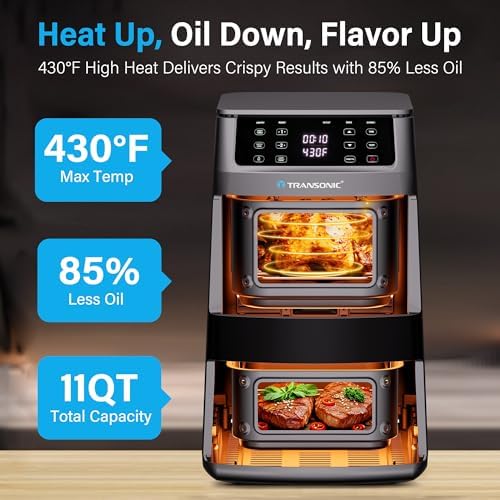
The Transonic 11QT Air Fryer features a space-saving vertical double-stack design with two independent cooking zones. The top basket is deep for roasting whole chickens, while the bottom basket is elongated for ribs, fish, and long vegetables. The unit uses 360° Rapid Heat Circulation for even cooking and can reach up to 430°F for high-heat broiling. It includes 6 preset functions and intelligent sync features (Smart Finish and Match Cook).


Features
Dual Independent Cooking Zones
Each basket has its own temperature and time controls, allowing you to cook two different foods simultaneously without flavor transfer.
- Top Basket (Deep): Designed for vertical clearance – ideal for roasting a whole chicken or large batches of fries.
- Bottom Basket (Long): Elongated shape for ribs, whole fish fillets, asparagus, or other long items that need to lie flat.
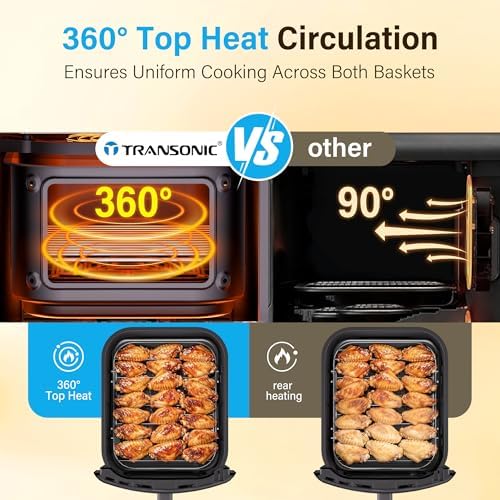
360° Rapid Heat Circulation
Superheated air is driven from the top heating element in a 360-degree motion, ensuring even cooking and crispy results without cold spots.
430°F High-Heat Broil
The maximum temperature setting of 430°F (220°C) is suitable for broiling, searing meats, and achieving a char on vegetables.
Easy-View See-Through Windows
Each basket has a transparent window on the front, allowing you to monitor cooking progress without opening the basket and losing heat.

6-in-1 Preset Functions
The air fryer includes six preset cooking modes: Air Fry, Bake, Broil, Dehydrate, Reheat, and Roast.
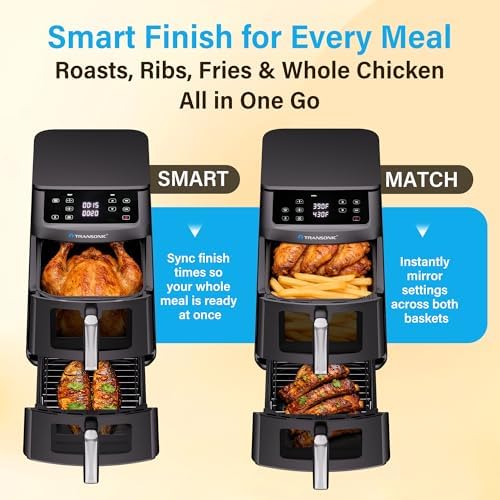
Smart Finish and Match Cook
- Smart Finish: Program different time/temperature settings for each basket, and the unit automatically syncs the finish times so both foods are ready simultaneously.
- Match Cook: Instantly copy the settings from one basket to the other for large-batch cooking.
Non-Stick Coating and Easy Cleaning
The baskets and racks have a PFAS-free non-stick coating. They are dishwasher safe for convenient cleaning. The interior uses odor-resistant materials.
Use Guide
Before First Use
- Remove all packaging materials and stickers from the air fryer and accessories.
- Wash the baskets, racks, and trays with warm soapy water or place them in the dishwasher. Rinse and dry thoroughly.
- Wipe the interior and exterior of the main unit with a damp cloth. Do not immerse the main unit in water.
- Place the air fryer on a stable, heat-resistant surface, away from walls and other appliances. Ensure at least 5 inches of clearance around the unit.
Control Panel Overview
The touch screen control panel is located on the front of the unit. It includes:
- Power Button: Turns the unit on/off.
- Zone Selector: Choose Top Basket, Bottom Basket, or Both (Dual Zone).
- Temperature Control (+/-): Adjusts cooking temperature in 5°F increments.
- Time Control (+/-): Adjusts cooking time in 1-minute increments.
- Preset Function Buttons: Air Fry, Bake, Broil, Dehydrate, Reheat, Roast.
- Smart Finish Button: Activates sync finish mode.
- Match Cook Button: Copies settings from one zone to the other.
- Start/Pause Button: Starts or pauses the cooking cycle.
Basic Operation
- Place the food in the appropriate basket. Do not overfill – leave space for air circulation.
- Insert the basket into the unit until it clicks into place.
- Press the Power button.
- Select the zone you want to use (Top, Bottom, or Both).
- Choose a preset function or manually set the temperature and time.
- Press Start to begin cooking.
- During cooking, you can check progress through the see-through window. If you need to open the basket, the unit will pause automatically.
- When the timer ends, the unit will beep. Remove the basket using the handle and place it on a heat-safe surface.
Using Smart Finish
- Load food into both baskets.
- Set the desired temperature and time for each zone independently.
- Press the Smart Finish button. The unit will calculate and adjust the start times so both zones finish at the same moment.
- Press Start. The display will show the adjusted times.
Using Match Cook
- Set the temperature and time for one zone (e.g., Top Basket).
- Press the Match Cook button. The same settings will be applied to the other zone.
- Press Start to begin cooking in both zones with identical settings.
High-Heat Broiling (430°F)
For broiling or searing, select the Broil preset or manually set the temperature to 430°F. This setting is ideal for:
- Steaks and chops (sear for 3-5 minutes per side)
- Chicken wings (crisp at high heat for 10-12 minutes)
- Vegetables (char for 5-8 minutes)
Note: When using high heat, monitor food closely to prevent burning. The unit may produce more smoke than usual – ensure proper ventilation.
Cleaning and Maintenance
- Unplug the unit and allow it to cool completely before cleaning.
- Remove the baskets, racks, and trays. Wash them in warm soapy water or place them in the dishwasher.
- Wipe the interior of the main unit with a damp cloth. Do not use abrasive cleaners or scouring pads.
- Clean the heating element area gently with a soft brush to remove any food debris.
- Dry all parts thoroughly before reassembling.

Safety Precautions
- Do not immerse the main unit in water or any liquid.
- Always use the unit on a stable, heat-resistant surface.
- Keep the unit away from curtains, paper, or other flammable materials.
- Do not block the air intake or exhaust vents.
- Use oven mitts when handling hot baskets or trays.
- Do not leave the unit unattended while in use.
- Unplug the unit when not in use.