Overview
This device is a multifunctional portable audio unit. It functions as a cassette tape player, a cassette-to-digital audio converter, an AM/FM radio, and a digital audio recorder/player. It is designed to convert audio from cassette tapes into MP3 files stored on a USB flash drive or Micro SD card without requiring a computer.

Key Capabilities:
- Play standard audio cassette tapes.
- Convert cassette tape audio to MP3 files on a USB drive or Micro SD card.
- Receive and play AM and FM radio stations.
- Play MP3/WMA files from a USB drive or Micro SD card.
- Record audio from the built-in microphone, radio, or a connected source to cassette, USB, or Micro SD card.
What's in the Box
- Cassette Player/Recorder/Converter Unit
- 110V AC Power Adapter
- User Manual (this document)
Items Not Included: AA Batteries (4 required for portable use), USB Flash Drive, Micro SD Card, Headphones/Earphones.
Product Features & Controls

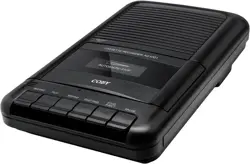
Front & Top Panel
- Cassette Compartment Door: Flip-open door for inserting and removing cassette tapes.
- Built-in Speaker: Outputs audio for tape playback, radio, or digital files.
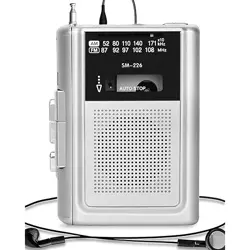
- Display Screen: Shows mode (TAPE, RADIO, USB/SD), frequency, track number, or playback status.
- Control Buttons (Typical Layout):
- Power (POWER): Turns the device on/off.
- Mode (MODE): Cycles between TAPE, RADIO, USB, and SD card functions.
- Play/Pause (▶❚❚): Starts or pauses playback in TAPE, USB, or SD mode.
- Stop (■): Stops playback or recording.
- Fast Forward (FF ▶▶): Advances the tape or skips forward in digital files.
- Rewind (REW ◀◀): Rewinds the tape or skips backward in digital files.
- Record (REC ●): Initiates recording. Often requires pressing simultaneously with Play for tape recording.
- Radio Tuning (TUNE - / +): Seeks or manually adjusts AM/FM radio frequency.
- Volume Control (VOL - / +): Adjusts audio output level.
Side & Rear Panels
- 3.5mm Earphone/Headphone Jack: For private listening. Plugging in headphones will mute the built-in speaker.
- USB Port (Type-A): For inserting a USB flash drive to play MP3 files or record/converted audio to.
- Micro SD (TF) Card Slot: For inserting a Micro SD card to play MP3 files or record/converted audio to.
- DC Power Input Jack: For connecting the included AC power adapter.
- Telescopic Antenna: Extends to improve FM radio reception. Rotates for optimal positioning.
- Battery Compartment: Holds 4 AA batteries for portable operation. Located on the underside or rear.
- Built-in Microphone: A small opening for capturing audio for recordings.
Power Sources
The device can be powered in two ways:
1. AC Power (Included)
- Ensure the device is turned OFF.
- Plug the included AC power adapter into a standard 110V wall outlet.
- Connect the other end to the DC Power Input Jack on the device.
- Turn the device ON.
2. Battery Power (Not Included)
- Ensure the device is turned OFF and disconnected from AC power.
- Open the battery compartment cover.
- Insert 4 AA batteries, observing the correct polarity (+/-) markings inside the compartment.
- Close the cover securely.
- Turn the device ON.
Usage Guide
Playing a Cassette Tape
- Press the POWER button to turn on the device.
- Press the MODE button until "TAPE" or a tape icon appears on the display.
- Open the cassette compartment door.
- Insert a standard audio cassette tape with the exposed tape facing down and towards you, and the side you want to play facing outward.
- Close the compartment door.
- Press the Play (▶❚❚) button to begin playback.
- Use FF and REW to fast-forward or rewind.
- Press Stop (■) to halt playback. The tape mechanism will disengage.
- To remove the tape, press Stop if playing, then open the compartment door.
Converting Cassette Tapes to MP3 (USB/SD)
This process records the audio from a tape directly to a digital file.
- Insert a formatted USB flash drive (4-128GB) into the USB port OR a Micro SD card (4-32GB) into the SD card slot.
- Turn on the device and set the mode to TAPE.
- Insert the cassette tape you wish to convert.
- Press the Record (REC) button (sometimes in combination with Play). The display should indicate recording (e.g., "REC").
- Immediately press the Play (▶❚❚) button to start tape playback and simultaneous digital recording.
- The device will create an MP3 file on your USB/SD card. The tape will play through normally.
- To stop recording, press the Stop (■) button. The MP3 file is now saved.
- You can now play this MP3 file back on the device (see below) or transfer the USB drive/SD card to a computer.
Playing MP3 Files from USB or Micro SD Card
- Insert a USB drive or Micro SD card containing MP3 or WMA files.
- Press the MODE button until "USB" or "SD" appears on the display.
- Playback should start automatically or can be initiated with the Play button.
- Use FF and REW to skip between tracks.
- Use Play/Pause to control playback.
Using the AM/FM Radio
- Fully extend and adjust the telescopic antenna for best reception, especially for FM.
- Press the MODE button until "RADIO" or an antenna icon appears.
- Press the MODE button again to toggle between AM and FM bands.
- Use the TUNE - / + buttons to manually search for stations.
- AM Frequency Range: 520 - 1710 kHz FM Frequency Range: 87 - 108 MHz
- Adjust volume using the VOL buttons.
Recording Audio (Microphone, Radio, or Line-in)
The device can record to a cassette tape, USB drive, or Micro SD card.
- Select Record Target: Ensure you are in the correct mode (TAPE, USB, or SD) for your desired recording destination.
- Select Audio Source:
- Built-in Mic: Speak towards the microphone on the unit.
- Radio: Tune to the desired AM/FM station.
- External Source (via playback): Play a tape or digital file to re-record it.
- Press the Record (REC) button (and Play if required for tape).
- Begin your audio source. The display will indicate recording.
- Press Stop (■) to end the recording.
Using Headphones
Plug standard 3.5mm headphones into the earphone jack. This will automatically mute the internal speaker.
Specifications
- Product Dimensions: 7.5 x 1.2 x 4.0 inches
- Item Weight: 0.9 lbs (unit only)
- Power Supply: 110V AC Adapter (included) OR 4 x AA Batteries (not included)
- Supported Digital Media: USB Flash Drive (4-128GB), Micro SD (TF) Card (4-32GB)
- Audio Formats: MP3, WMA (for playback from USB/SD)
- Radio Bands: AM (520-1710 kHz), FM (87-108 MHz)
- Output: Built-in Speaker, 3.5mm Stereo Headphone Jack
- Input: Built-in Microphone
- Manufacturer: SEMIER
- Model Number: JKHG-JGKL-0108
Troubleshooting
- Device does not power on:
- Check that the AC adapter is firmly connected to both the wall outlet and the device.
- If using batteries, ensure they are fresh, correctly inserted, and the compartment is closed.
- Cassette does not play or record:
- Ensure the tape is inserted correctly and is not a blank tape on the side you are trying to play.
- Check if the tape has reached its end. Rewind it.
- Ensure the device is in TAPE mode.
- USB/SD card not recognized:
- Ensure the USB drive or SD card is formatted to FAT32 (most common).
- Check that it is within the supported size range (USB: 4-128GB, SD: 4-32GB).
- Try reinserting the media firmly.
- Ensure the device is in the correct USB or SD mode.
- Poor radio reception:
- Fully extend the telescopic antenna.
- For FM, adjust the antenna's angle and position.
- Move the device to a location with fewer obstructions (near a window).
- No sound from speaker:
- Check the volume level.
- Ensure headphones are not plugged in.
- Verify the device is in an active mode (tape playing, radio tuned, etc.).
- Recording fails:
- Ensure there is sufficient free space on the USB drive or SD card.
- For tape recording, ensure the cassette tab is intact (not broken off).
- Check that you are pressing the correct button combination (often REC + PLAY for tape).
Care & Maintenance
- Keep the device dry. It is not waterproof.
- Clean the exterior with a soft, dry cloth. Do not use liquid cleaners.
- Store the device in a cool, dry place away from direct sunlight.
- Handle cassette tapes with care to avoid tangling the tape.
- Remove batteries during prolonged storage or when using AC power.
Warranty & Support
For warranty information about this product, please visit the manufacturer's warranty page on Amazon: SEMIER Product Warranty.
For further support, contact the seller through your Amazon order details page.