Overview
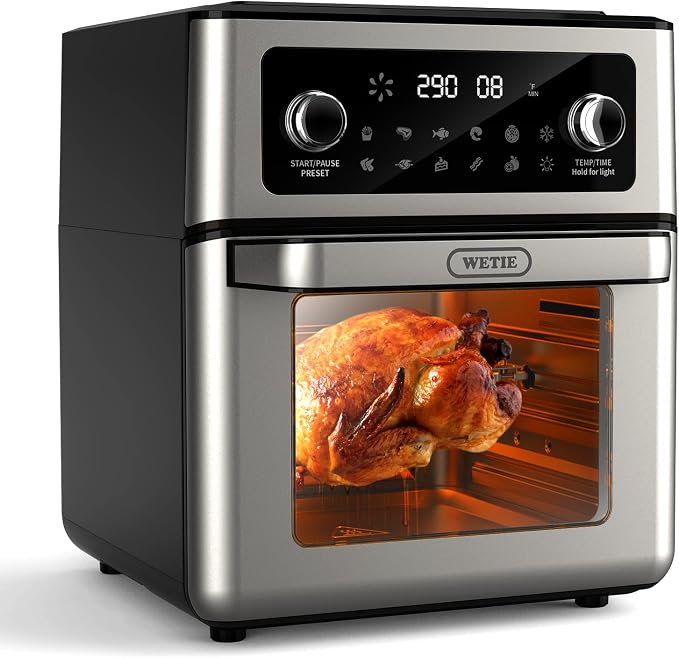
The WETIE FO12B is a 13-quart capacity air fryer oven. It combines the functions of an air fryer, toaster oven, rotisserie, and dehydrator. The unit features a digital control panel with two knobs, a viewing window, and 11 preset cooking programs.
Key specifications:
- Model: FO12B
- Capacity: 13 Quarts
- Power: 1700W, 120V
- Temperature Range: 180°F to 400°F
- Timer: 0 to 60 minutes
- Dimensions: 15"D x 12.6"W x 14.6"H
- Material: Stainless Steel (Exterior and Interior)
Features and Components

External Components
- Door with Viewing Window: Allows you to monitor food without opening the door. Features a heat-resistant handle.
- Control Panel: Located on the front. Contains a digital display and two control knobs.
- Left Knob (Function): Used to select cooking presets or turn the unit on/off.
- Right Knob (Time/Temperature): Used to set the cooking time and temperature.
- Digital Display: Shows the selected preset, current temperature, and remaining time.
- Interior Light: Illuminates the cooking chamber when the unit is operating.
- Cool-Touch Housing: The exterior remains cool during operation for safety.
Included Accessories

- Wire Rack: For baking, roasting, and air frying.
- Rotisserie Fork (Spit): For rotisserie cooking of whole chickens or roasts.
- Drip Tray: Non-stick coating, dishwasher safe. Catches grease and food drippings.
- Handle: Tool for safely inserting and removing the rotisserie fork and wire rack.
Cooking Technology
The oven uses 360° hot air circulation technology to cook food evenly, aiming to provide a crispy texture using up to 85% less oil than traditional deep frying.
Use Guide
Initial Setup and Safety
- Place the oven on a stable, level, heat-resistant countertop. Ensure at least 4 inches of clearance on all sides, especially the rear vent.
- Remove all packaging materials and accessories from inside the oven.
- Wash the wire rack, drip tray, and rotisserie fork with warm, soapy water. Dry thoroughly.
- Wipe the interior and exterior with a damp cloth. Do not immerse the main unit in water.
- Before first use, run the oven empty at 400°F for 15 minutes to burn off any manufacturing residues. Ensure the area is well-ventilated.
Safety Notes: The exterior door and handle will get hot during use. Always use the handle to open the door. Use oven mitts when handling hot accessories. The parts that contact food are made from food-grade materials.
Basic Operation

- Plug In: Insert the power plug into a standard 120V outlet.
- Prepare Food: Place food on the appropriate accessory (wire rack or drip tray). For air frying, use the wire rack to allow air circulation. Place the drip tray underneath to catch drips.
- Insert Accessories: Carefully slide the accessory into the desired position on the oven rails.
- Select Function: Turn the Left Knob to choose a cooking preset or the manual setting.
- The 11 presets are: French Fries, Steak, Fish, Shrimp, Pizza, Whole Chicken, Chicken Wings, Cakes, Bacon, Fruits, Vegetables.
- Set Time & Temperature: Turn the Right Knob to adjust the time (0-60 min) and temperature (180-400°F). The display will show your settings.
- If using a preset, the time and temperature are pre-set but can be manually adjusted.
- Start Cooking: The oven will begin heating. The interior light will turn on.
- Monitor Cooking: You can check food through the viewing window. It is normal to pause cooking to shake or turn food for even results.
- End of Cycle: A buzzer will sound when the time ends. The oven will stop heating.
- Remove Food: Use the handle and oven mitts to carefully pull out the accessory. Food and accessories will be very hot.
- Power Off: Turn the left knob to the "Off" position and unplug the appliance.
Using the Rotisserie Function
- Secure the food (e.g., whole chicken) onto the rotisserie fork using the adjustable prongs. Ensure it is balanced and centered.
- Use the provided handle to insert the rotisserie fork into the oven, ensuring the ends are properly seated in the rotating mechanism at the back and front.
- Place the drip tray on the bottom rack position to catch juices.
- Select the "Whole Chicken" preset or manually set the temperature (typically 350°F) and time (approx. 20-25 minutes per pound).
- Start the oven. The fork will rotate automatically.
- When cooking is complete, use the handle to carefully remove the hot rotisserie fork. Let the meat rest before removing from the fork.
Cleaning and Maintenance
- Always Unplug the oven and allow it to cool completely before cleaning.
- Interior & Door: Wipe with a soft, damp cloth. For stubborn residue, use a mild, non-abrasive cleaner. Do not use steel wool or harsh abrasives.
- Accessories (Wire Rack, Drip Tray, Rotisserie Fork): Wash in warm, soapy water. The drip tray has a non-stick coating and is dishwasher safe.
- Exterior: Wipe with a damp cloth. Do not use abrasive cleaners.
- Never immerse the main oven unit, cord, or plug in water or any other liquid.
Troubleshooting
- Oven does not turn on: Check that the power cord is securely plugged into the outlet. Ensure the left control knob is turned to a cooking setting, not "Off".
- Food is not cooking evenly: Ensure food pieces are similar in size and not overcrowded. Shake or turn food halfway through the cooking time. For rotisserie, ensure the food is balanced on the fork.
- Smoke is coming from the oven: Excess grease or food debris may be burning. Ensure the drip tray is in place and clean. Clean the interior of the oven if necessary.
- Display is not working: Unplug the oven for 5 minutes, then plug it back in. If the issue persists, contact support.
- Unusual noises: A fan noise is normal. If you hear loud grinding or rattling, especially during rotisserie use, stop the oven, unplug it, and check that the rotisserie fork is properly seated and balanced.
Product Specifications
| Feature | Specification |
|---|
| Model | FO12B |
| Brand | WETIE |
| Capacity | 13 Quarts |
| Power | 1700 Watts |
| Voltage | 120 Volts |
| Temperature Range | 180°F to 400°F |
| Timer | 0 to 60 minutes |
| Preset Programs | 11 (Fries, Steak, Fish, Shrimp, Pizza, Whole Chicken, Chicken Wings, Cakes, Bacon, Fruits, Vegetables) |
| Control Method | Touch / Digital Knobs |
| Dimensions (D x W x H) | 15" x 12.6" x 14.6" |
| Material | Stainless Steel (Exterior & Interior) |
| Accessories Included | Wire Rack, Rotisserie Fork, Drip Tray, Handle |
| Certification | ETL Certified |
Note: This manual is based on information available from the product listing. Always refer to any physical manual included with your product for the most accurate and detailed instructions. Specifications are subject to change by the manufacturer.
