Loading ...
Loading ...
Loading ...
76
InstallationInstallation
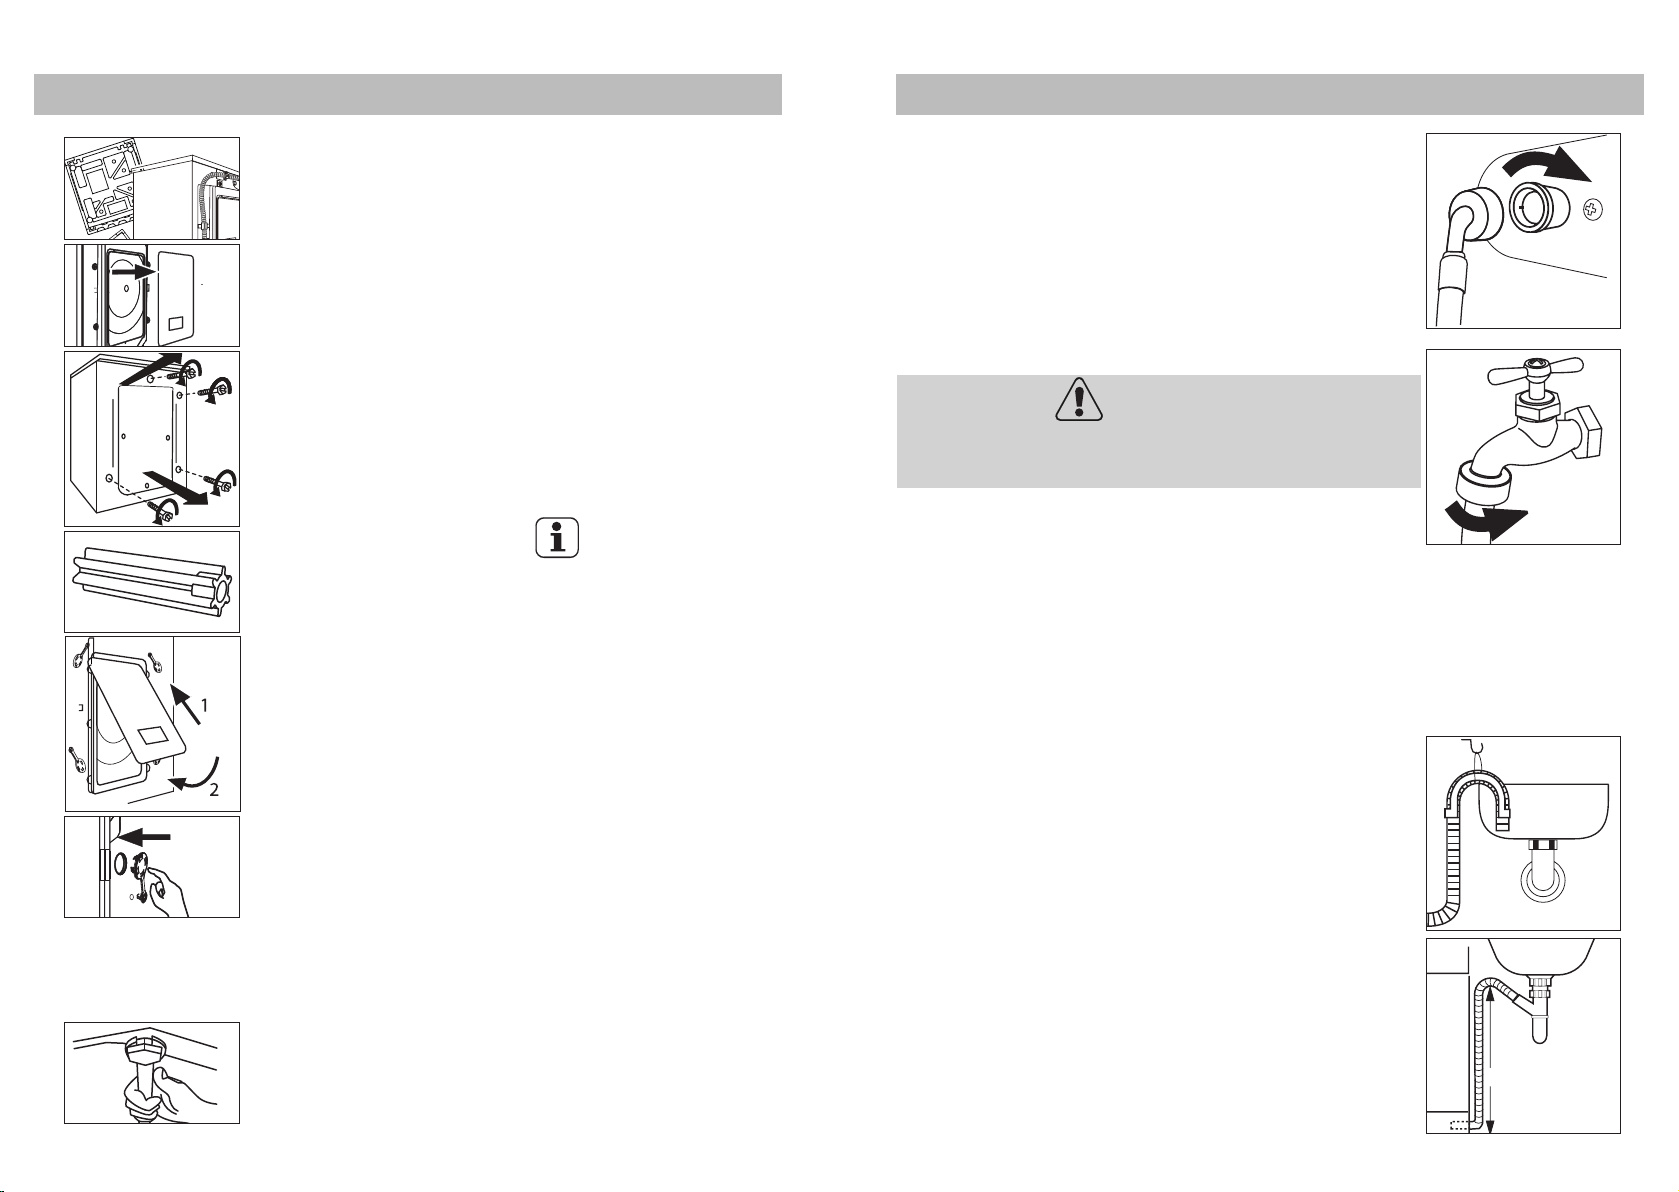
Inlet hose
1. Connect inlet hose to the machines water inlet valve.
2. Connect inlet hose to a water tap.
3. Tighten inlet hose connections and turn on water supply.
Check for any water leaks. Stop all water leaks before
continuing with installation.
Warning!
Appliance is only qualified for cold water supply!
Use the hose-set supplied with the appliance.
Old hose-sets should not be reused.
Drain hose
Drainage could be installed in different ways. Nevertheless,
level of drain hose has to reach between 80-100 cm.
If possible alwa
ys keep drain hose
fixed to the clip at the
back of the appliance.
1. Drain hose to sink
Use the drain hose bracket to keep drain hose end retained
and out of any water level.
Fix the bracket securely to avoid dropping due to operational
movements.
2. Drain hose to sink siphon
Connection has to be securely sealed and fixed to corres-
ponding adapter above the siphoning part!
Preparation
Remove all packaging material including polystyrene base.
While opening the package, water drops may be seen on
plastic bag and po
water tests and quality control in the factory.
rthole. This is normal as a result from
Removing the transportation bolts
The transportation bolts are designed for clamping anti-
vibration components inside the appliance during transpor-
tation.
1. Remove the back cover.
2. Remove bolts on the rear side and take out
plastic spacers
from the inner side of the machine.
General information and tips:
Keep the transportation bolts in a safe place for later use.
If the machine is to be moved to another location, replace
transportation bolts to prevent damage.
3. Replace back cover by inserting it in the two gaps,its
convexity is facing outside.
4. Fill the transportation bolt holes with blanking plugs.
Adjusting the feet
Adjust all feets to achieve a complete level position.This will
minimize vibrations and thus noise during use. It will also
reduce wear and tear. We recommend to use a spirit level
for adjustment. Floor should be as stable and flat as possible.
1
.
3.
4
.
3.
4
.
3.
80 - 100 cm
2
.
2.
Location
Install the machine on a solid and level floor surface ensuring it
has at least 20 mm clearance on
each side. The washer must not
be installed on any textured floor coverings (eg carpet, rugs).
Loading ...
Loading ...
Loading ...