Loading ...
Loading ...
Loading ...
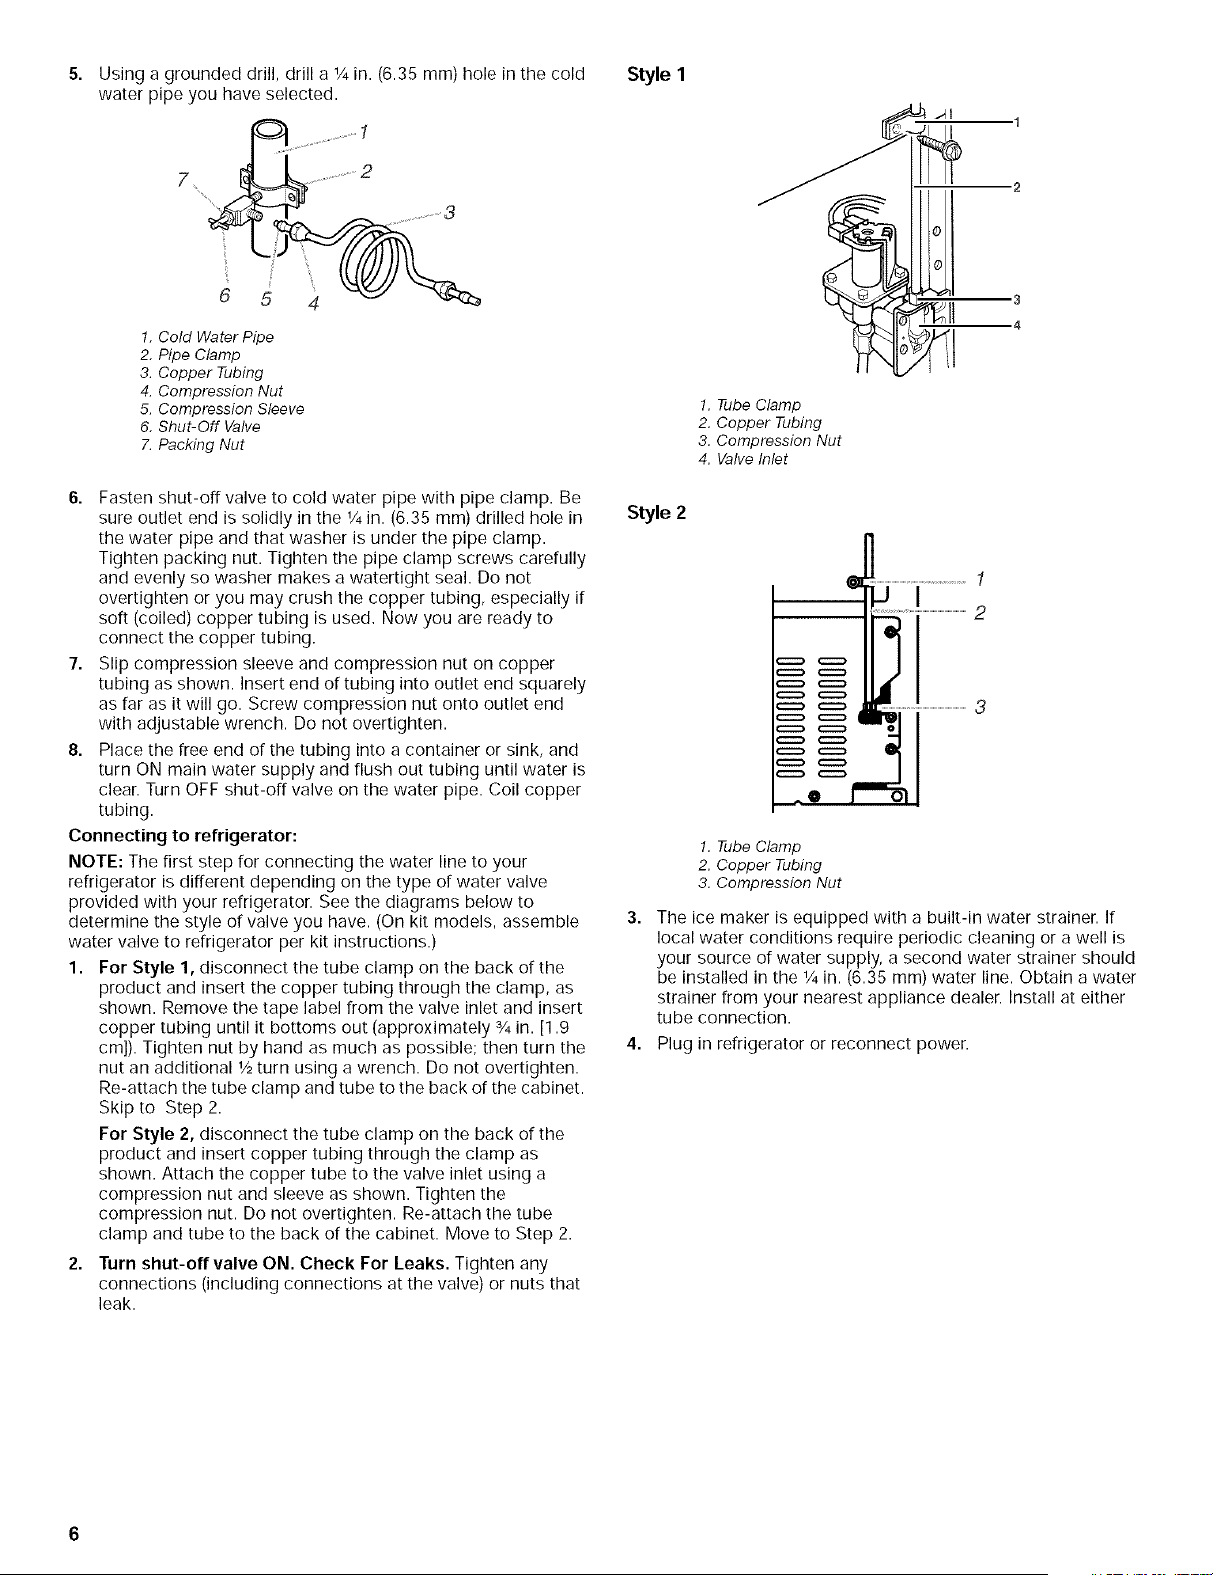
Usingagroundeddrill,drilla¼in.(6.35mm)holeinthecold
waterpipeyouhaveselected.
...........1
7• .........................2
1. Cold Water Pipe
2. Pipe Clamp
3. Copper Tubing
4. Compression Nut
5. Compression Sleeve
6. Shut-Off Valve
7. Packing Nut
6. Fasten shut-off valve to cold water pipe with pipe clamp. Be
sure outlet end is solidly in the 1/4in. (6.35 mm) drilled hole in
the water pipe and that washer is under the pipe clamp.
Tighten packing nut. Tighten the pipe clamp screws carefully
and evenly so washer makes a watertight seal. Do not
overtighten or you may crush the copper tubing, especially if
soft (coiled) copper tubing is used. Now you are ready to
connect the copper tubing.
7. Slip compression sleeve and compression nut on copper
tubing as shown. Insert end of tubing into outlet end squarely
as far as it will go. Screw compression nut onto outlet end
with adjustable wrench. Do not overtighten.
8. Place the free end of the tubing into a container or sink, and
turn ON main water supply and flush out tubing until water is
clear. Turn OFF shut-off valve on the water pipe. Coil copper
tubing.
Connecting to refrigerator:
NOTE: The first step for connecting the water line to your
refrigerator is different depending on the type of water valve
provided with your refrigerator. See the diagrams below to
determine the style of valve you have. (On kit models, assemble
water valve to refrigerator per kit instructions.)
1. For Style 1, disconnect the tube clamp on the back of the
product and insert the copper tubing through the clamp, as
shown. Remove the tape label from the valve inlet and insert
copper tubing until it bottoms out (approximately 3/4in. [1.9
cm]). Tighten nut by hand as much as possible; then turn the
nut an additional 1/2turn using a wrench. Do not overtighten.
Re-attach the tube clamp and tube to the back of the cabinet.
Skip to Step 2.
For Style 2, disconnect the tube clamp on the back of the
product and insert copper tubing through the clamp as
shown. Attach the copper tube to the valve inlet using a
compression nut and sleeve as shown. Tighten the
compression nut. Do not overtighten. Re-attach the tube
clamp and tube to the back of the cabinet. Move to Step 2.
2. Turn shut-offvalve ON. Check For Leaks. Tighten any
connections (including connections at the valve) or nuts that
leak.
Style I
Style 2
1. Tube Clamp
2. Copper Tubing
3. Compression Nut
4. Valve Inlet
1. Tube Clamp
2. Copper Tubing
3. Compression Nut
3. The ice maker is equipped with a built-in water strainer. If
local water conditions require periodic cleaning or a well is
your source of water supply, a second water strainer should
be installed in the 1/4in. (6.35 mm) water line. Obtain a water
strainer from your nearest appliance dealer. Install at either
tube connection.
4. Plug in refrigerator or reconnect power.
Loading ...
Loading ...
Loading ...