Loading ...
Loading ...
Loading ...
English 6
(2) Mount the canvas ducts to the air outlet and inlet so that the
vibration of the air conditioner will not be transmitted to the
duct or ceiling. Apply a sound-absorbing material (insula-
tion material) to the inner wall of the duct and vibration insu-
lation rubber to the suspension bolts (refer to 8. DUCT
WORK).
(3) Open installation holes (if the ceiling already exists).
• Open the installation holes on the ceiling. Lay the refrig-
erant piping, drain piping, power line, transmission wir-
ing, and remote controller wiring for the piping and wiring
connection port of the unit.
In the case of the installation of a wireless remote con-
troller, refer to the installation manual provided with the
wireless remote controller.
Refer to 6. REFRIGERANT PIPING WORK, 7. DRAIN
PIPING WORK, and 10. WIRING EXAMPLE AND HOW
TO SET THE REMOTE CONTROLLER.
• The ceiling framework may need reinforcement in order
to keep the ceiling horizontal and prevent the vibration of
the ceiling after the installation holes are opened. For
details, consult your construction or interior contractor.
(4) Install the suspension bolts. Make sure that the suspension
bolts are M10 or the equivalent in size.
•
Use hole-in anchors if the suspension bolts already exist;
otherwise use embedded inserts and embedded founda-
tion bolts so that they will withstand the weight of the unit.
Adjust the distance to the ceiling surface in advance.
5. INDOOR UNIT INSTALLATION
It may be easier to install accessories (sold separately)
before installing the indoor unit. Refer to the installation
manuals provided to the accessories as well.
Be sure to use the accessories and specified parts for
installation work.
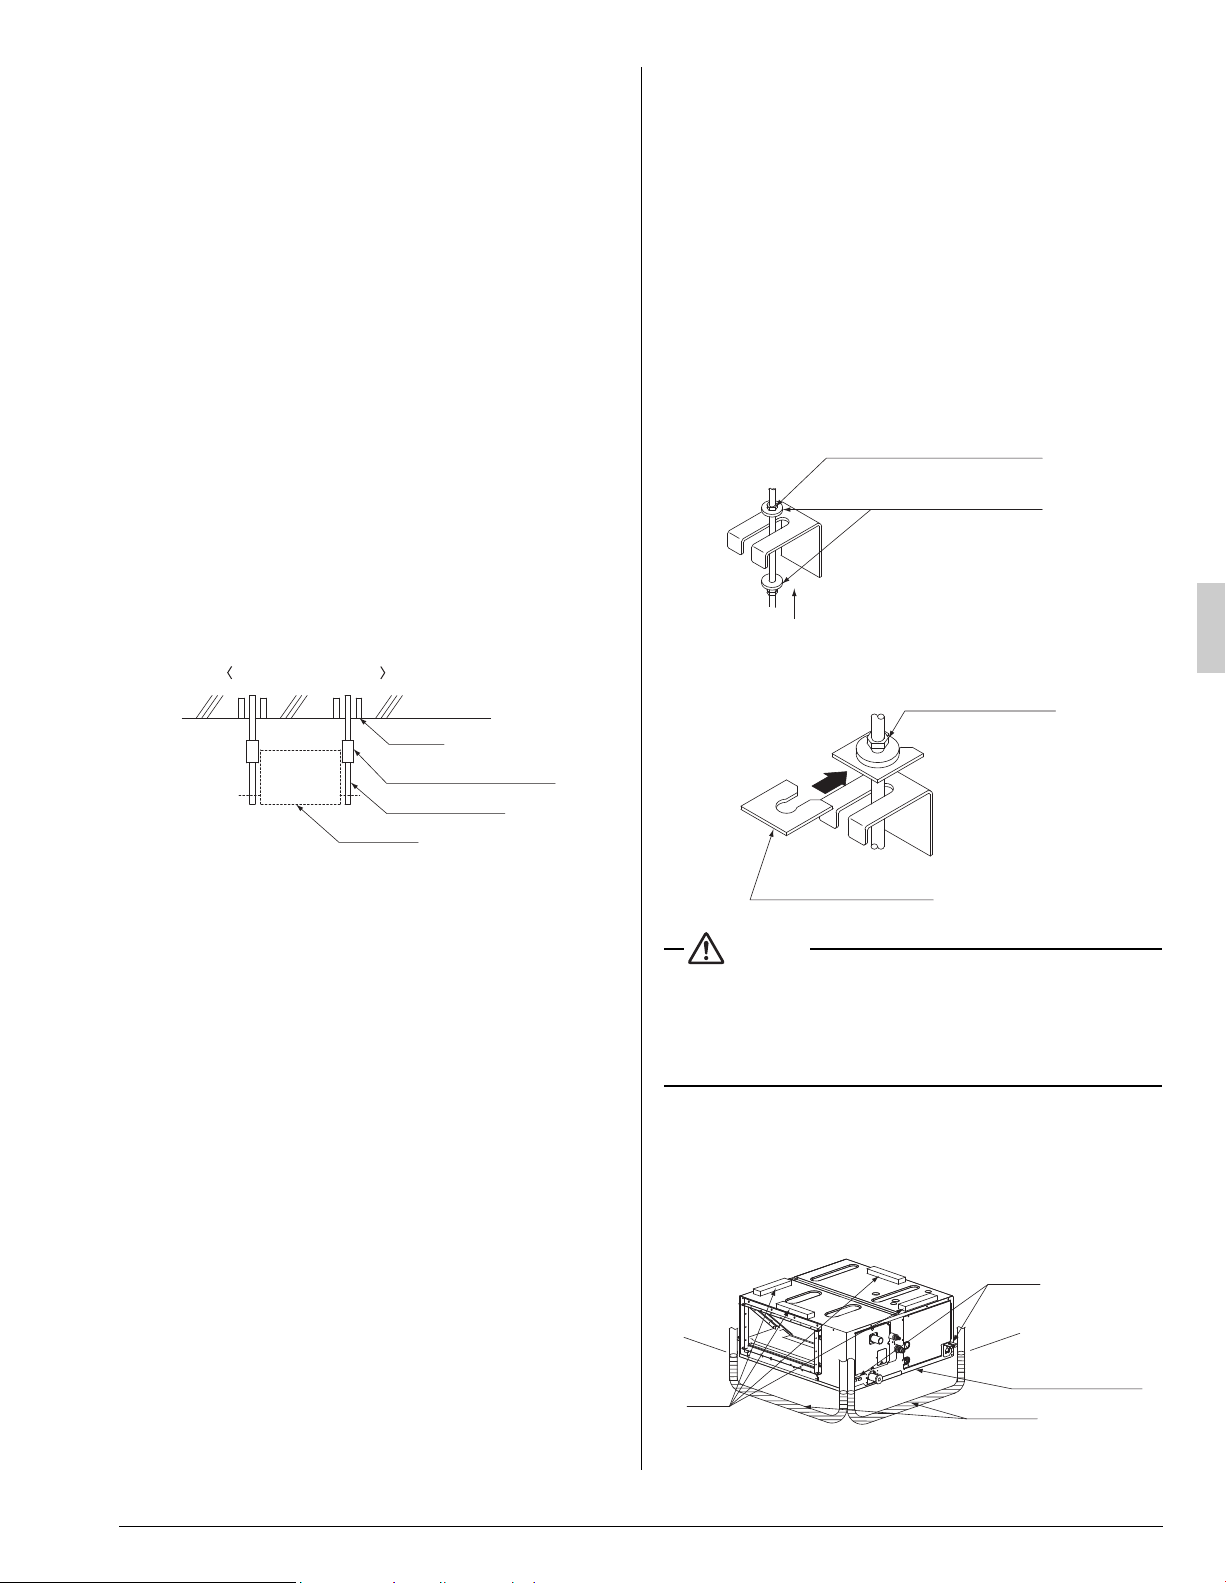
(1) Temporally install the indoor unit.
• Connect the hangers to the suspension bolts. Be sure to
use and tighten the nut and washer for hanger (11) for
each hanger from both upper and lower sides of the
hanger. (Refer to Fig. 3) If the washer fixing plate (9) is
used, the upper side washer for hanger (11) will be pro-
tected from falling off.
CAUTION
• Keep the air outlet covered with a protective sheet to pre-
vent weld splatter and other foreign materials from enter-
ing the indoor unit, and damaging the resin drain pan.
Water leakage may occur if holes or cracks are generated in
the resin drain pan.
(2) Make adjustments so that the unit will be in the right posi-
tion.
(3) Check the level of the unit.
(4) Remove the washer fixing plate (9) used for preventing the
washer for hanger (11) from dropping, tighten the upper
side nuts, and securely fix the unit.
Note) All the above parts are field supplied.
Installation example
Ceiling slab
Anchor
Long nut or turn-buckle
Suspension bolt
Indoor unit
Washer for hanger (11)
(accessory)
Part to be procured in the field
Washer fixing plate (9)
(accessory)
Insert
Tighten from above and below
(Double nut)
[Fixing hangers]
[Fixing method of washers]
Fig. 3
Nut on the upper side
Hanger
Bottom of product
Level
Vinyl tube
01_EN_3P530815-1.fm Page 6 Tuesday, July 10, 2018 6:20 PM
Loading ...
Loading ...
Loading ...